
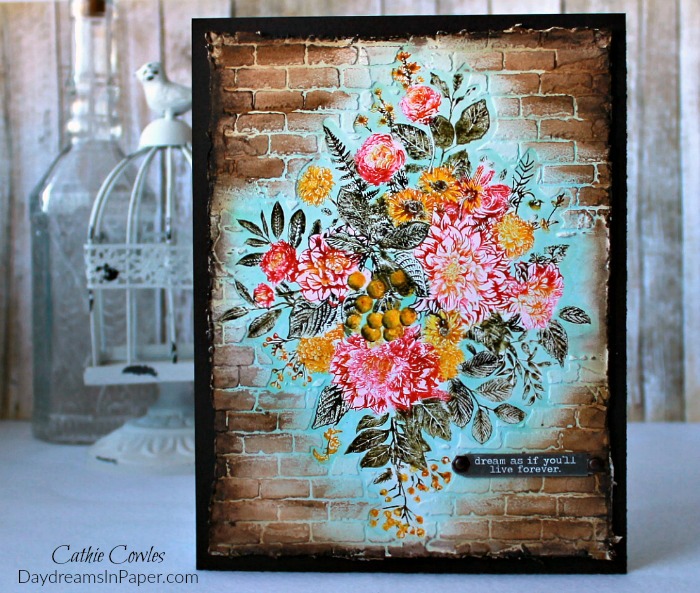
Hello Friends! I hope you had a lovely weekend and you’re ready for a new challenge on the Simon Says Stamp Monday Challenge. This week’s challenge is, In My Garden. For this challenge I created a beautiful wall hanging using the Tim Holtz Glorious Bouquet stamp. I chose to use the entire intricate stamp for my project and while it did take a long time to color each flower, stem and leaf with watercolor markers, the result was well worth the time. Enjoy!
Also, don’t forget to stop by our guest designer, Stacy Hutchinson’s amazing blog. This is her last week with us on the challenge. Each week has been such a treat and this week is no different. Check out her beautiful creations at Tattered Nest Designs .
![]()
![]()
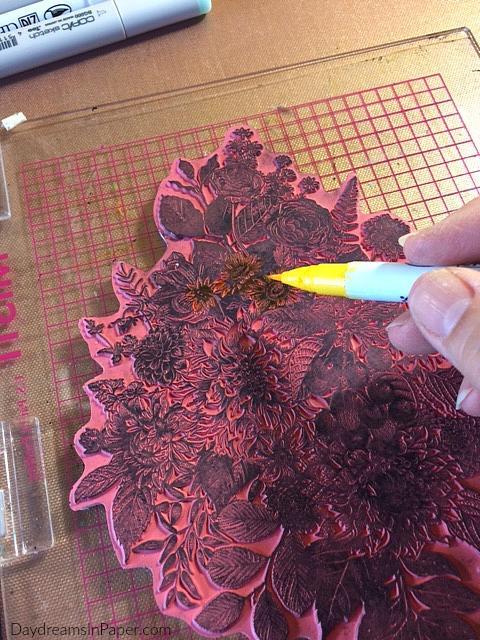
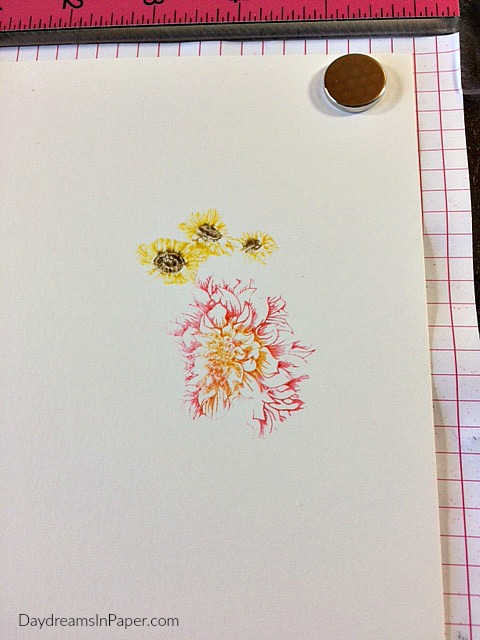
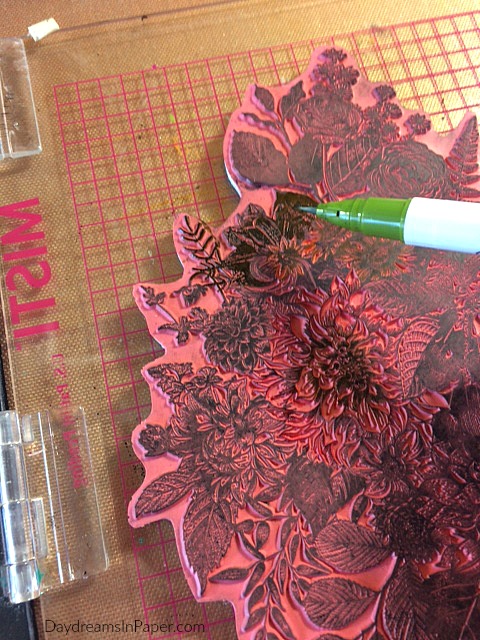
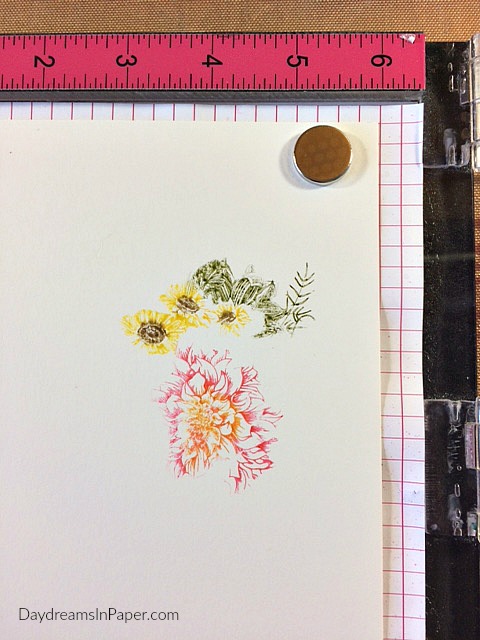
Place watercolor paper onto a stamping tool such as the Misti or the Tim Holtz Craft Stamp Platform. You will need a 6-1/2″ x 8-1/2″ piece of watercolor paper if you want to color the entire image. I begin coloring the image with Zig Clean Color Real Brush Markers. I color in small sections working from the center of the image to the outer edges.
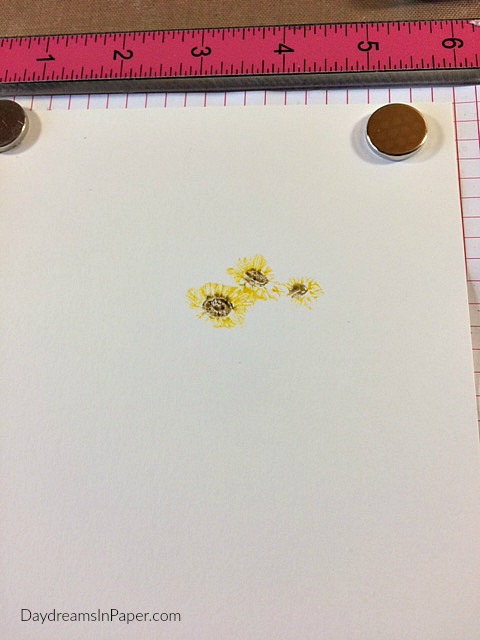
When you are finished coloring a few flowers, stamp the image onto the watercolor paper while it is still wet.
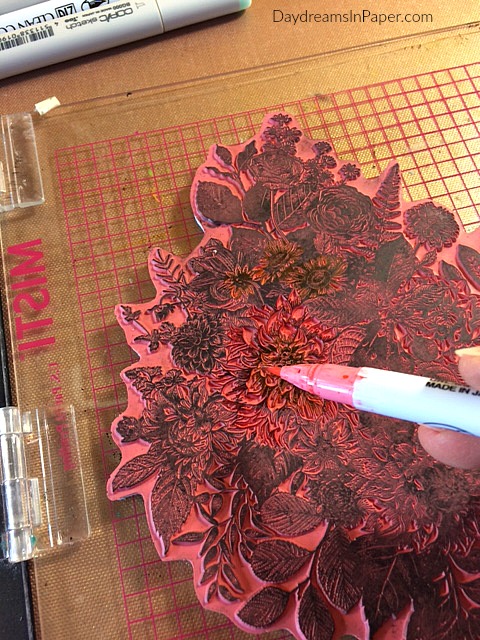
I continue this process until the entire stamp is colored and transferred onto the paper.
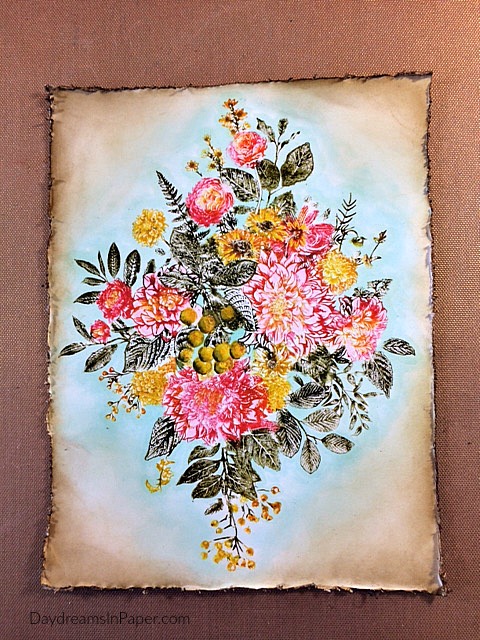
The image is complete and I fill in the empty areas between the flowers and leaves with blue Copic markers. I also extend the blue colors outside the bouquet. I then distress the edges and ink the edges with Vintage Photo and Ground Espresso Distress Inks.
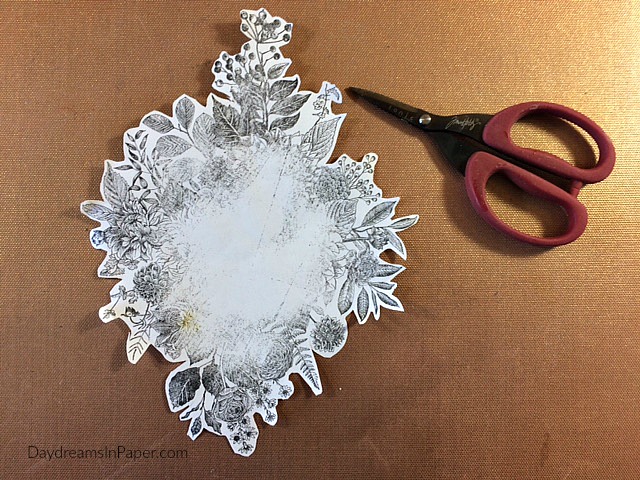
I decide I want to add a garden element around the bouquet so I create a mask. I stamp the image onto a piece of masking paper (you only need to stamp out the outer portions of the image) and cut out the image from around the edges. I place this masking piece over the colored bouquet and stencil on the Tim Holtz Bricked stencil around the image using Wendy Vecchi White Embossing Paste.
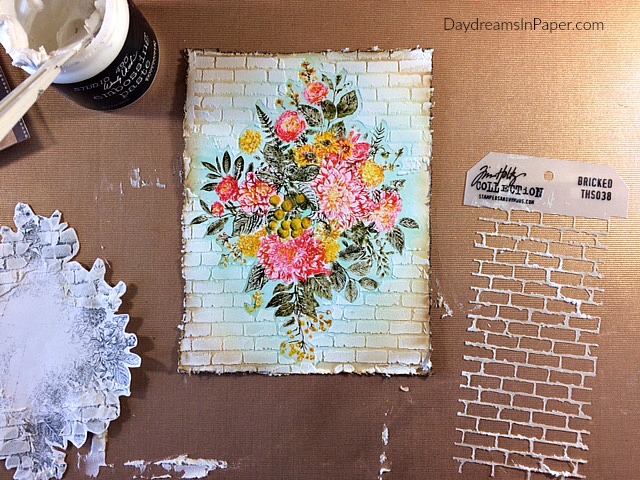
Carefully peel away the masked image and viola, your bricks appear all around the bouquet. Allow the paste to completely dry before moving on to the next step.
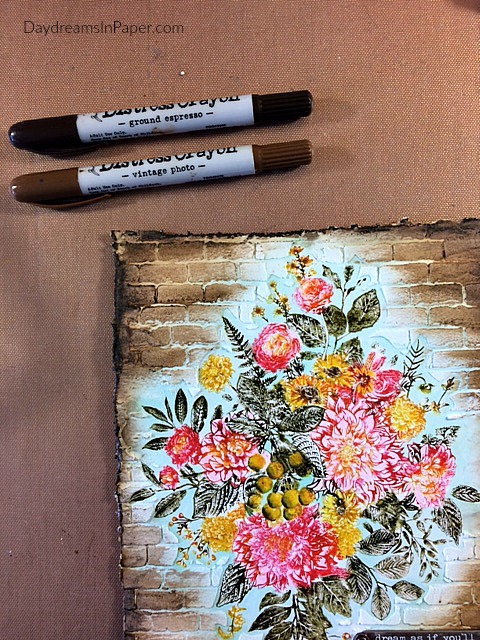
When the embossing paste is completely dry, I color the bricks with Vintage Photo and Ground Espresso Distress Crayon pigment.
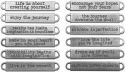
To complete the wall hanging I add a Tim Holtz Metal Word Band colored with Picked Fence Distress Crayon pigment and fastened it onto the panel with two hex fasteners. I attach the entire panel onto a 7″ x 9″ piece of Simon Says Stamp Dark Chocolate cardstock and my project is done.
I hope you enjoyed seeing how I created my In The Garden wall hanging and that you will join us in this fun challenge. Remember you could win a $50 gift voucher to Simon’s amazing store by linking your project to the challenge.


 |
 |
 |
 |
 |
 |
 |
 |
 |
 |
 |
 |
 |
 |
 |
 |
 |
 |
 |
 |
 |
 |


Pingback: Simon Says: In My Garden - Simon Monday Challenge Blog
Gorgeous wall hanging Cathie 🙂 the floral bouquet is beautiful and I love how you coloured the whole image bit by bit, so very pretty. Love the wall background too 🙂
luv
Lols x x c
Oh Wow! What patience to color those flowers, Cathie! They are gorgeous! I can see how necessary the stamp platform is for this technique. hugs, Maura
Oops – MISTI. Definitely need a tool like these!
Beautiful and so bold! I love your black edges I told that before, I know 🙂 This bouquet seems to be growing out from the bricks! Such a geat idea of cutting off the edges of the stencil to keep the pattern! Love that! Hugs, Marzena
beautiful work Cathie
this is spectacular! Love the brick wall around your colorful bouquet. And your coloring is amazing too!
Wow! This is so beautiful. Thanks for explaining how you did it. I love the results!
Stunning project, Cathie! I love how you did the light blue “fade out” around the floral bouquet. It really helps to spotlight it even more! The coloring is stunning!
*mwah*
Steph
Simon Says Stamp!
Wow, your wall hanging is so beautiful! The way you built up the image using the colour markers and your stamping tool is amazing 😁. Happy Weekend! J 😊
WOW! This is definitely one of my favourite projects that you’ve ever created Cathie, it’s just stunning and the amount of work and detail you’ve put into it, is amazing! Love, love…LOVE! <3
Wow–this is one amazing & beautiful project! Thank you for the detailed tutorial! I’ve never colored onto a stamp with my Zigs, but think I’ll give it a try!
your card is stunning Cathie and you have rocked that Glorious Bouquet Image hugs kath xxx
Oh my goodness! My patience probably would’ve worn out after about the first couple of leaves, but this is such a stunning work of art! Your diligence paid off because the details are really incredible. It looks so life-like and feels like an art-gallery-level of project!
Wow.. this is such a gorgeous creation, Cathie. The texture on the background and the flower image are amazing. 🙂
Oh wow, Cathie! This is amazing! Love that you’ve used markers and the MISTI to color that gorgeous bouquette stamp! I have that one on my wishlist (along with so much more, hahaha). Hugs, Sandra
Speechless!this stamp is in my wish list! I adore your coloring and love love love the idea to cut stencil! genius! barbara