
Hi friends! I’m here today to share a card I created using a new technique I call reverse embossing paste coloring. It’s something new I came up with while I was creating my card. Although I’ve never seen it done before, I’m not saying I’m the creator of this technique. I often use a stencil with embossing paste and then color the image. Or there are times when I’ve used colored embossing paste. I wondered what would happen if I reversed the process and I have to say I’m pleased with the results. I put together a tutorial below. Enjoy!
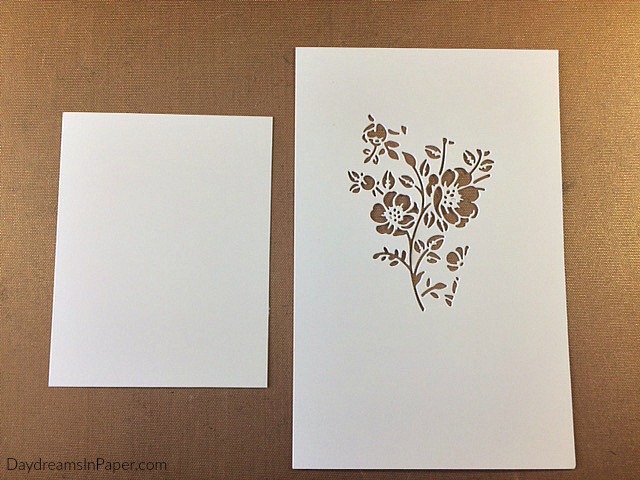
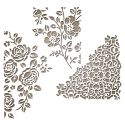
To begin, create a stencil using one of the dies from theTim Holtz Mixed Media #5 die set. I cut this out of Neenah Solar White 110lb. cardstock. You can also cut this out of thin plastic to create a permanent stencil.
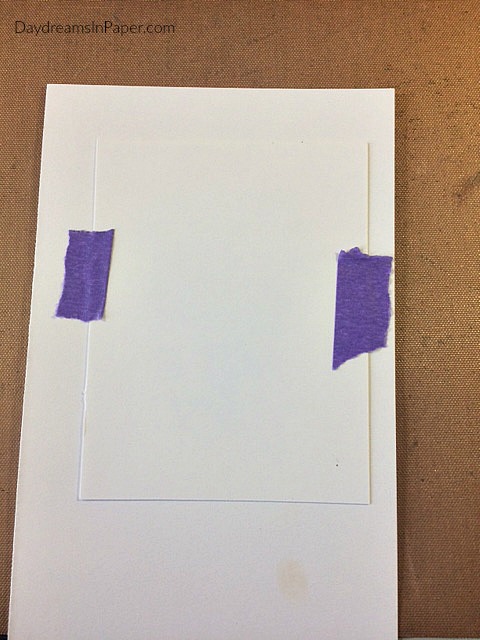
Tape cardstock over the image and then turn it over.
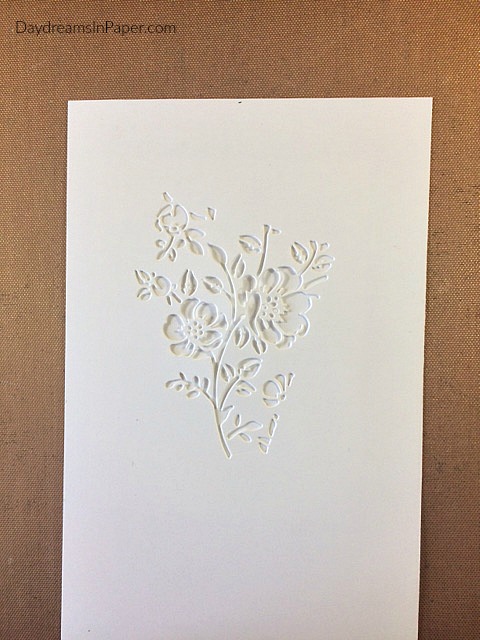
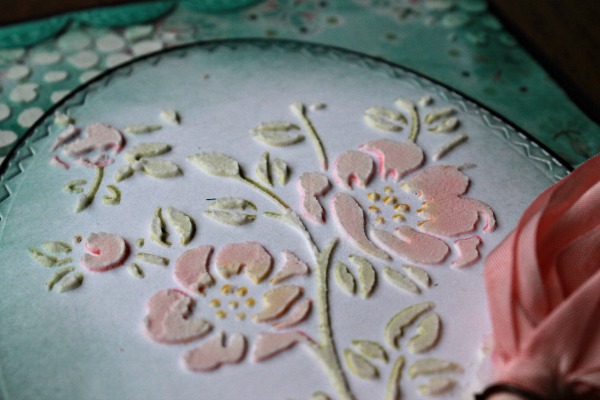
Begin coloring the design with Distress Inks and blending brushes.
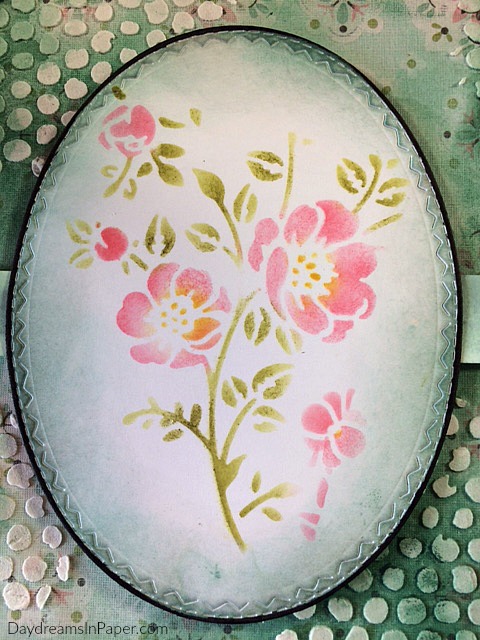
Here is what the image looks like after coloring with Distress Inks and Distress Blending Brushes. This is when the idea of reverse embossing paste coloring hit me.
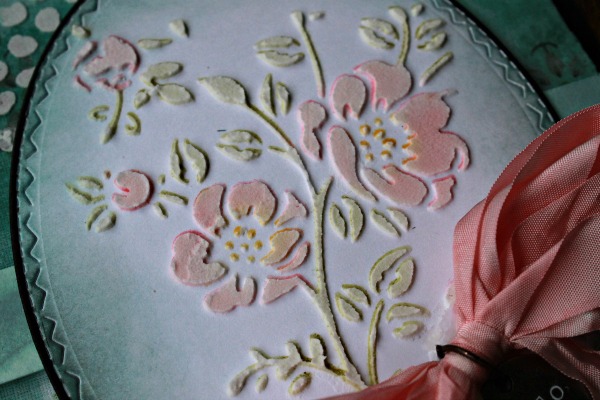
I wondered if the colors could be softened a bit for a more romantic look, so I placed a newly cut stencil over the colored design and applied white embossing paste. It’s white at first but as the paste dries the colors come through in a beautiful softened tone.

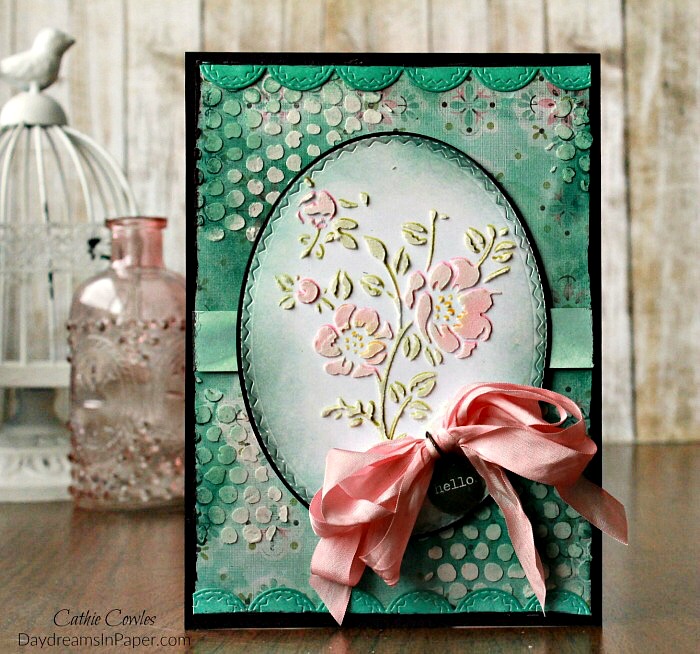
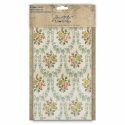
For the background, I used one of the designs from the Tim Holtz Worn Wallpaper collection and sanded the surface with a sanding tool. Next, I applied some Evergreen Bough Distress Ink over the surface applying the ink very gently with a blending tool. I spritzed it with water so the colors would move around and lighten.
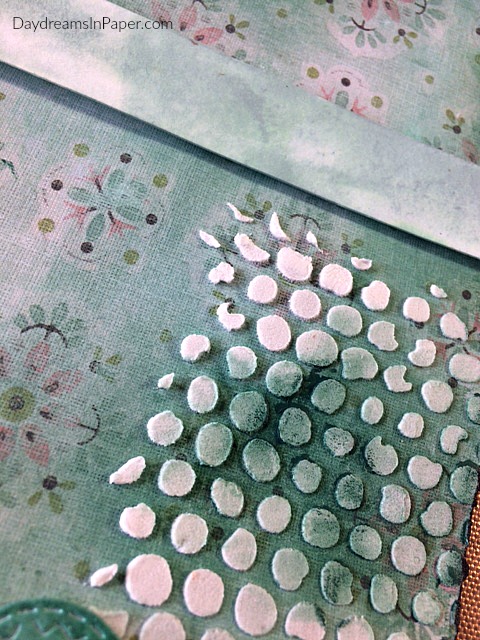
I applied the Tim Holtz Bubble stencil design in random areas over the worn wallpaper and colored areas of the bubbles with a Evergreen Bough Distress Crayon.
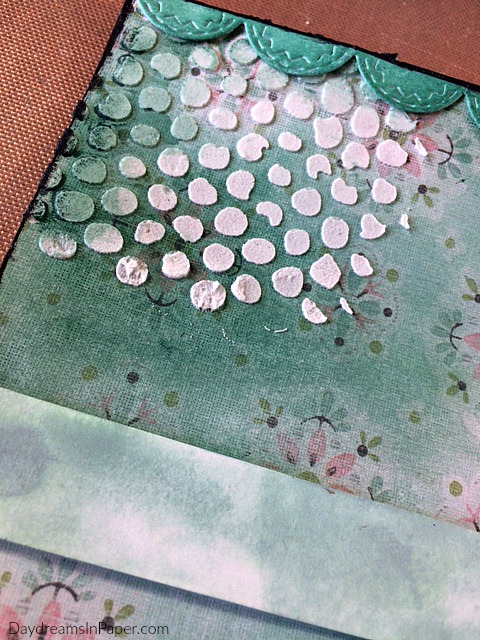
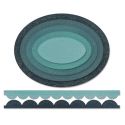
I added a decorative strip to the top and bottom of the card panel using the Tim Holtz Stitched Ovals die set colored with Evergreen Bough Distress Ink. The center strip is created using white cardstock and colored with Evergreen Bough Distress Oxide.
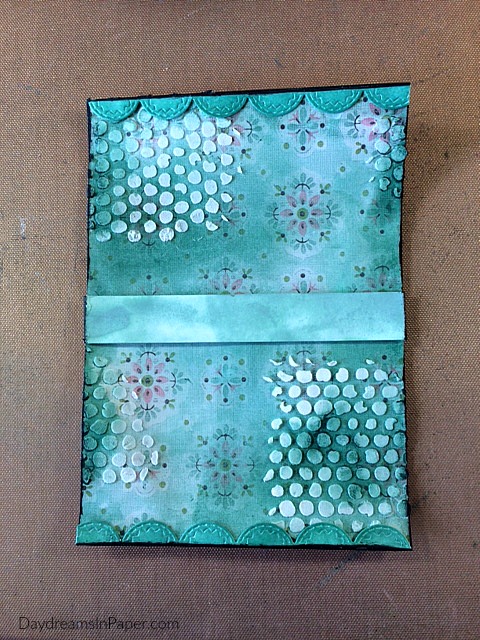
I darkened the edges with a Evergreen Bough Distress Crayon and then ran Black Soot Distress Paint just to the very edges of the panel.
Here are some close-ups of my card.
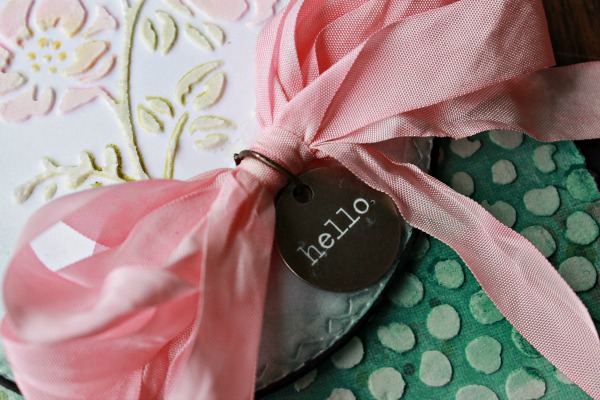
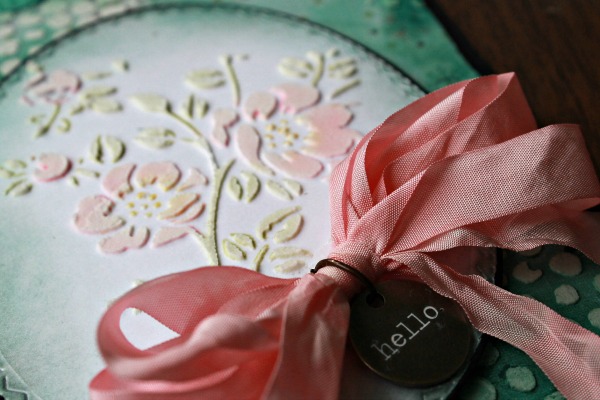
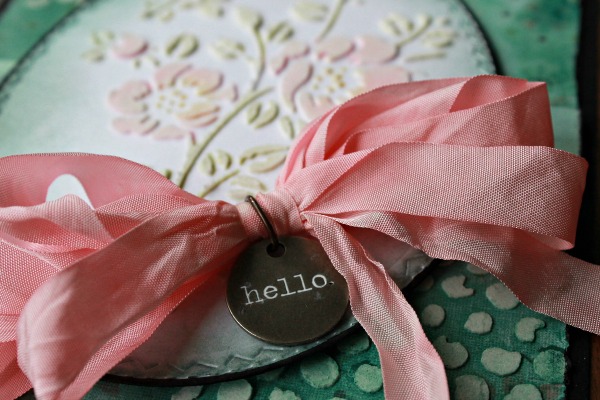

To finish the card, I adhered the main card panel onto a 5-1/4″ x 7-1/4″ piece of Simon Says Stamp Black Cardstock. I adhered the flowers to the center of the card using 3D foam tape and added a shabby bow with a Tim Holtz Typed Token colored with a Picket Fence Distress Crayon.
I hope you enjoyed seeing how I put my card together and that you give this reverse embossing paste coloring a try. Thanks so much for stopping by!

 |
 |
 |
 |
 |
 |
 |
 |
 |
 |
 |
 |
 |
 |
 |
 |
 |
 |
 |
 |
 |
 |
 |


Cathie, this is wonderful! I love every little bit of it!
This is awesome! I’m in love with the colors, technique, details etc. WOW! WOW! WOW! It’s going on my “to try” list…I don’t have all the supplies you used but I can improvise with what I have in my stash! Thanks so much!!
Big thumbs up. Beautifully creative. Thanks for sharing this
This is amazing! Thank you so much for sharing this idea! I am going to give this a go. I love the soft look it gives. Beautiful!
Wow oh wow!!! LOVE your card!! Such fabulous romantic feel!
Pinned it! https://www.pinterest.it/pin/534802524498103903
Thanks for the tutorial!!
Genius, I love it, it’s soft and watercolored looking.
That’s a beautiful card!
Very pretty card. I like the way you turned around the tech. Tnxs
Your card is beautiful!! Thanks for sharing your creative process. I need to give this a try.
Gorgeous card, Kathy! I love the technique you used! Thank you soooo much for sharing the tutorial! I am going to give this a try!!!
Beautiful card. Thanks for sharing your technique. Anxious to try it.
Your card is stunning! It stopped me in my tracks, and I immediately joined Daydreams in Paper. I’m certainly looking forward to all of your tutorials! Thank you
Gloria
Your card is stunning!!!! Love it!!
Very elegant card, so many special things included.
I loved this card and thank you for sharing your technique with us. It looked very much like how I like my cards to come out with the softened look.
Gorgeous ❤️
Beautifully creative!! If you were to mail this, what would you put it in?
Thank you, Naomi! In answer to your question, I would mail this card in a small bubble mailer. If the card didn’t have a shabby bow on it, I would mail it in a regular envelope but I would write “Please Hand Stamp” on the outside of the envelope.