
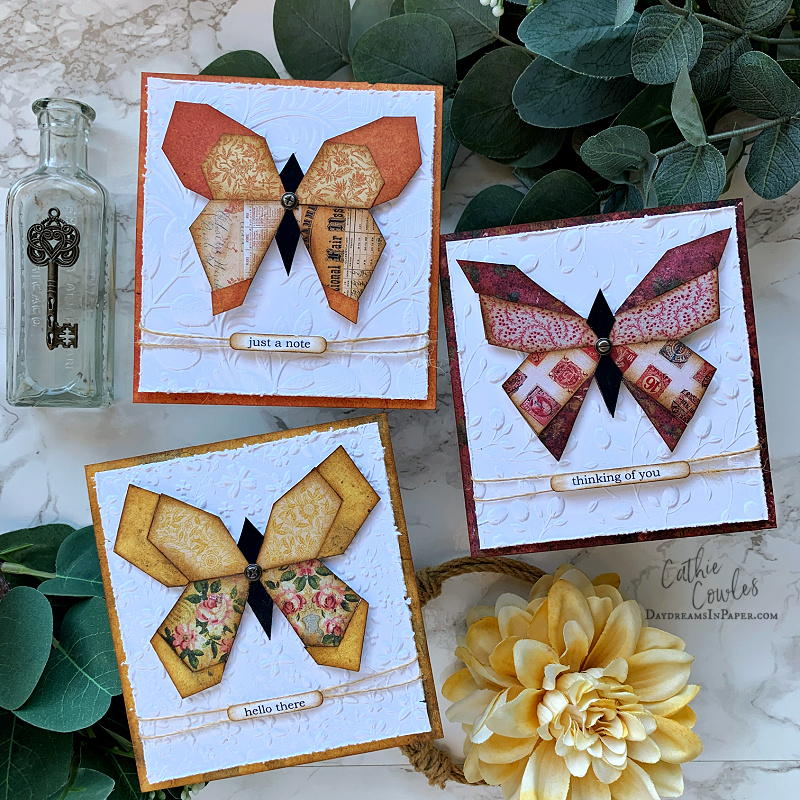
Hello friends! Today I’m sharing some notecards I created using a pattern from lillyella.com. I searched for some simple patterns that I could use with the new Tim Holtz Palette Collection colors and came across this adorable pattern of butterflies. Nicole, from Lillyella Stitchery, has designed these sweet butterfly block patterns and even gave each butterfly a name. Cricket, Gidget and Pepper are the stars of these adorable charm blocks patterns. She offers the tutorial and patterns for free on of her website. There are other amazing patterns and tutorials as well and her website is one you will want to check out. You can find the link here. I created these butterflies using the free coloring page because, like I’ve stated before, I’m not a quilter and using the coloring page for my pattern was one that worked best with my brain. Enjoy!
.
.
Below I’ve created a tutorial on how I put these adorable butterflies together using Nicole’s pattern. I hope you find it helpful.
.
Step 1:
.

Trace the pattern of the butterfly complete with all the lines as shown above. This will be your base piece where you glue all the pieces of the patterned paper creating the butterfly.
.
Step 2:
.
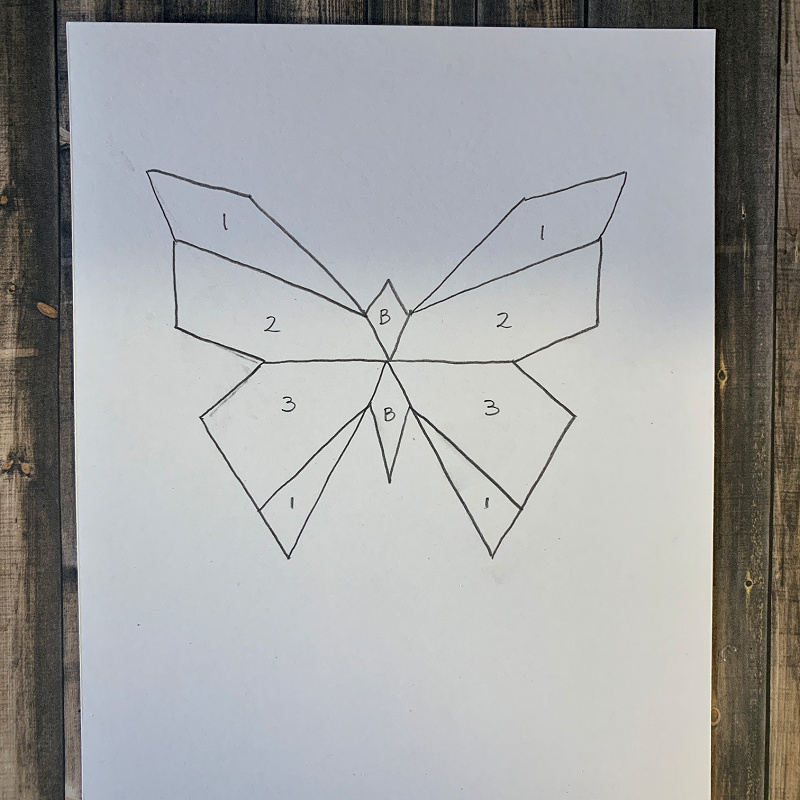
Next, trace another copy of the butterfly with all the lines of the pattern and number each section to coordinate with the patterned paper you’ll be using. This will help tremendously when putting the butterfly back together like a puzzle. The shapes marked with a “B” will be cut out of black cardstock.
.
Step 3:
.
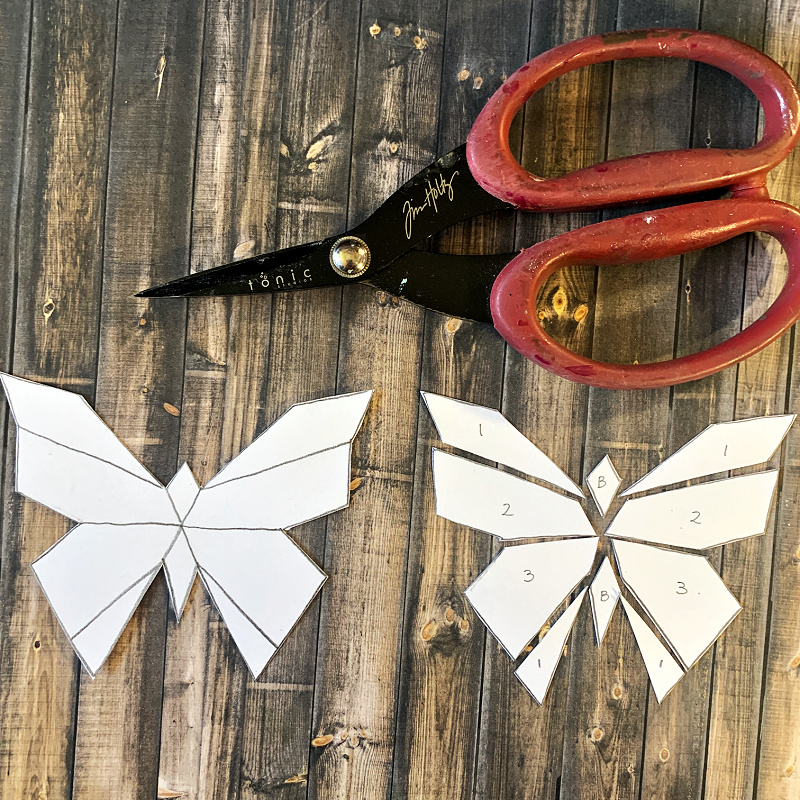
Cut out each butterfly as shown above. Use the pattern pieces on the right to trace over the patterned paper you choose to use for your butterfly in the section you want that particular patterned paper design. I found it best to choose the three different patterned paper designs I wanted to use together. After choosing the three patterned paper designs I decided where each of those patterned papers would be used in the design of the butterfly before cutting the sheets into pattern pieces. The pieces marked with a “B”, I cut out of black cardstock.
.
Step 4:
.
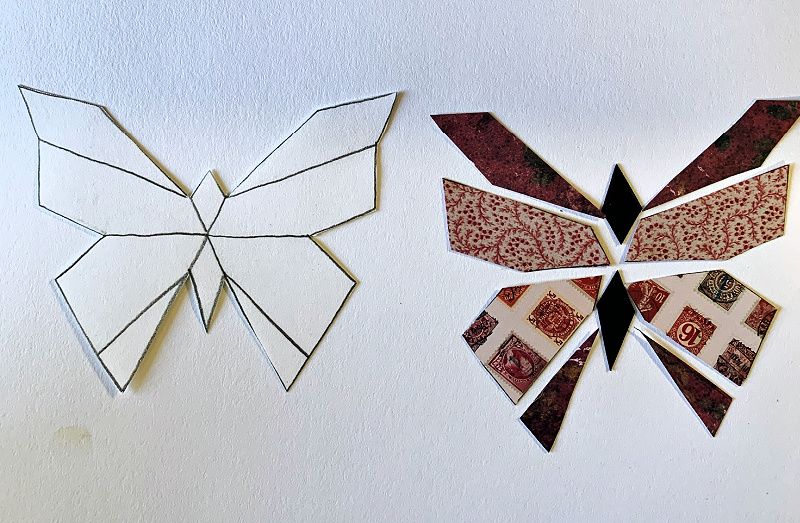
After choosing my patterned paper and where I wanted those designs to be placed on the butterfly, I cut the shapes accordingly and laid them all out. Before moving onto the next step ink the edges of each pattern piece with Vintage Photo Distress Ink. This will give your butterfly more depth.
Step 5:
.
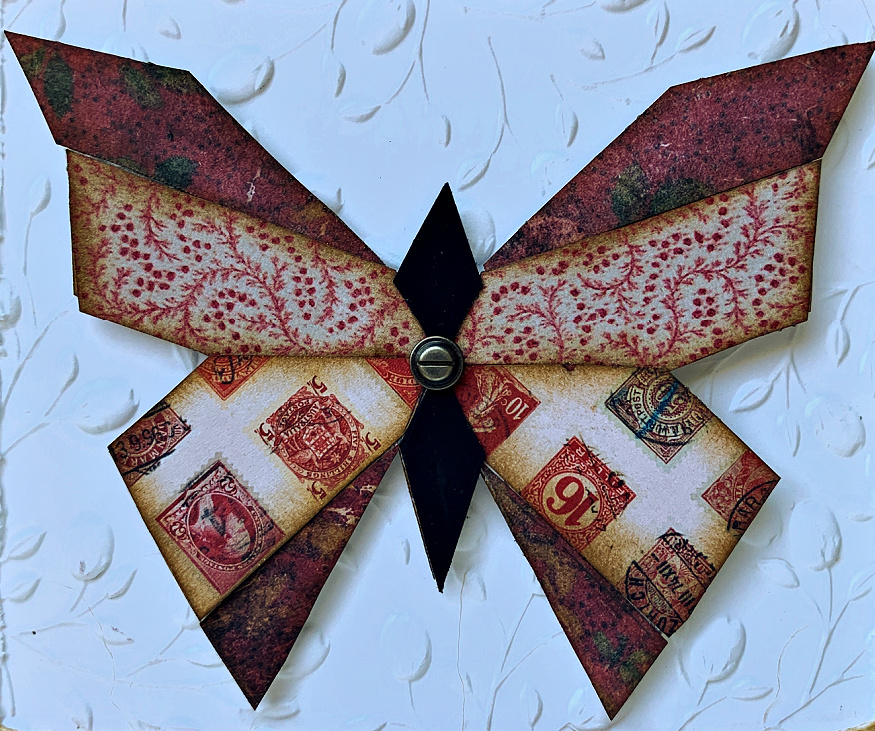
Next, glue all the pieces together onto the base piece as shown above and for a little interest and design I added a screwhead in the center of the butterfly.
I used this same method to create the other two different butterfly designs for each card.
To finish the cards I placed them onto simple embossed cardstock, added a bit of burlap twine with a sweet notecard sentiment and adhered that onto a piece of patterned paper from the same collection to complete the look.
I hope you enjoyed this tutorial and that you’ll give this a try. I had so much fun putting them together and can’t wait to search for more designs and ideas on how to use these amazing Tim Holtz patterned papers.
Thanks so much for stopping by and spending your time here with me. I appreciate it so much as I know your time is valuable and you chose to spend it here with me. Thank you!
You can find everything I used to create this projet at Simon Says Stamp.

Tim Holtz Idea-ology Palette Collection – Orange (TH94471)
Tim Holtz Idea-ology Palette Collection – Red (TH94470)
Tim Holtz Idea-ology Palette Collection – Yellow (TH94472)
Simon Says Stamp Embossing Folder – Tiny Tufts (SF439)
Simon Says Stamp Embossing Folder – Vine Canopy (SF221)
Simon Says Stamp Embossing Folder – Tiny Flora (SF540)
Simon Says Stamp E2 Strips – Rounded Rectangles (1392sdc)
Tim Holtz Idea-ology Screwheads (TH94371)


Thanks for sharing this detailed tutorial—using the coloring page instead of traditional quilting methods is such a smart and accessible approach for crafters like me who aren’t quilters. It’s great that Nicole’s patterns are free and so well-designed, and your step-by-step guide makes it easy to follow along. I love how you incorporated the Tim Holtz Palette Collection colors, and the idea of numbering sections to help with assembly is a game-changer for accuracy.