
Hi friends! I’m here today with Distress Mixology No. 7.
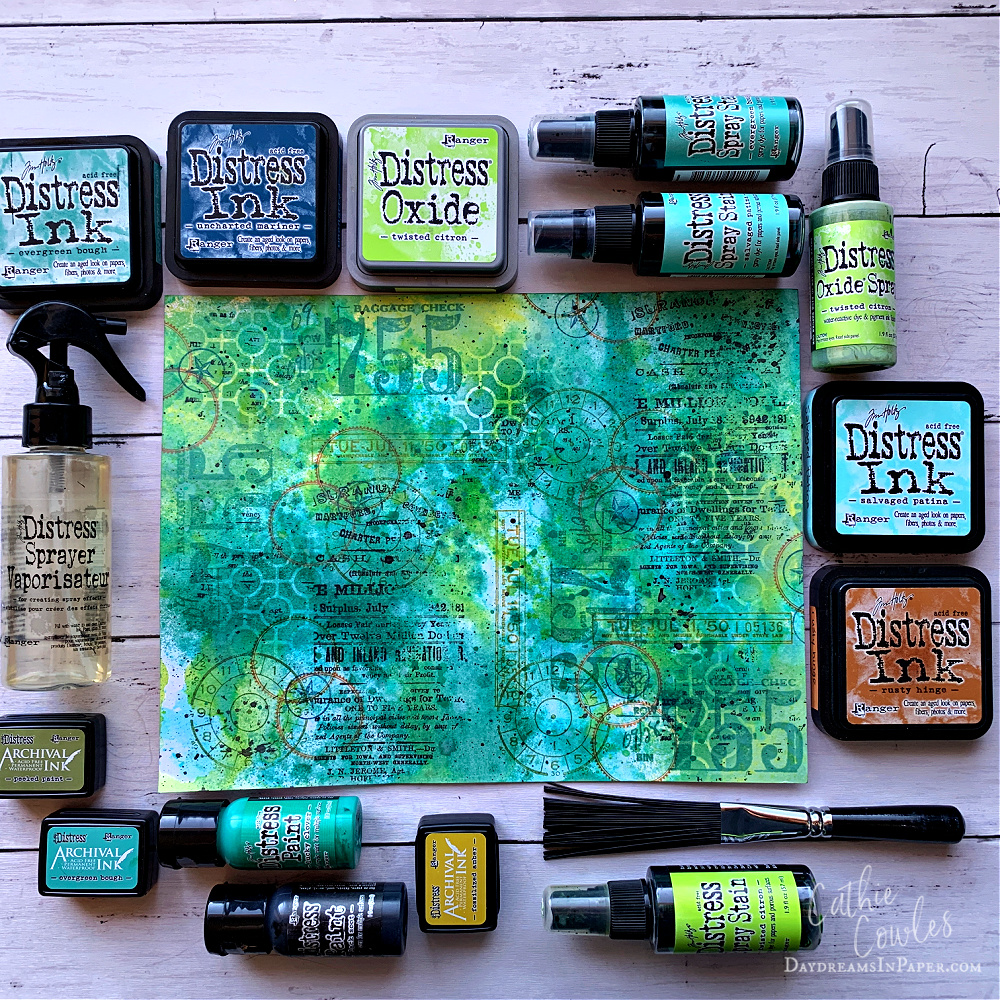
Below is a step-by-step tutorial so you can see all the steps I used in creating this background. Distress Mixology No. 7 contains the following Distress products just in case you want to play along.
- Distress Watercolor Cardstock
- Distress Inks: Evergreen Bough, Rusy Hinge, Uncharted Mariner and Salvaged Patina
- Distress Oxide: Twisted Citron
- Distress Spray Stains: Salvaged Patina, Evergreen Bough and Twisted Citron
- Distress Oxide Spray: Twisted Citron
- Distress Paints: Lucky Clover and Black Soot
- Distress Archival Inks: Evergreen Bough, Fossilized Amber and Peed Paint
- Distres Splatter Brush
- Distress Sprayer
- Distress Heat-It Craft Tool
Other items used in this background are:
- Tim Holtz Stampers Anonymous Stamp Set – The Professor (CMS395)
- Tim Holtz Stampers Anonymous Stamp Set – Mail Art (CMS339)
- Tim Holtz Stampers Anonymous Layering Stencil – Linked Circles (THS159)
You can use the exact same items I’ve used or you can switch things up by using different colors, stamps and stencils and just use the same techniques. You can also do something completely different, I’m just trying you to inspire background making. Let’s begin.
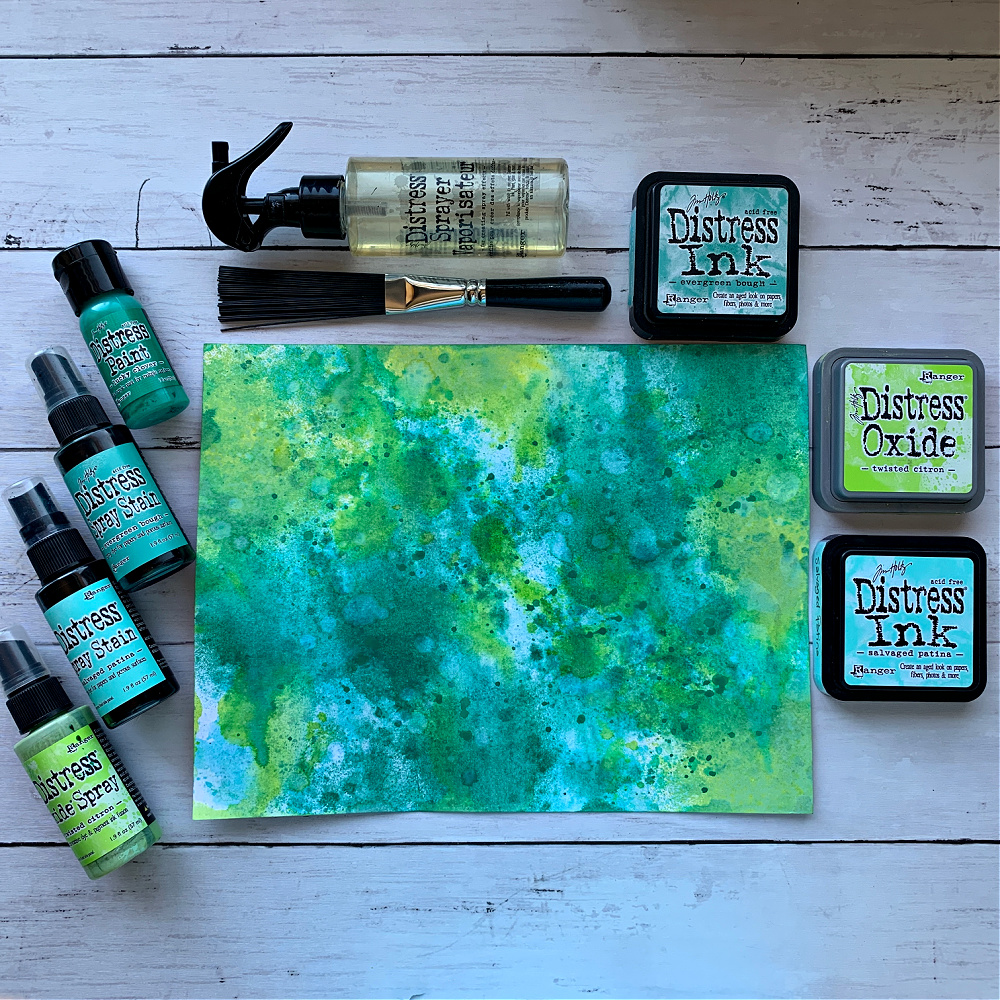
Begin by smooshing Distress Inks onto a craft mat and spritz with water. Spritz the watercolor cardstock with water as well and dip the cardstock into the distress inks. Continue this process until you are happy with the outcome making sure to dry each layer completely before adding another.
Next, smoosh some Twisted Citron Oxide onto a craft mat and spritz with water. Dip the Distress inked watercolor cardstock piece you just made into the Twisted Citron oxide in random areas until you are happy with the outcome. Now to create areas with more vibrant color spritz the Distress Sprays in random areas. Spritz with water if you want the sprays to move on the cardstock a bit. Dry with a heat tool. Allow this to completely dry. When everything was completely dry, I splattered the background with Lucky Clover Distress Paint.
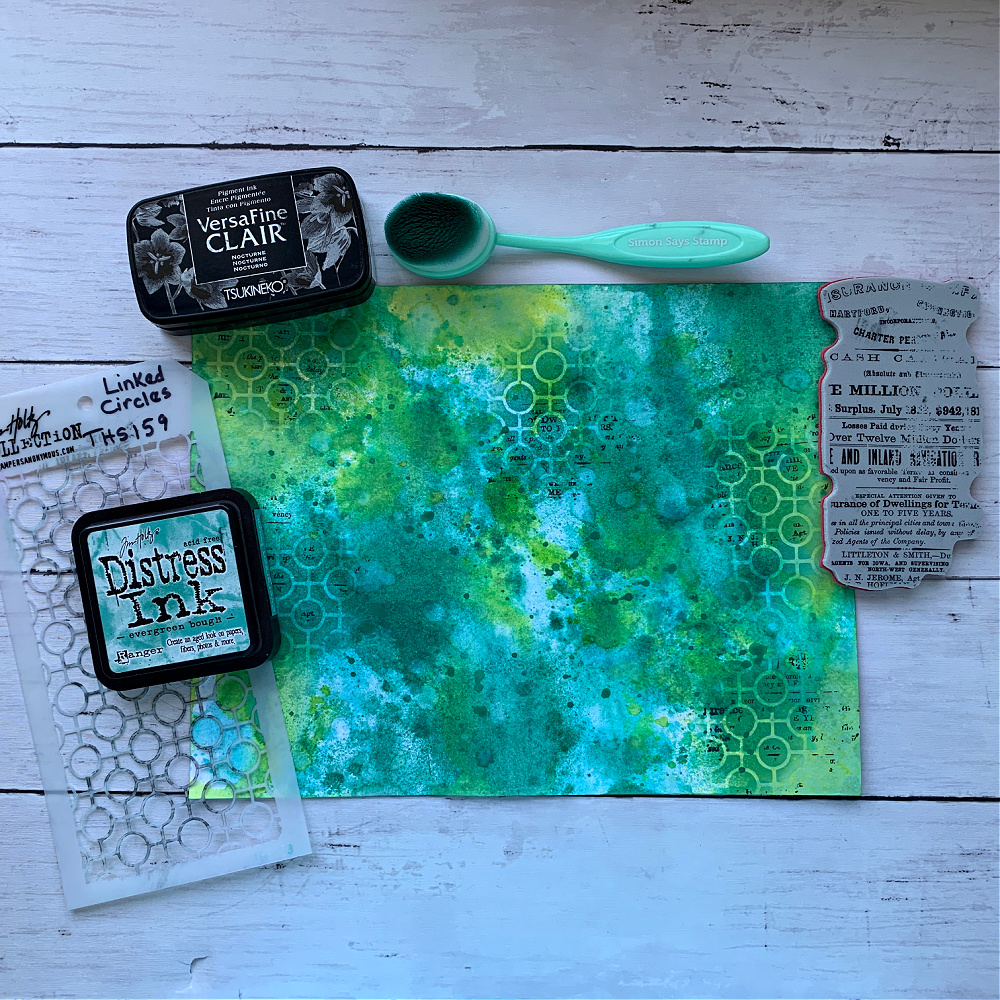
Next, lay the stencil over a lighter area of the panel and using a blending brush tool ink over the stencil design with a darker color Distress Ink. Before removing the stencil from the area you just stenciled, ink the script stamp and stamp over the stencil. This will allow the stenciled design to remain visible but the script stamp design will only transfer through the open areas of the stencil.

To add another layer to the background, I chose a few of the stamps from The Professor stamp set. I inked those images with coordinating colors of Distress Archival Ink in random areas of the panel that had some open space.

I like to add circles to my backgrounds so I chose a couple of circular designs from the Mail Art stamp set and inked them in sets of three using coordinating Distress Ink colors. To finish the background, I splattered the entire piece with watered down Black Soot Distress Paint.
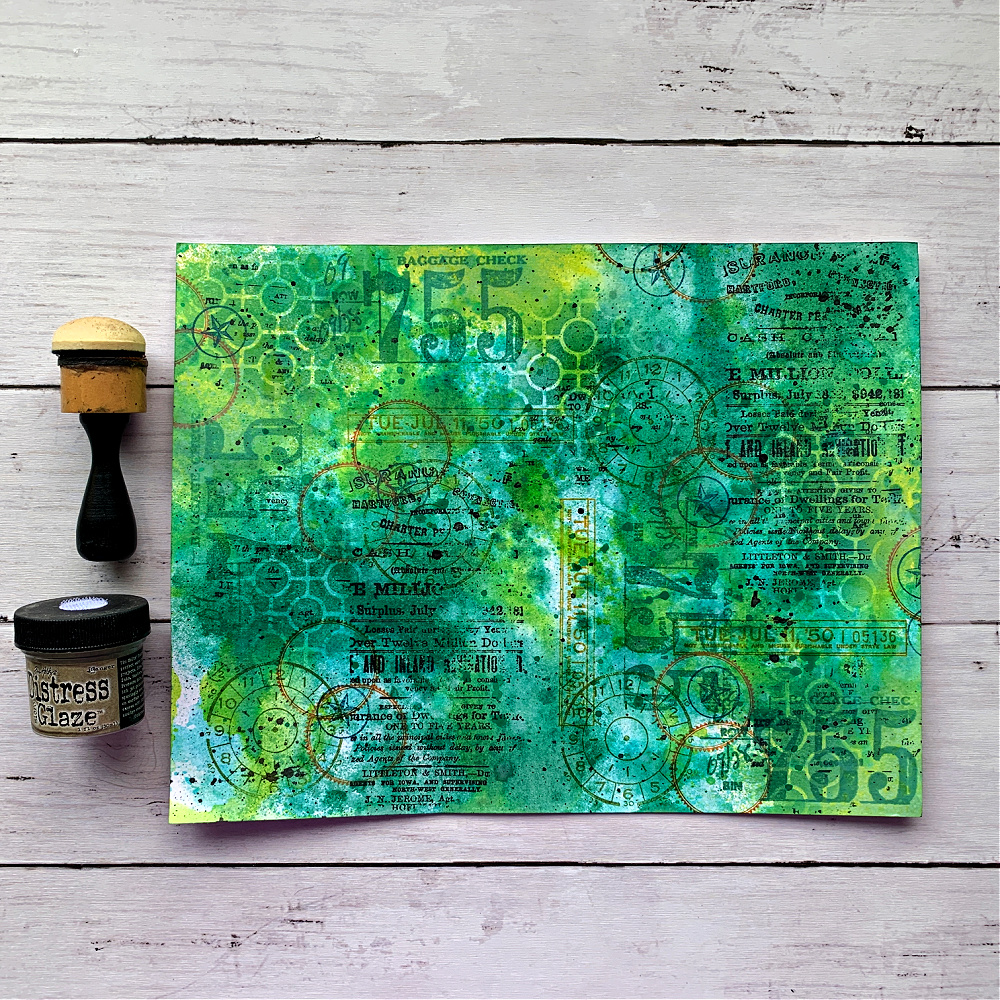
I like to seal my backgrounds with Distress Glaze. This makes them waterproof and brightens them up a bit. Remember to do this when you are completely finished and not before. The glaze will affect and prevent some mediums from adhering to your background, such as Distress Paint, if you try to add them after your piece has been glazed.
I hope you enjoyed seeing how I created this background and that you play along with me on these Distress Mixology adventures. Tag me on Instagram if you joined along so I can see what you created. Also, come back in a few days and I’ll share what I created with this background. Thanks so much for sticking with me to the end! I appreciate the time you send here with me.
You csan find all the supplies I used at Simon Says Stamp with the list below.


