Hi Friends! It has been a long, long time since I’ve posted anything to my blog. Three months to be exact and a lot has happened since then. I’ve still been creating and making things and you can see all I’ve been doing over on my Instagram page. As far as tutorials and posts to my blog, that was put on hold when my mother fell and broke her femur. My crafting time and commitment to tutorials on my blog have had to take a back seat for a while. I’m still dividing my time between the two so they won’t be regular for a few more months. All that being said, I’m so happy to be back today with another tutorial. This tutorial is all about creating a background for the card panel as well as for the focal point. It’s a fun way to put together a quick and easy card.
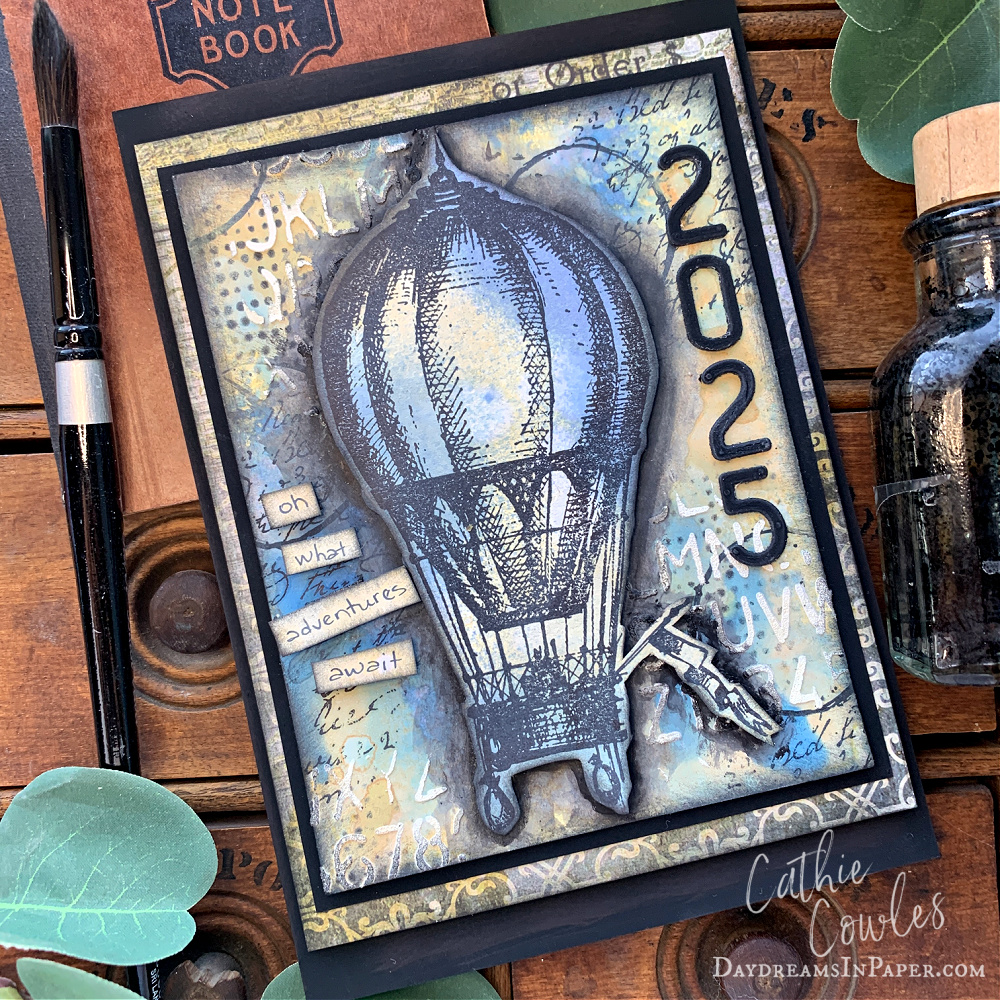
I’ll be showing you how I created the background for this card.
Let’s Begin!
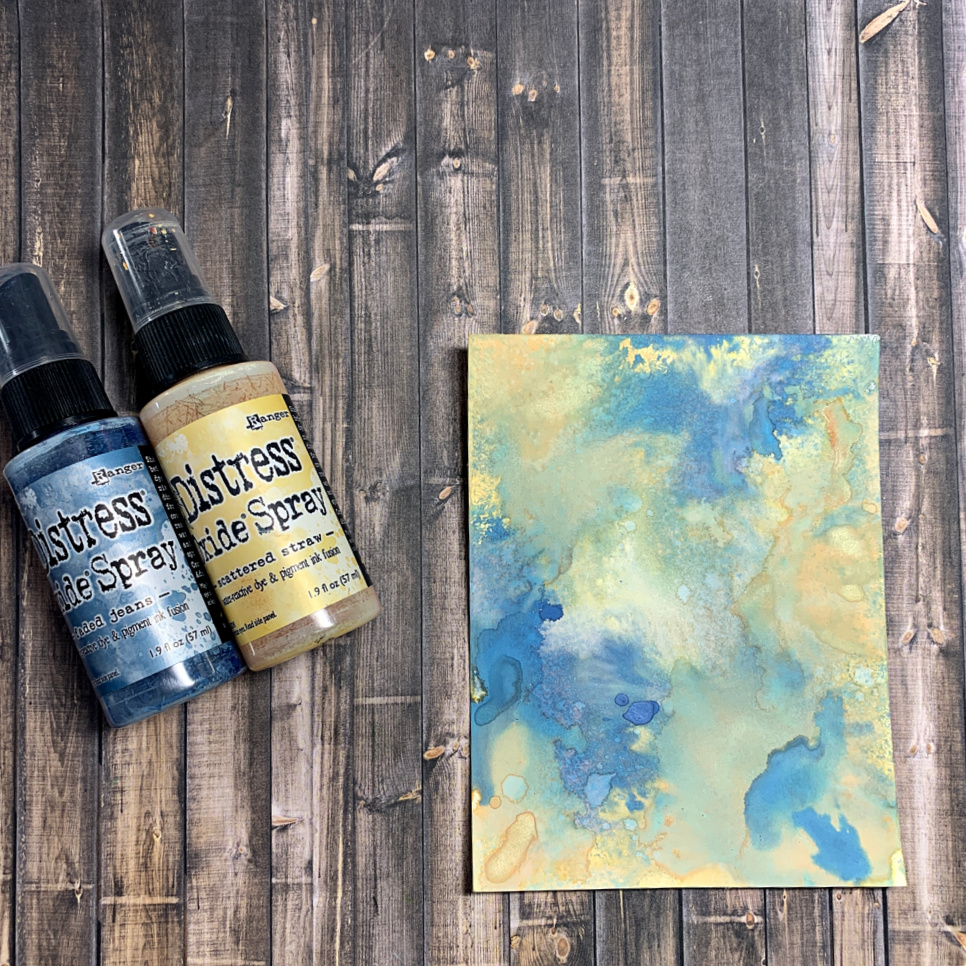
Begin by spraying a piece of Distress Watercolor cardstock with Faded Jeans and Shattered Straw Distress Oxide Spray. Spritz with water to get the colors moving and continue the process until you are happy with the results.
Complete this same process on another piece of Distress Watercolor cardstock where you will stamp on your focal image.
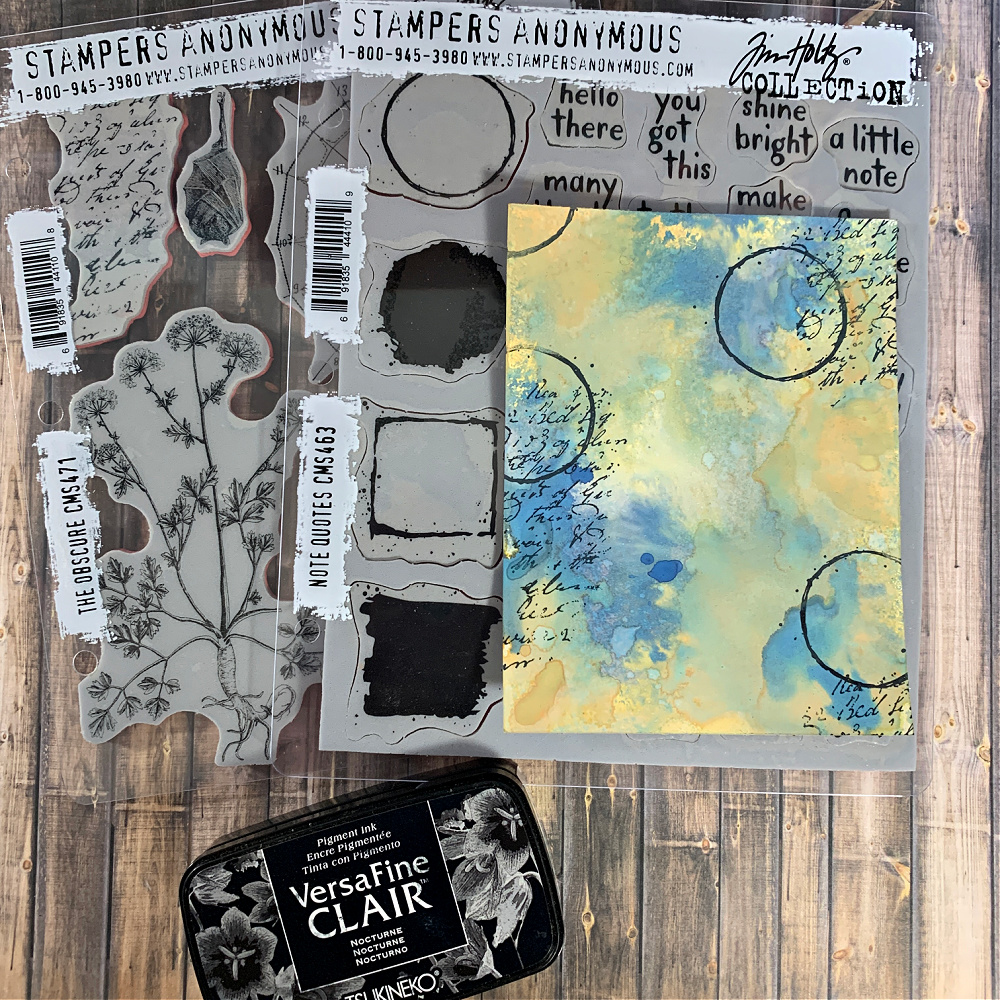
Next, stamp some mixed media type images in random areas to the background. I used the script stamp from the Tim Holtz Stamper’s Anonymous stamp set CMS471. I used stamp set CMS463 for the circle with light splatters. I want the images to be a bold black so I used VersaFine Clair Nocturne.
Allow the ink to complete dry before moving on to the next step.
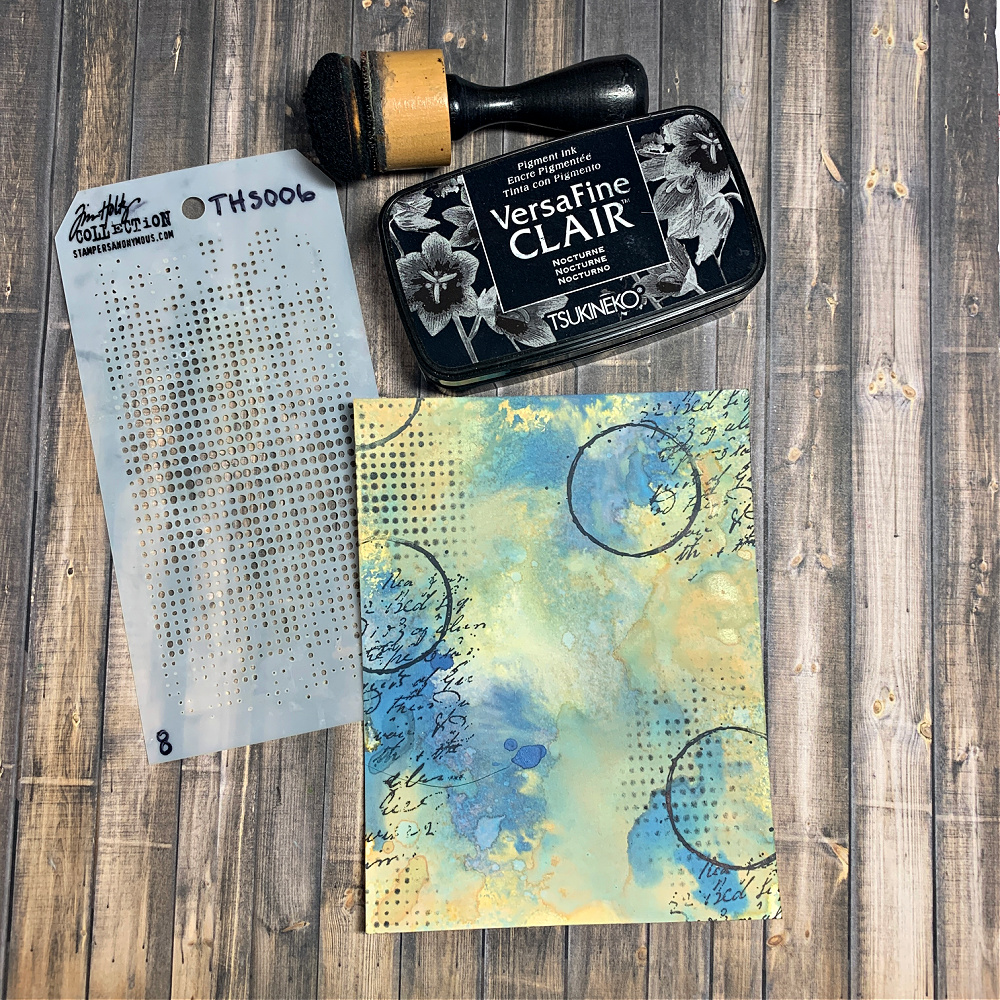
Now to add a little more movement and to fill in some blank areas I stencil Tim Holtz Stampers Anonymous Dot Fade mini stencil to random areas with the same ink.
Allow the stenciling to completely dry so the ink doesn’t smudge while completely the next step.
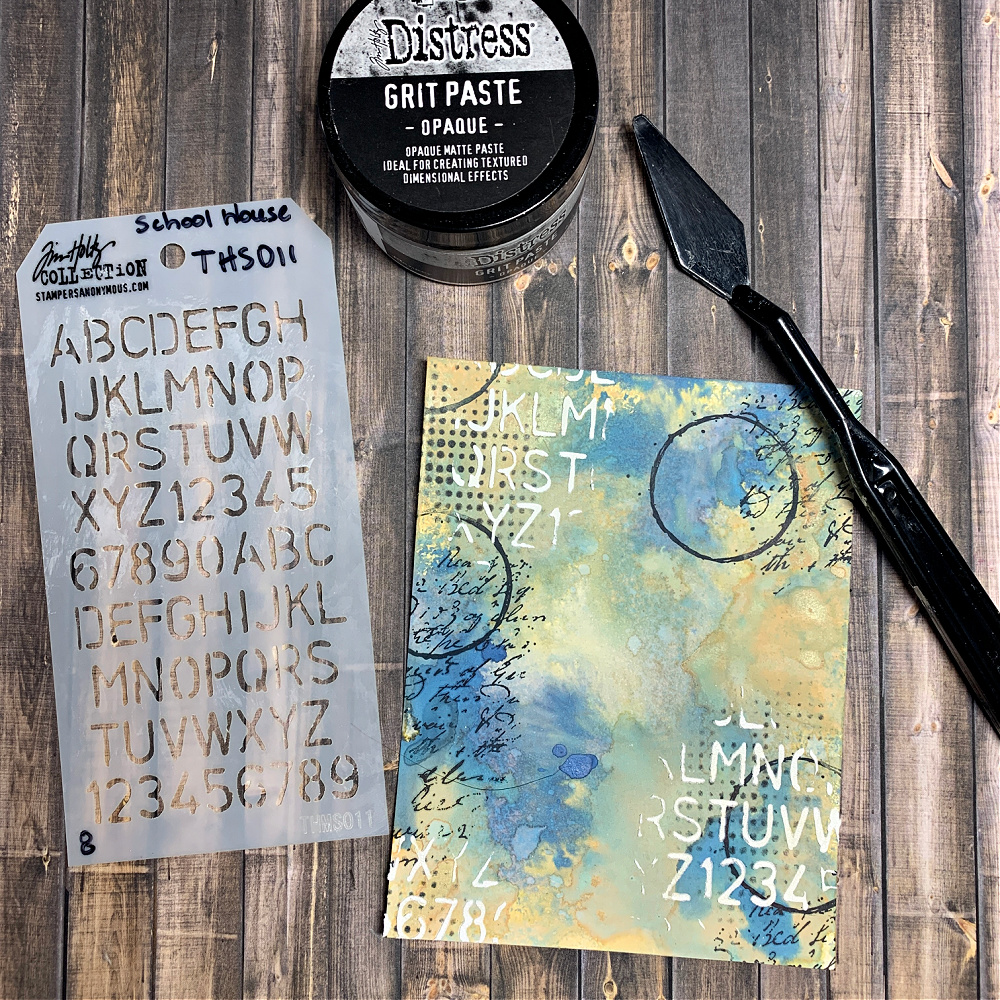
I want to add a little brightness to the background and stencil on some letters and numbers from the Tim Holtz Stampers Anonymous School House mini stamp set with Distress Grit Paste.
Allow the stenciling to completely dry.
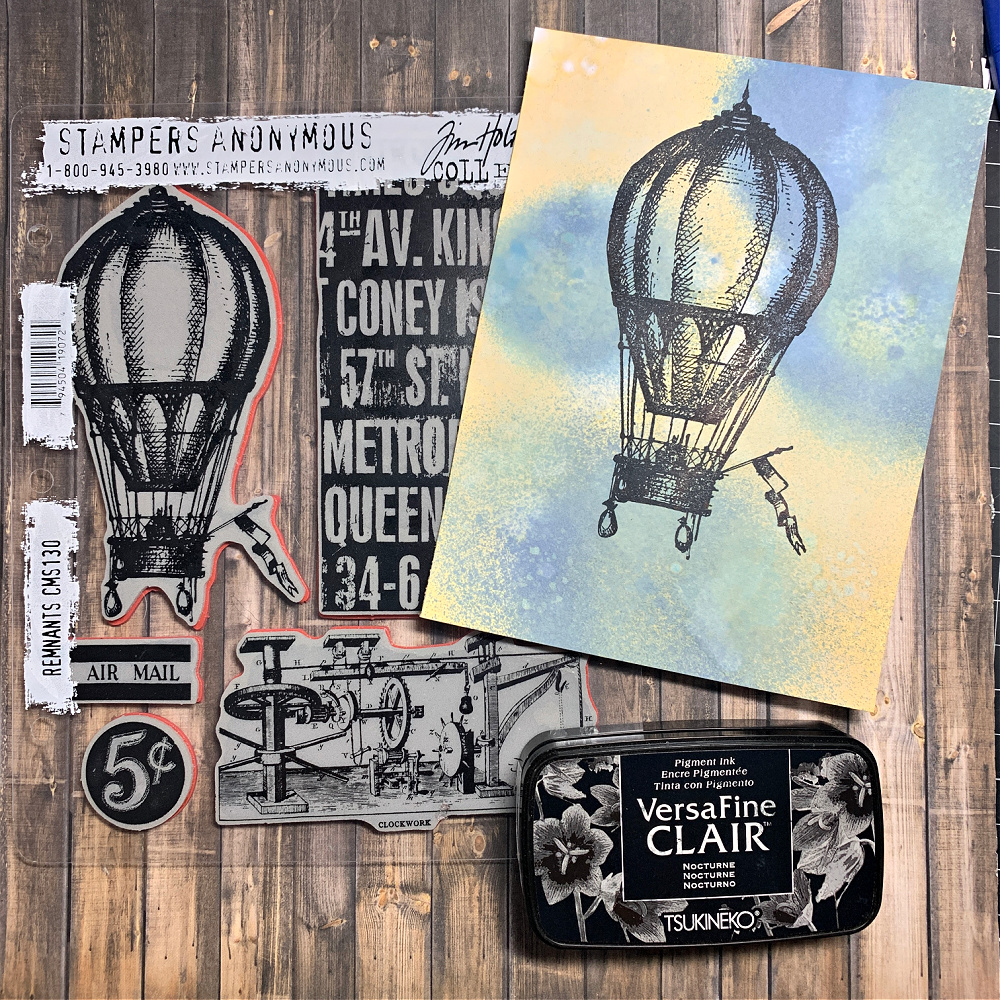
Next, I chose the flying balloon from the Tim Holtz Stampers Anonymous Remnants CMS130 stamp set. I thought the balloon was a great respresentation of adventure which fit my theme.
I stamped the image onto my second piece of cardstock colored with Faded Jeans and Scattered Straw Distress Oxide in VersaFine Clair Nocturne ink.
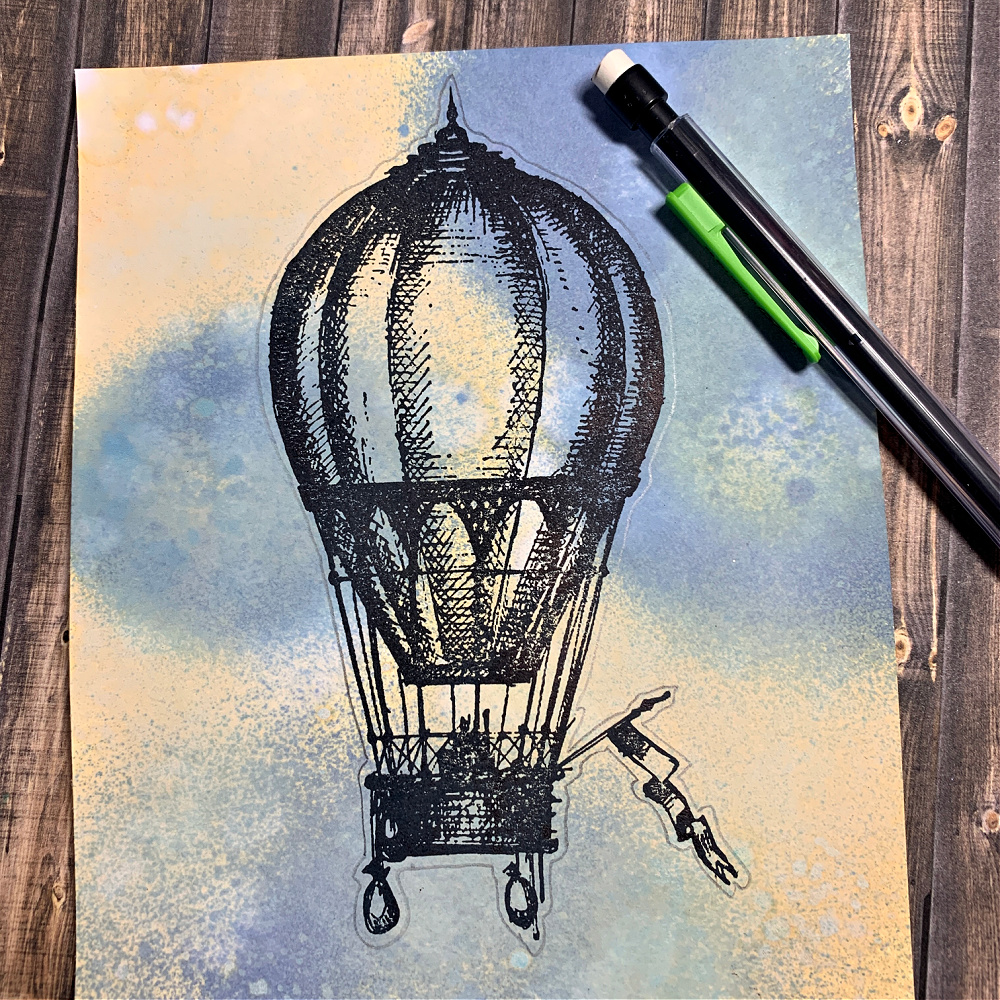
I want to cut the image out, so I draw a line close enough to the edge of the design as possible while still being able to get a clean cut of the image. I use a light hand when tracing around the image with a pencil.
NOTE: I don’t usually do this when fussy cutting an image but for someone who maybe has never fussy cut I wanted to show an easy way to accompish it that may help ease some anxiety when doing so. This may sound strange to some, but I get so many comments about how fussy cutting makes crafter’s anxious and they don’t even want to attempt it so I included this little step to ease some of that anxiety. Remember, it’s just paper and you can reink some cardstock and restamp the image and try again.
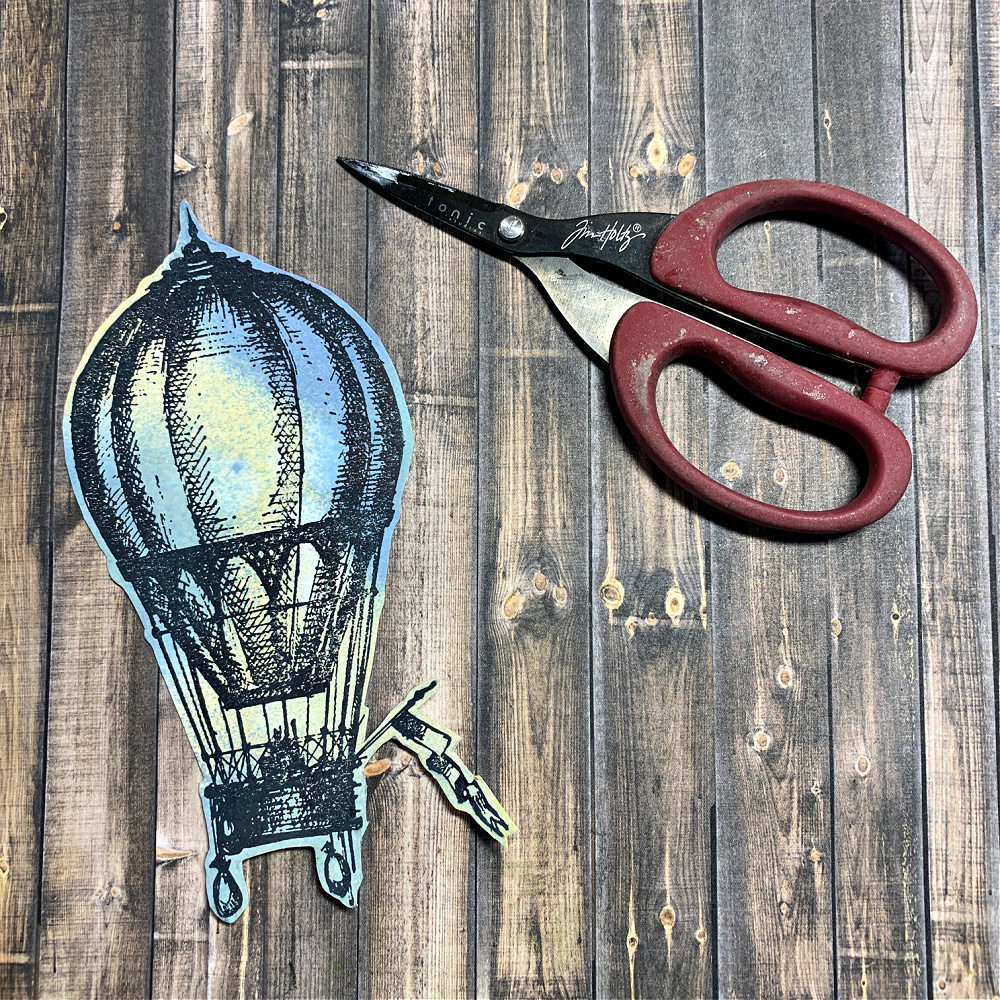
Here you can see how close I cut around the edges. You can cut right on the lines if you want, but because this image has quite a bit of detail along the bottom and around the flag I chose to leave a bit of space around the perimeter. I will be inking the edges black so most of the perimeter outside the image will not show so much.
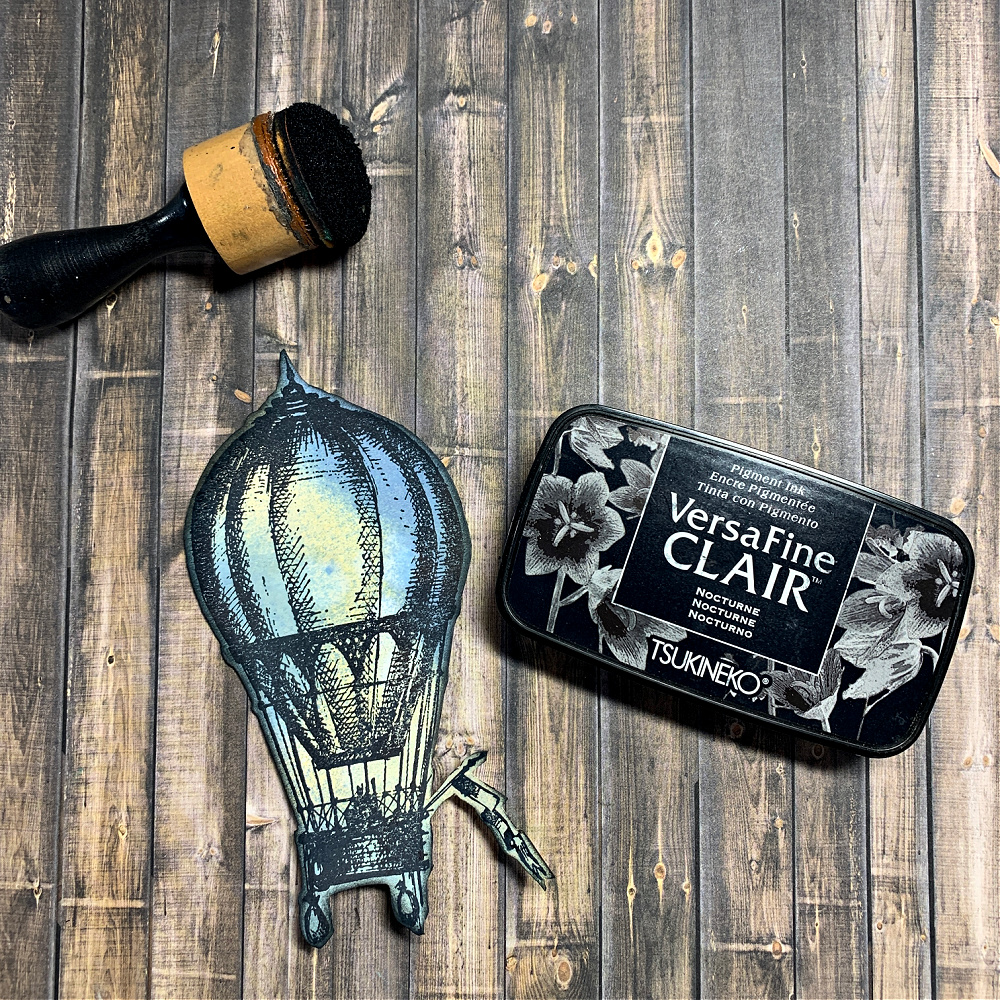
Next, I ink the edges of the image with an ink blending tool and VersaFine Clair Nocturne ink. If you want to get better coverage in the area between the ballon weights and flag you can use the tiny ink blending tool.
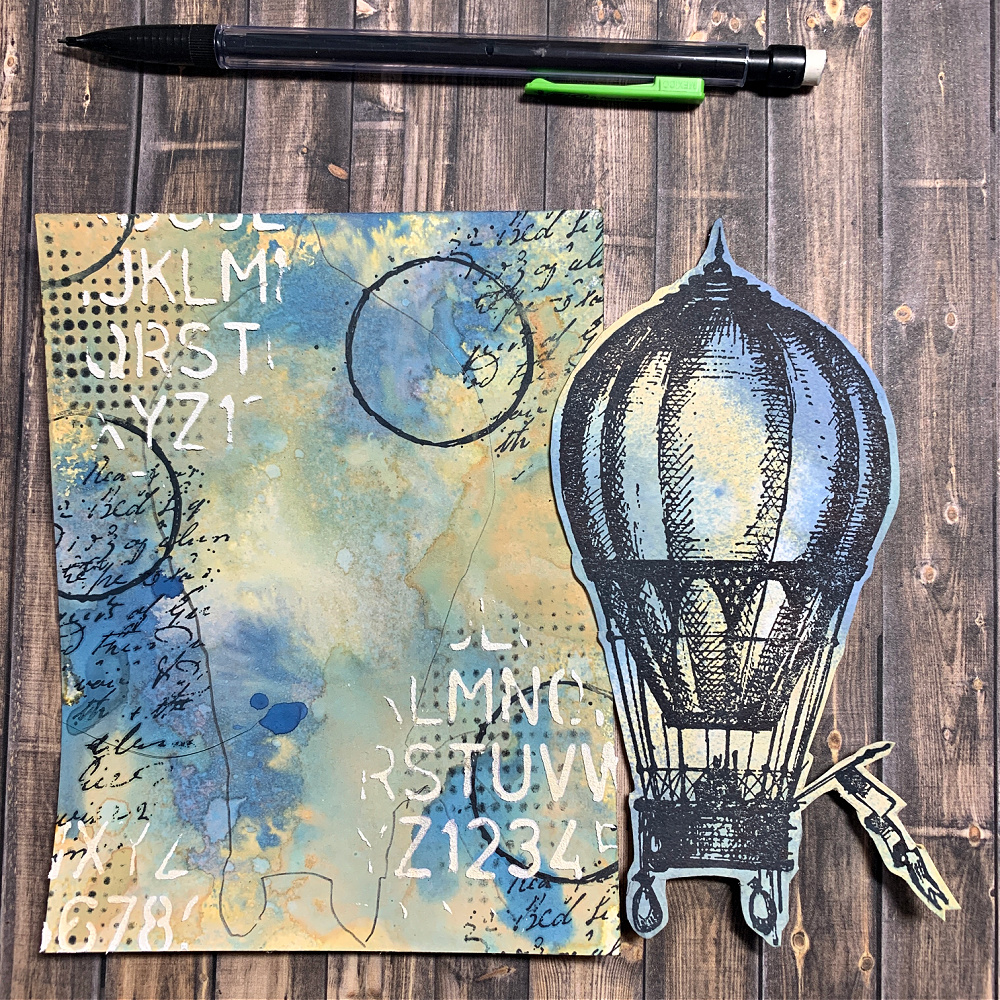
Now I trace the cut out image onto the front card panel with a pencil. Use a very light hand when doing so.
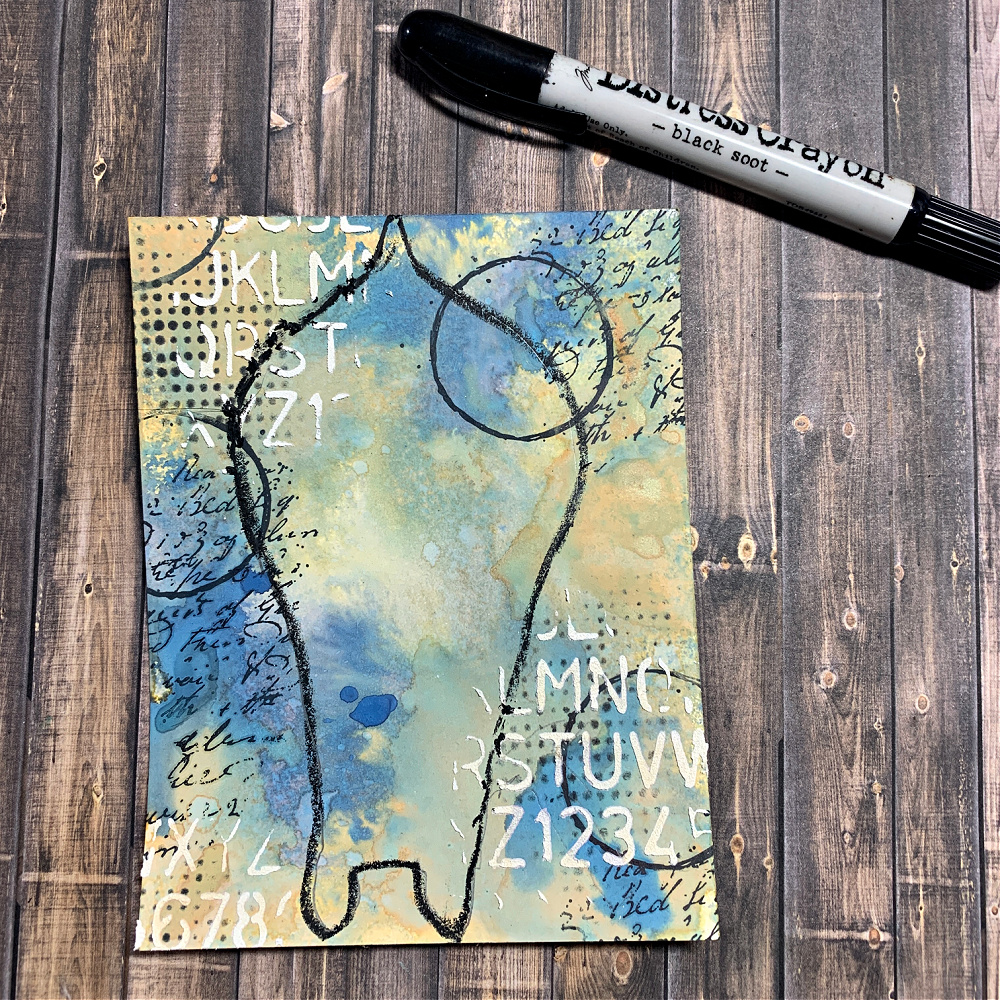
Next, trace over the pencil marks with a Black Soot Distress Crayon.
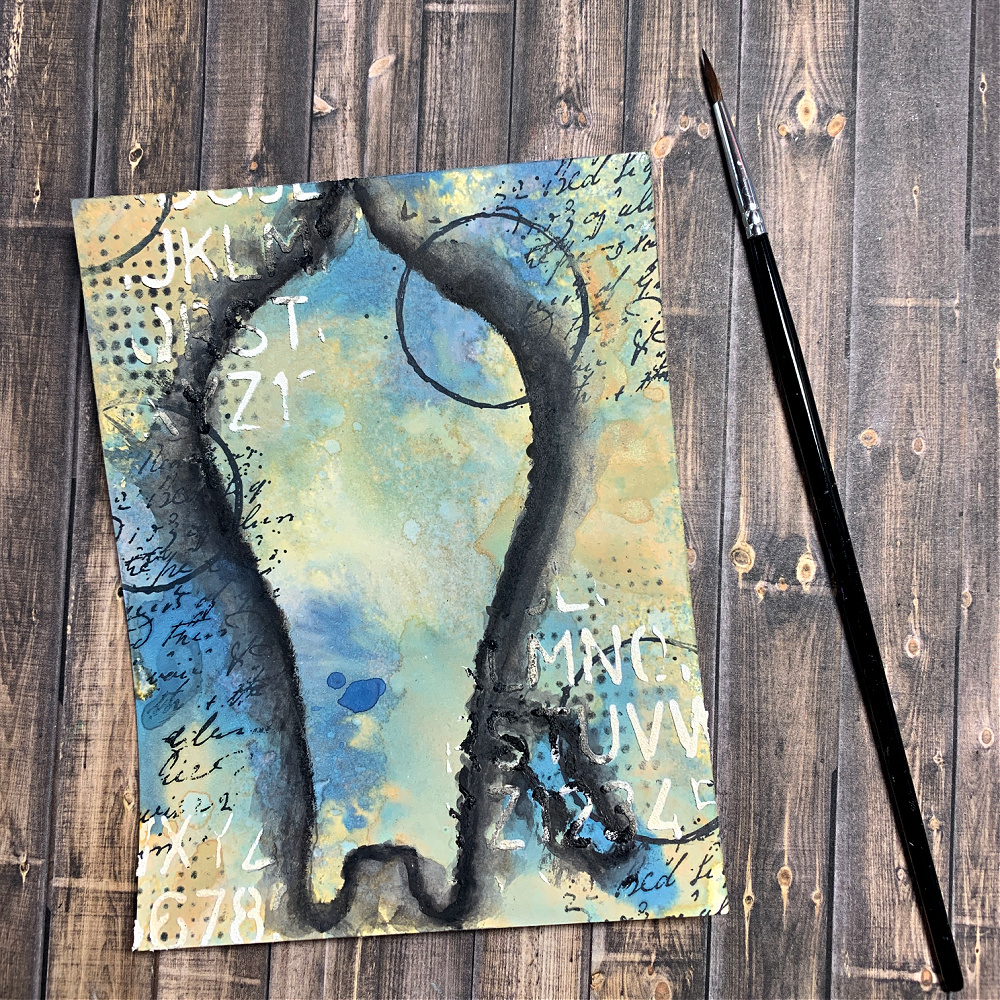
Using a paintbrush dipped in water, smudge the outline drawn with the Black Soot Distress Crayon. Extend the shadow as little or as much as you desire.
Allow the crayon to completely dry and then ink the edges with Nocturne ink (not shown).

To finish the card, I attached the image to the center inside the shaded area, added a handwritten sentiment and the year 2025 cut from the Tim Holtz Sizzix Letterboard Sidekick die set. I cut the numbers out of Distress Black Heavystock. I matted the main card panel to a piece of the same black heavystock paper, an older piece of Tim Holtz patterned paper stash cardstock and another piece of black heavystock for the bottom layer.
It seems like a lot of steps but the process goes very quickly and you have a beautiful background piece for any card.
I hope your 2024 has been a year filled with peace and love and that you are surrounded by loved ones when you ring in the new year.
Thank you so much for sticking with me to the end of this tutorial. I truly appreciate the time you spend here with me. Happy New Year!

You can find all the supplies I used to create this card at the links below:
Tim Holtz Stampers Anonymous Remnants Stamp Set (CMS130)
Tim Holtz Stampers Anonymous The Obscure Stamp Set (CMS471)
Tim Holtz Stampers Anonymous Note Quotes Stamp Set (CMS463)
Tim Holtz Stampers Anonymous Mini Stencil Set #8 (MST008)
Tim Holtz Sizzix Letterboard Sidekick Die and Embossing Folder Set (666859)
Tim Holtz Ranger Ink Distress Oxide Spray Scattered Straw
Tim Holtz Ranger Ink Distress Oxide Faded Jeans
Tim Holtz Ranger Ink Black Soot Distress Crayon
Simon Says Stamp Nocturne Black VersaFine Clair Ink Pad
Tim Holtz Ranger Ink Opaque Grit Paste
Tim Holtz Ranger Ink Distress Watercolor Cardstock
Tim Holtz Ranger Ink Black Heavystock


good to see you back. hope your mom heals quickly. my girl friend broke her femur three months ago and is healing well so I hope the same for you. thanks as always for sharing and all the inspiration.