
Hi friends! I’m here today to share the exciting news that Simon Says Stamp has come out with 7 new coordinating dies for Tim Holtz Stampers Anonymous stamp sets. These dies coordinate with stamp sets, Wildflower CMS253, Flutter CMS294, Ornate Trims CMS326, Perspective CMS213, Papillon CMS106, and two die sets that coordinate with Mini Bouquet CMS269.
I’ll be sharing some tips and tricks as I reveal everything I created using these coordinating die sets so check back often so you don’t miss a thing. These are not techniques I’ve come up with or created myself and I want to be transparent about that. These are some techniques you may already know about or ones you may have just forgotten. Let’s get started!
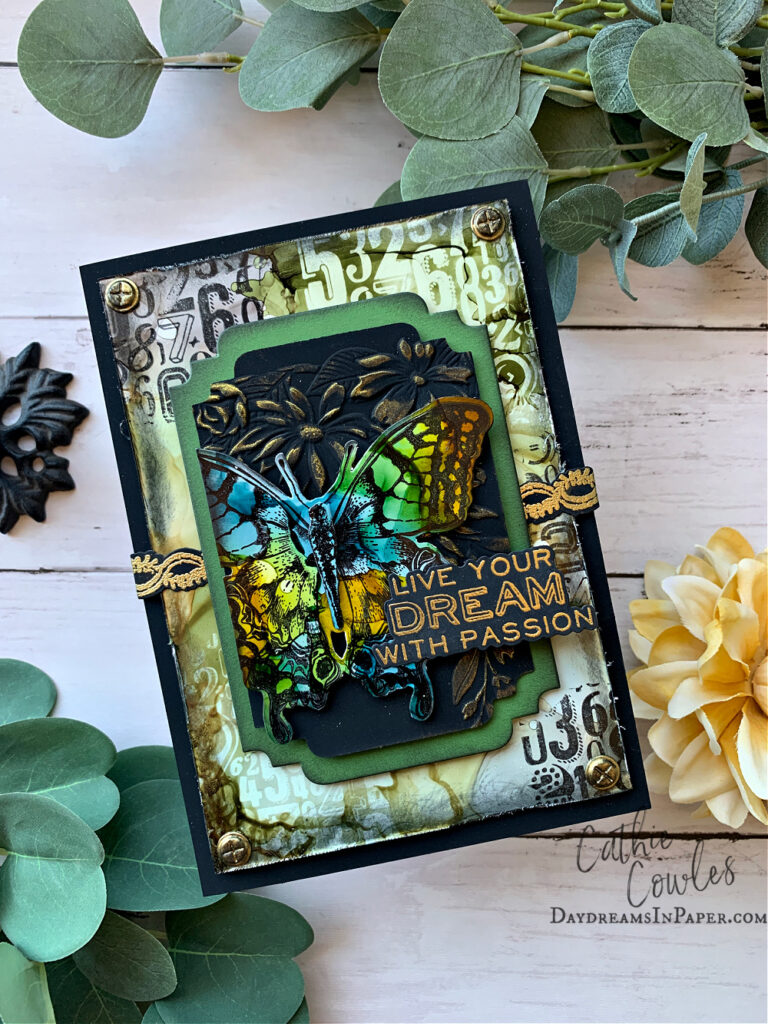
My first project uses the Perspective stamp set and coordinating dies. Below I’ll show you an easy way to line up the stamp with the die for foolproof cutting.
Step 1:
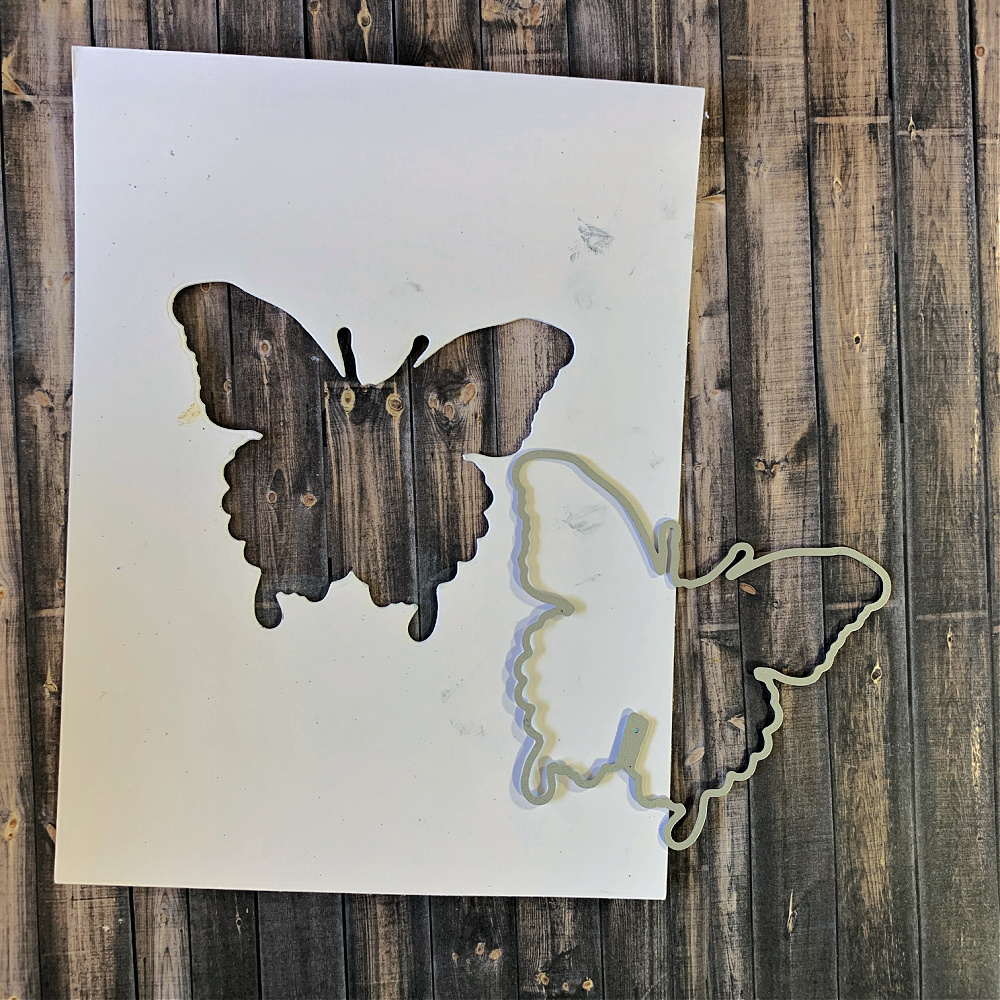
Begin by cutting out the butterfly in the Perspective 213SSS die set out of a scrap piece of cardstock.
Step 2:
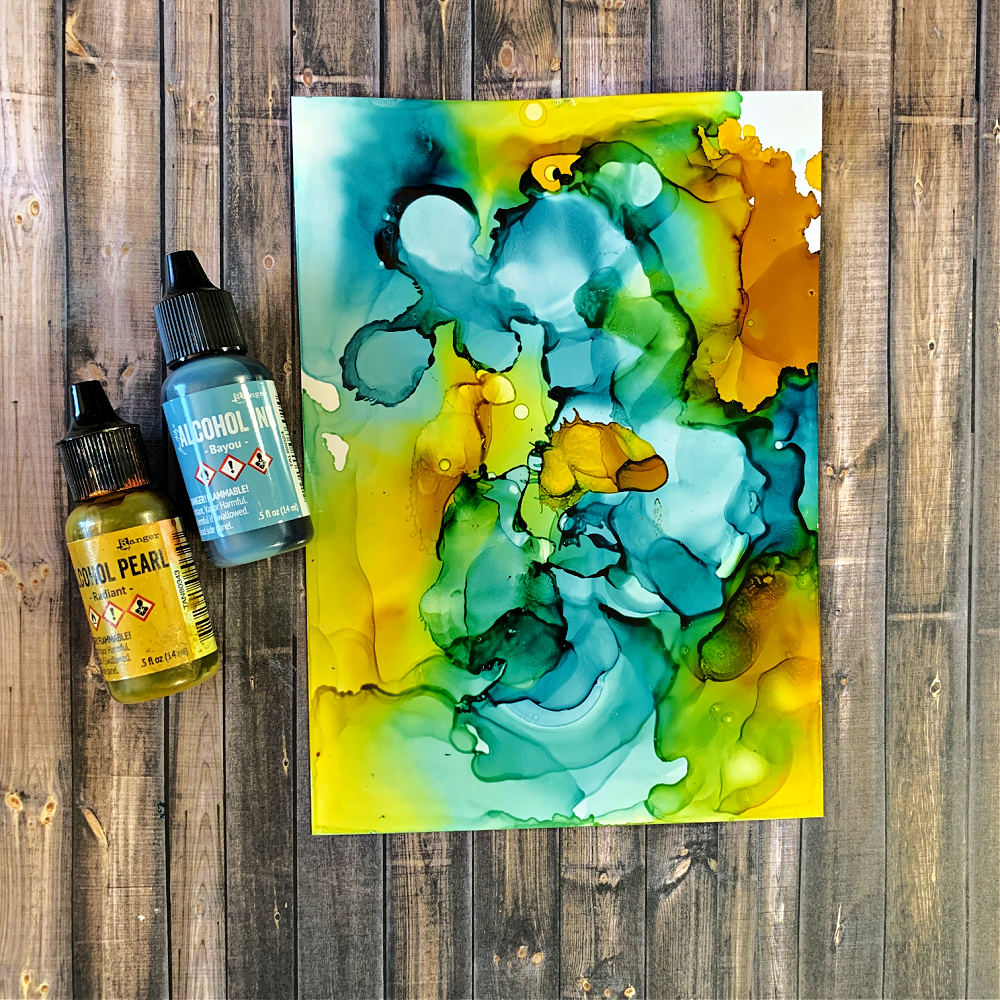
Create a colorful background out of any colors and type of ink you desire. I used Ranger Bayou and Radiant Pearl alcohol inks.
Step 3:
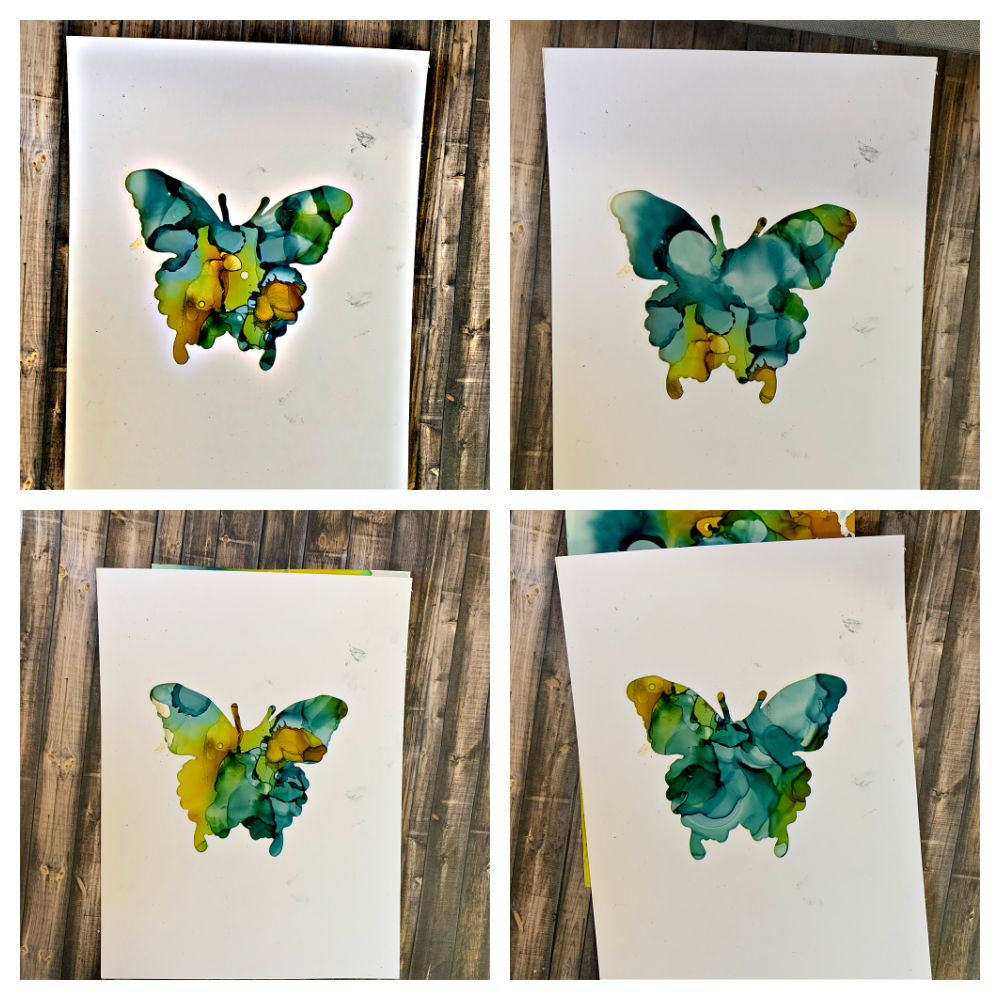
Take the cut out butterfly from Step 1 and place it over your inked cardstock piece from Step 2. Move the cut out butterfly around the inked cardstock piece until you like the colors in the window. This will be the colors that appear on your butterfly when you cut it out. Keep moving the cardstock around until you like what you see through the window.
Step 4:
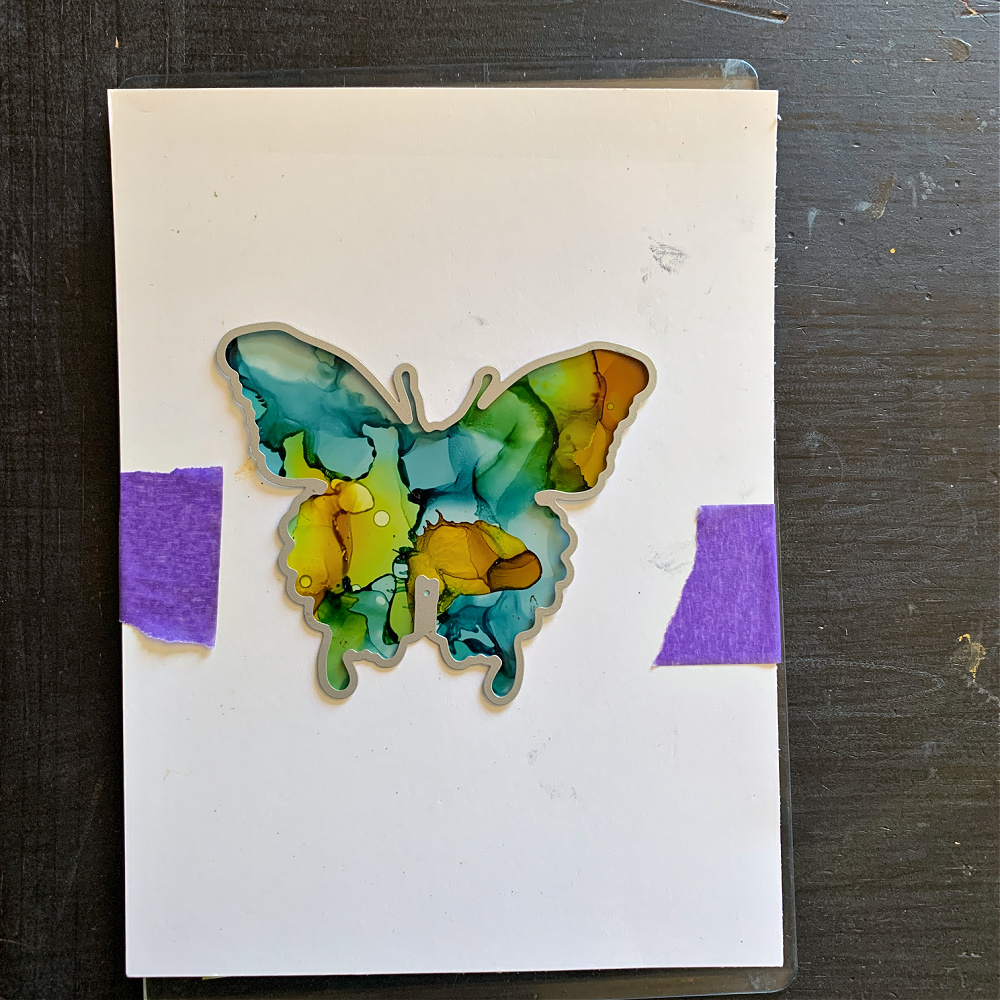
Once you are happy with the colors in the placement of the window, tape the two pieces of cardstock together. Fit the butterfly die inside the cut out window. You should feel it fall into place. Once it falls into place you can secure it with a piece of tape, if needed.
Step 5:
After making your die cut sandwich, run it through your die cut machine.
Step 6:
Remove the cut out butterfly and reserve the original cut out piece from Step 1.
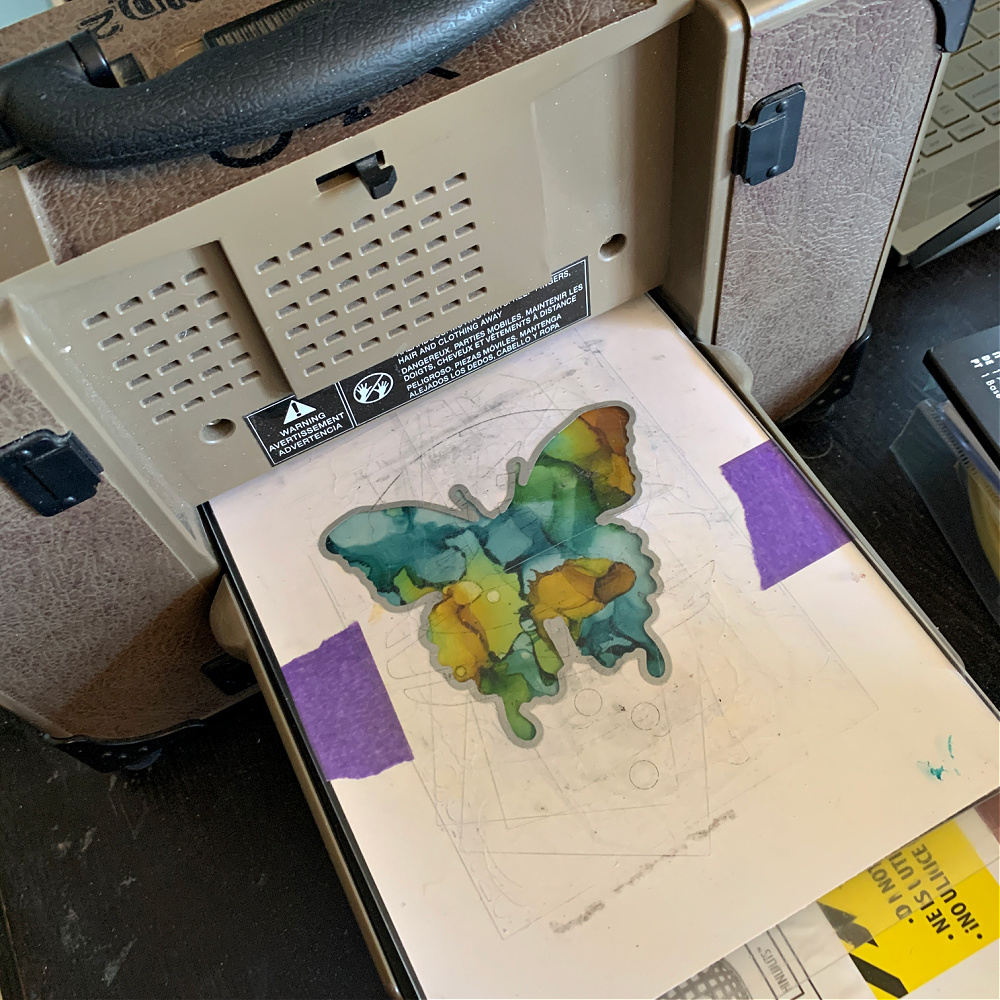
Step 7:
Take the butterfly cut out cardstock piece from Step 1 and place it on a stamping tool. Secure it with magnets. Insert the cut out inked butterfly from Step 6 and place it into the cut out butterfly area as shown above. You will need to secure this cut out piece by using double sided tape underneath the butterfly or by using a small piece of a Sizzix Sticky Grid sheet.
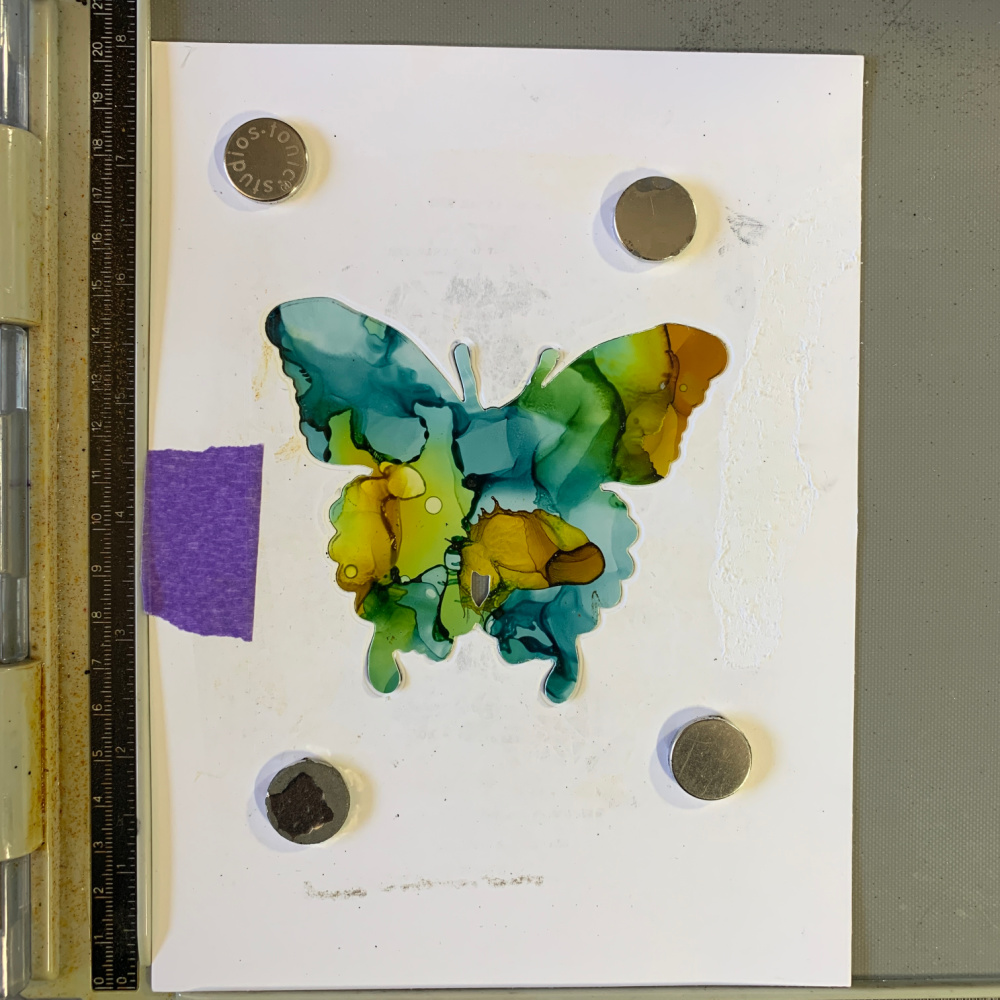
Step 8:
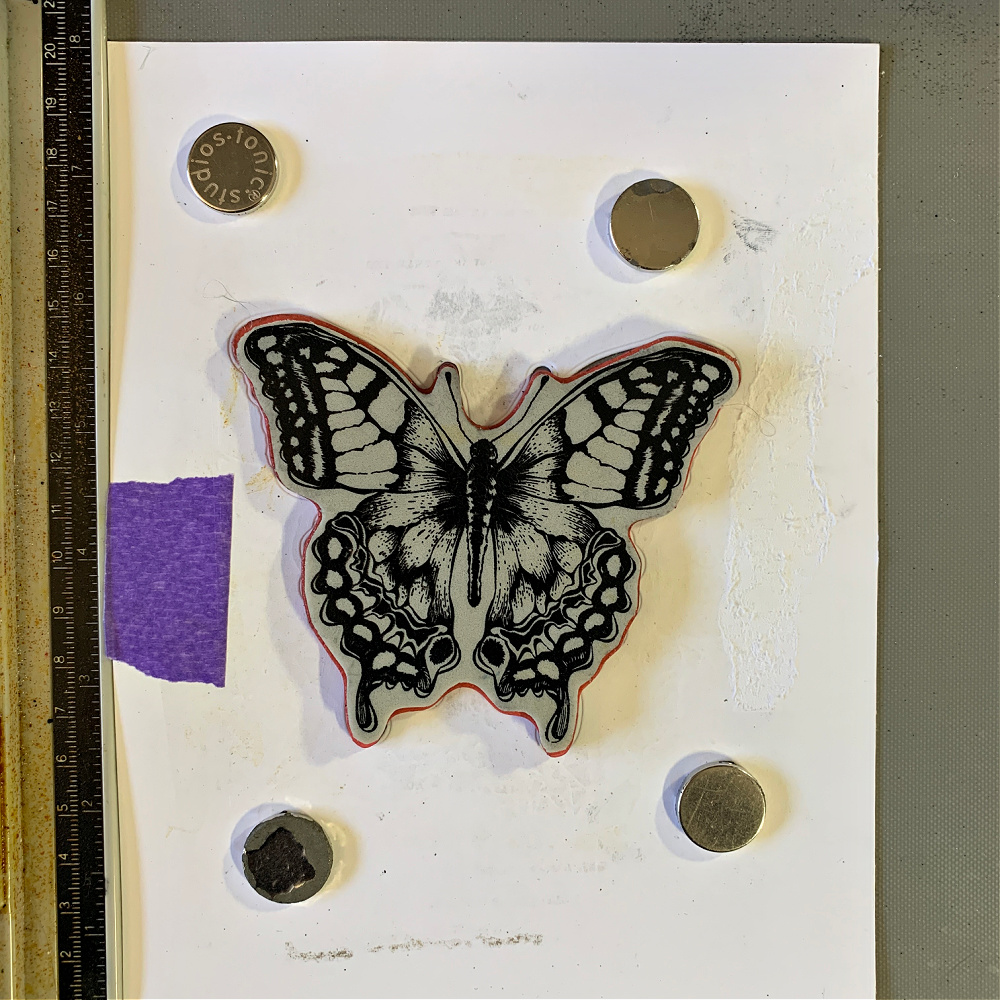
Fit the butterfly stamp into the cut out area. You should feel it fall or slide into place. If you give it a little nudge, it shouldn’t move. When this happens you know you have the stamp lined up with the cut out area correctly and it’s safe to stamp your image.
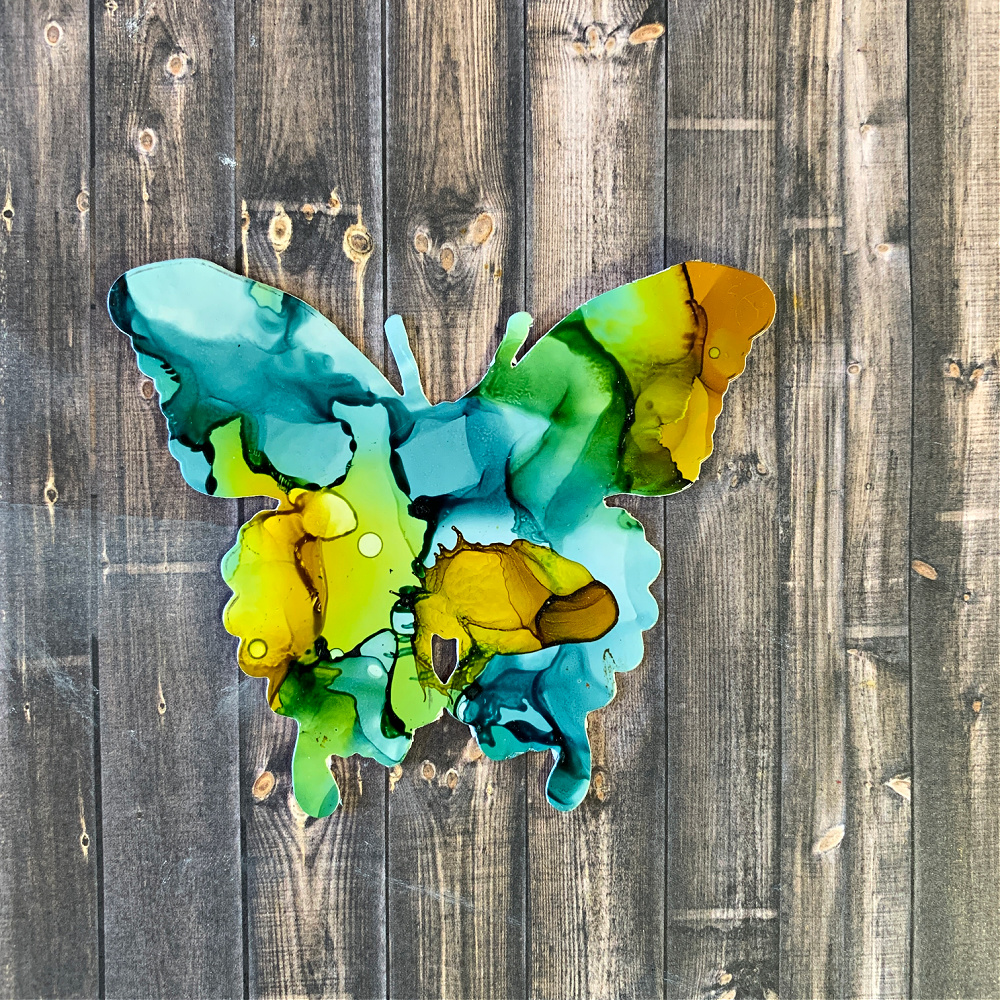
Step 9:
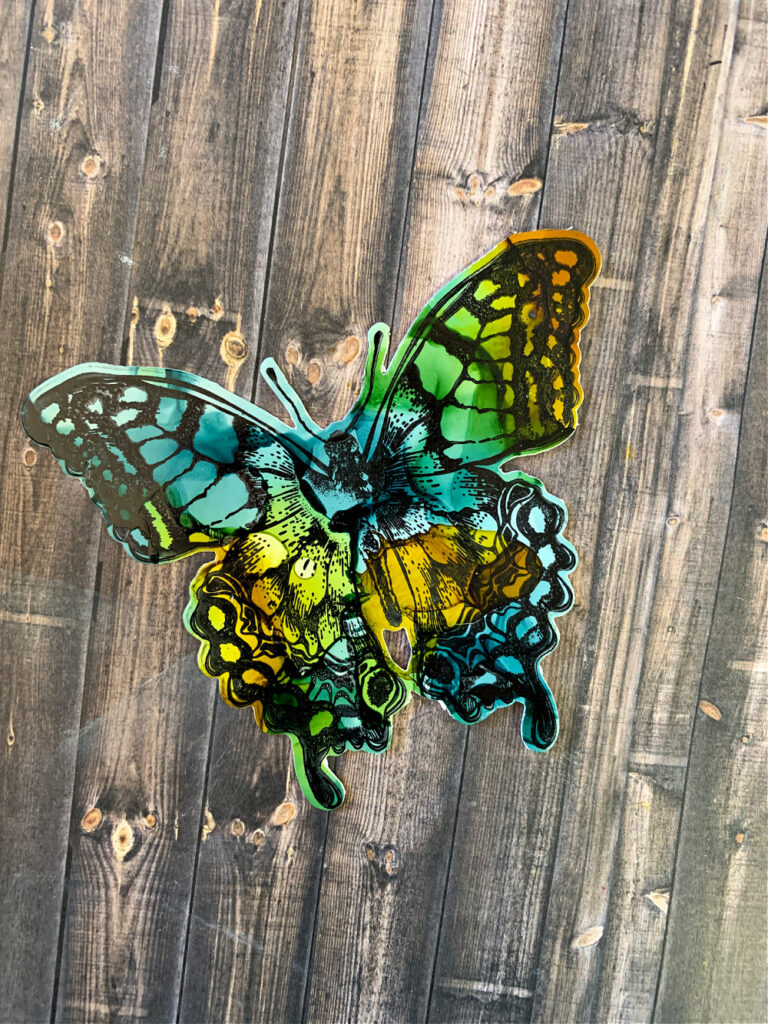
And there you have it! A perfectly stamped butterfly cut out that you can now use on any project.
I hope you found this helpful and that you give it a try. Thank you so much for sticking with me to the end and remember to check back over the next few weeks as I create more fun projects using these new coordinating die sets from Simon Says Stamp.

Click the link below to see the stamp and die set I used for this card.
Tim Holtz Perspective Stamps with Simon Says Stamp Dies Bundle


