
Hi Friends! Today I’m sharing some tips and tricks on how to easily use the dies that Simon Says Stamp exclusively creates to coordinate with Tim Holtz Stamps. Below is a step-by-step photo tutorial on how I get mine to turn out perfectly every time. I am not the inventor of this hack but it is one I’ve seen on YouTube over and over again so I have no idea who originally came up with this idea. Whoever did, I tip my hat off to you, you are a genius! The only step I added to this hack is running it through a laminator after coloring the image because the paper can curl after coloring. Enjoy!
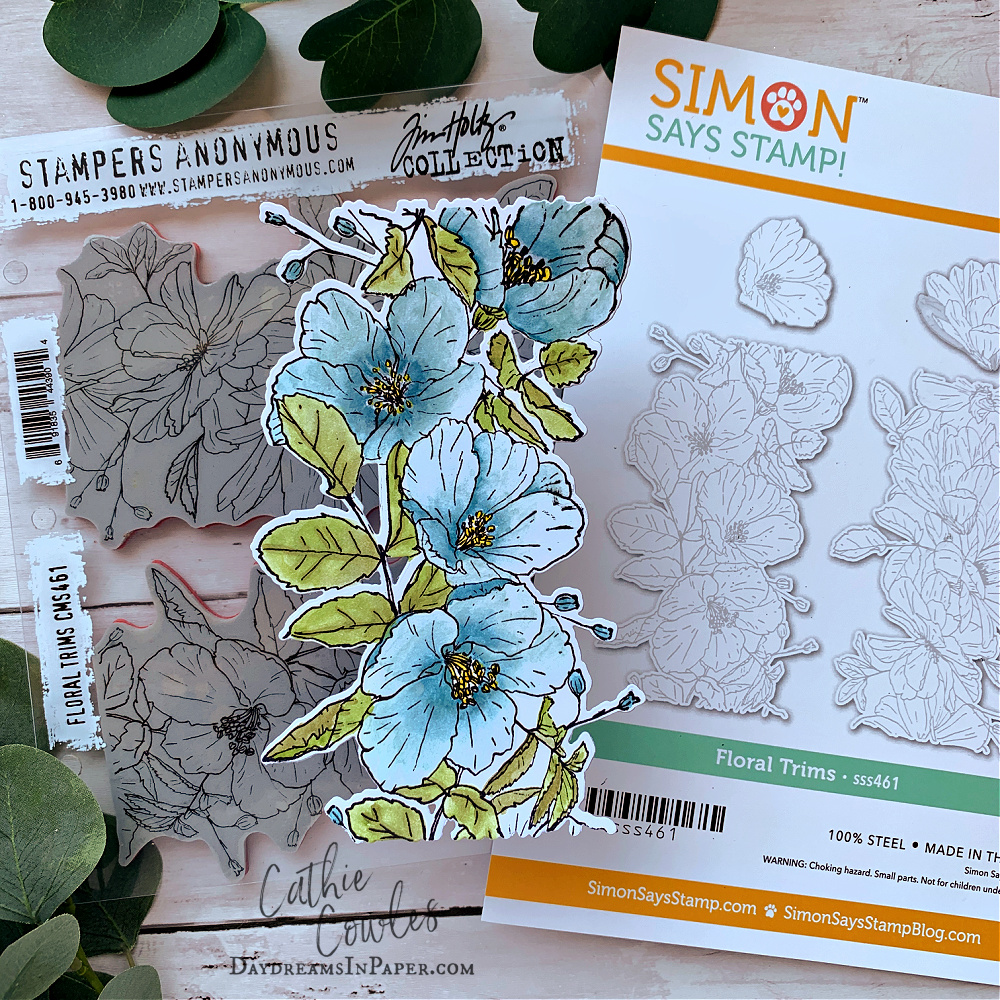
Let’s face it, sometimes you want a beautiful Tim Holtz floral stamped image to pop off your card or project and it’s almost impossible to fussy cut a beautiful image like the one above. Simon Says Stamp has made it a breeze with their coordinating Tim Holtz stamp dies. It’s not as difficult as you think to get the stamp and the die to line up perfectly. Below are some tips and tricks on how to do just that.
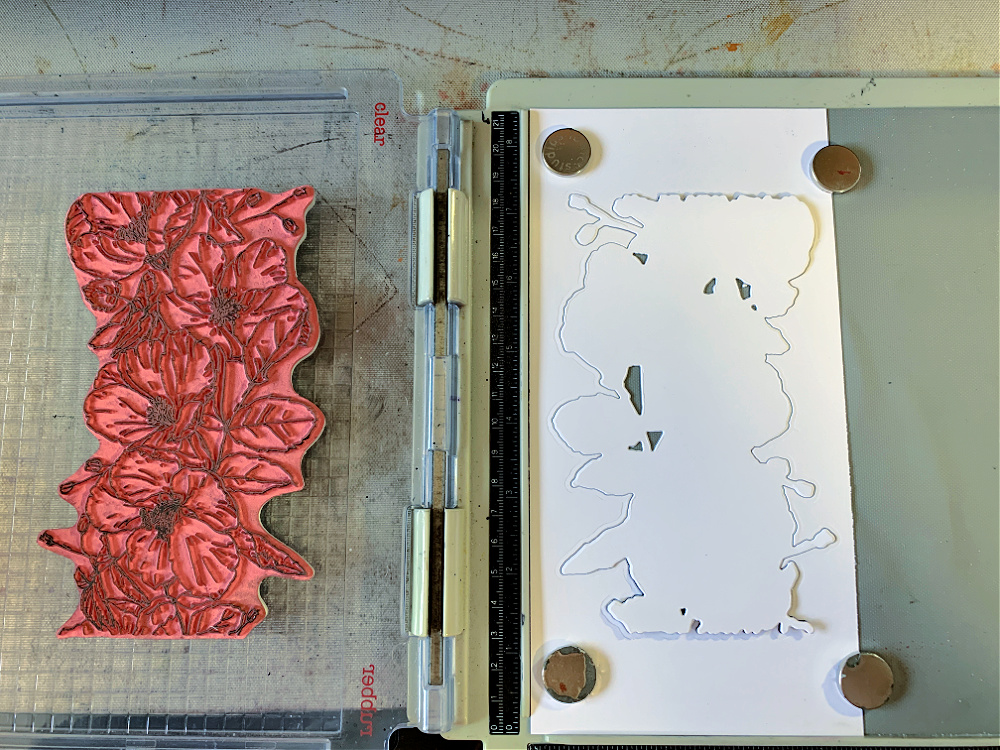
Step 1:
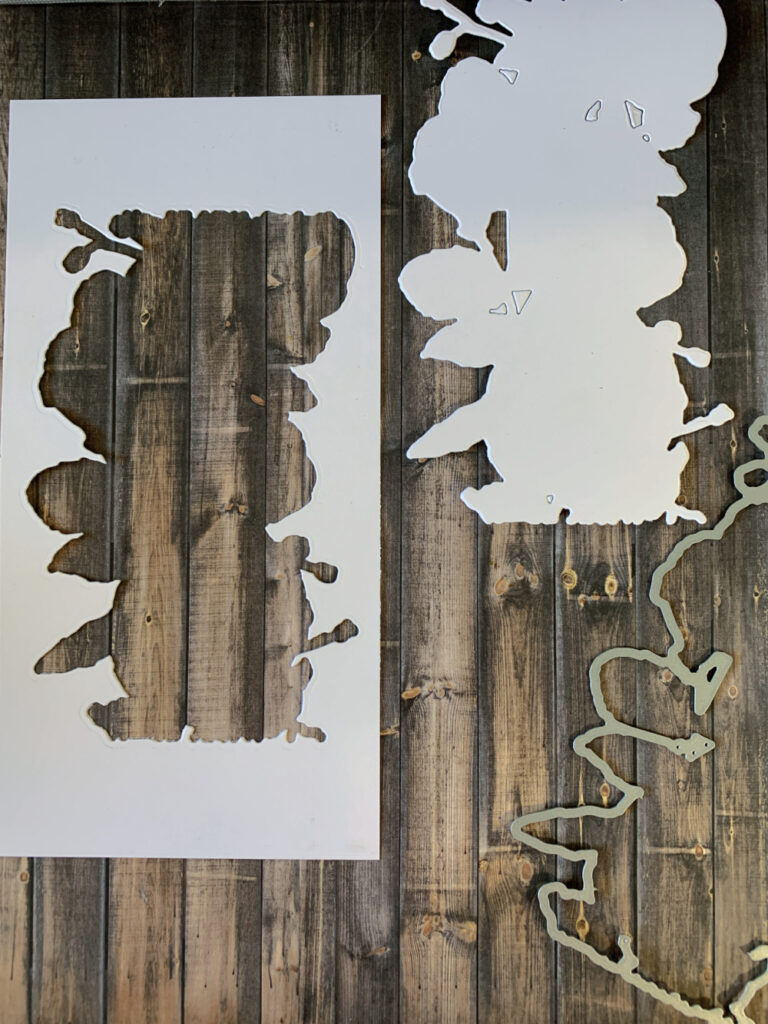
Choose the image you want to create and cut out the coordinating die.
Step 2:

Line the negative of the die cut along the edges of your stamping tool.
Step 3:
Place the stamp inside the cut out area until you feel it “click” or drop into place.
Step 4:
Close the door of your stamping tool to pick up the stamp.
Step 5:
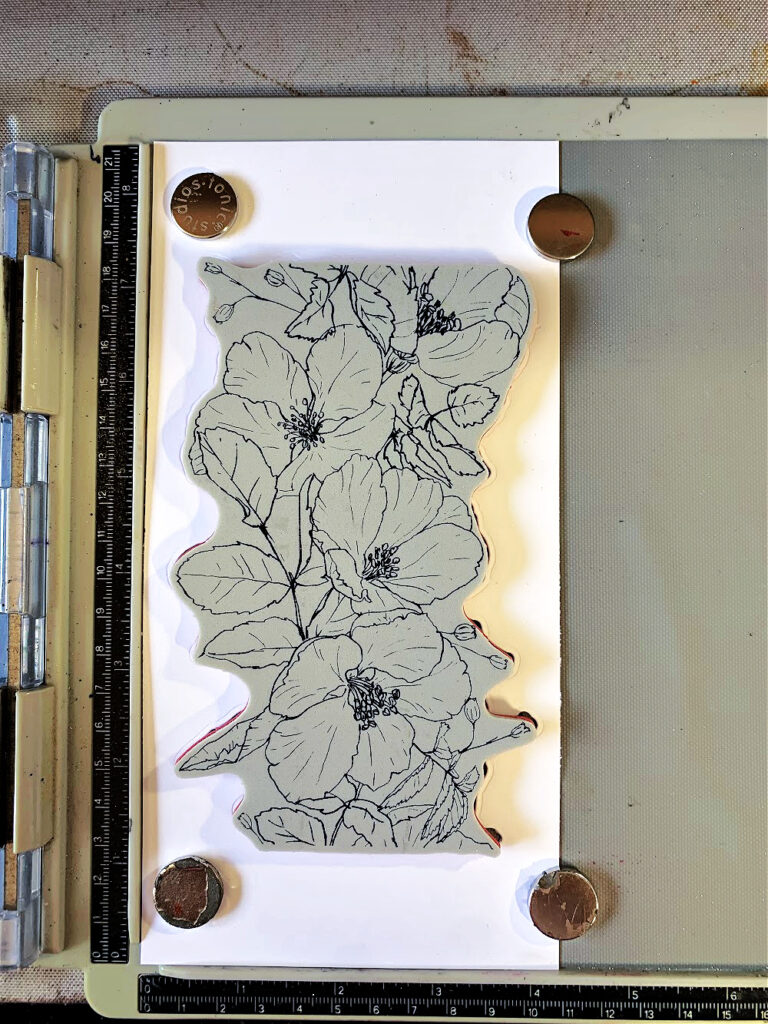
Place the die cut piece back inside the cut out area as shown above.
Step 6:
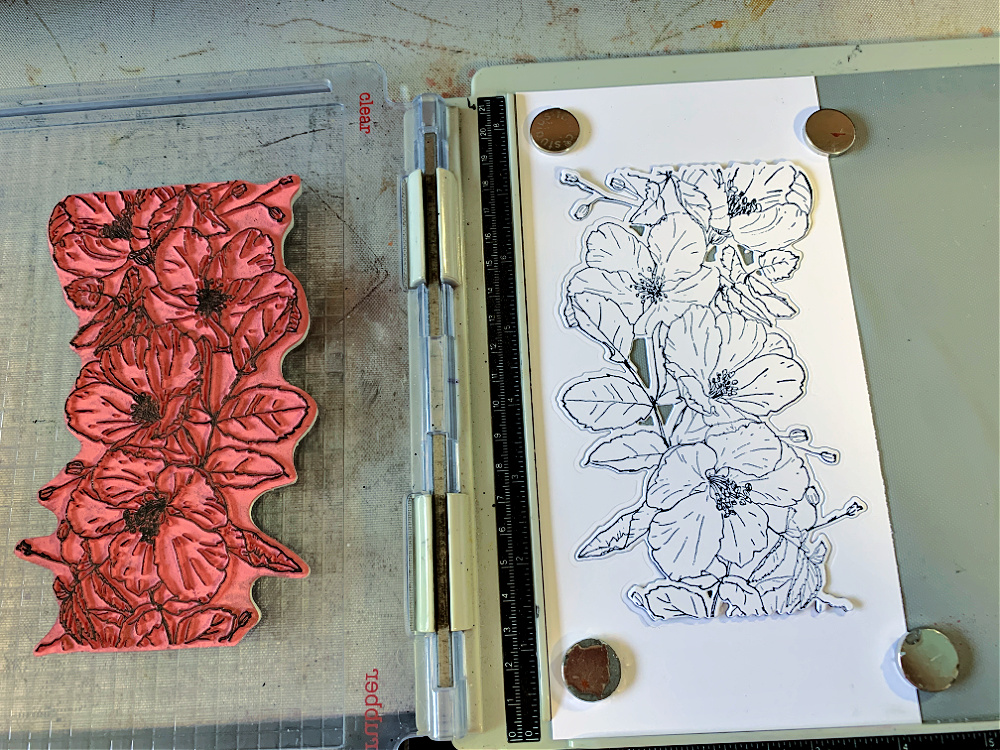
Ink the stamp and stamp the image onto the die cut piece.
Do not remove the negative cut out or the stamp from the stamping tool This is very, very important! If you remove the stamp you will never be able to line it up perfectly to restamp the image after coloring.
Step 7:
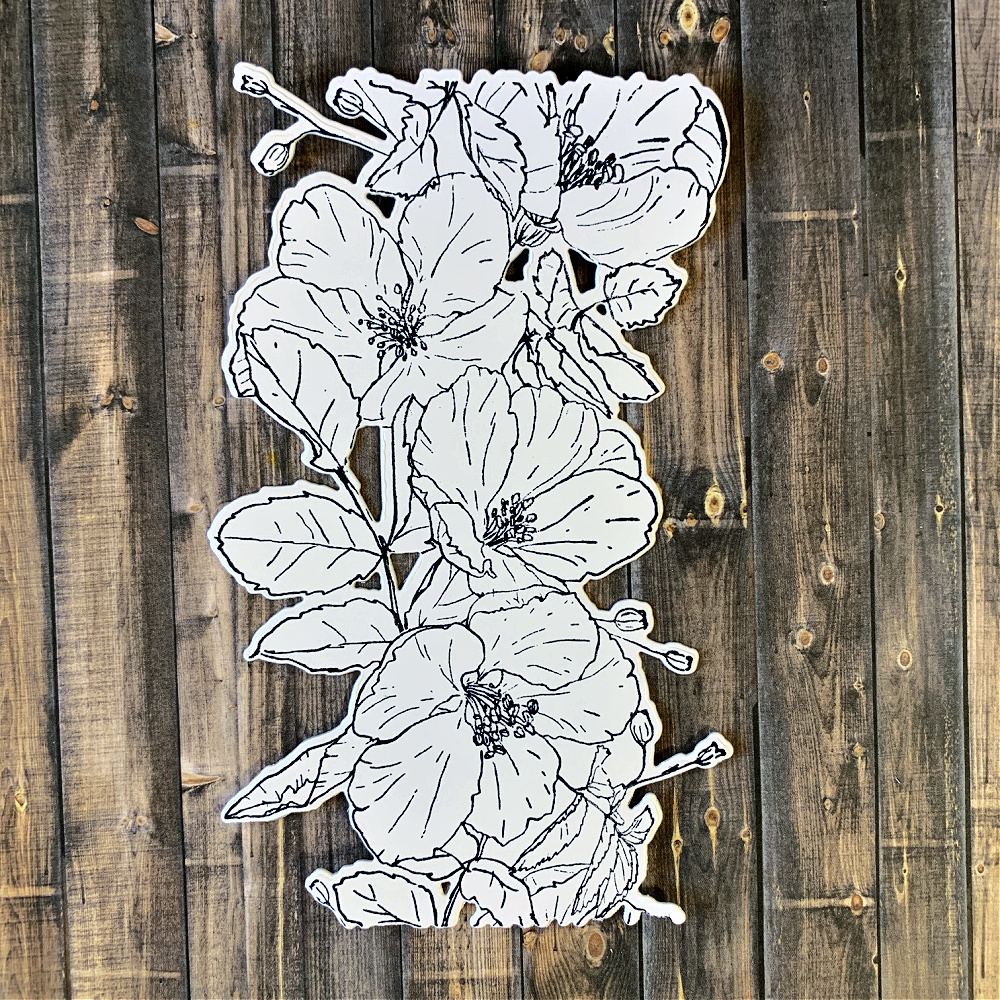
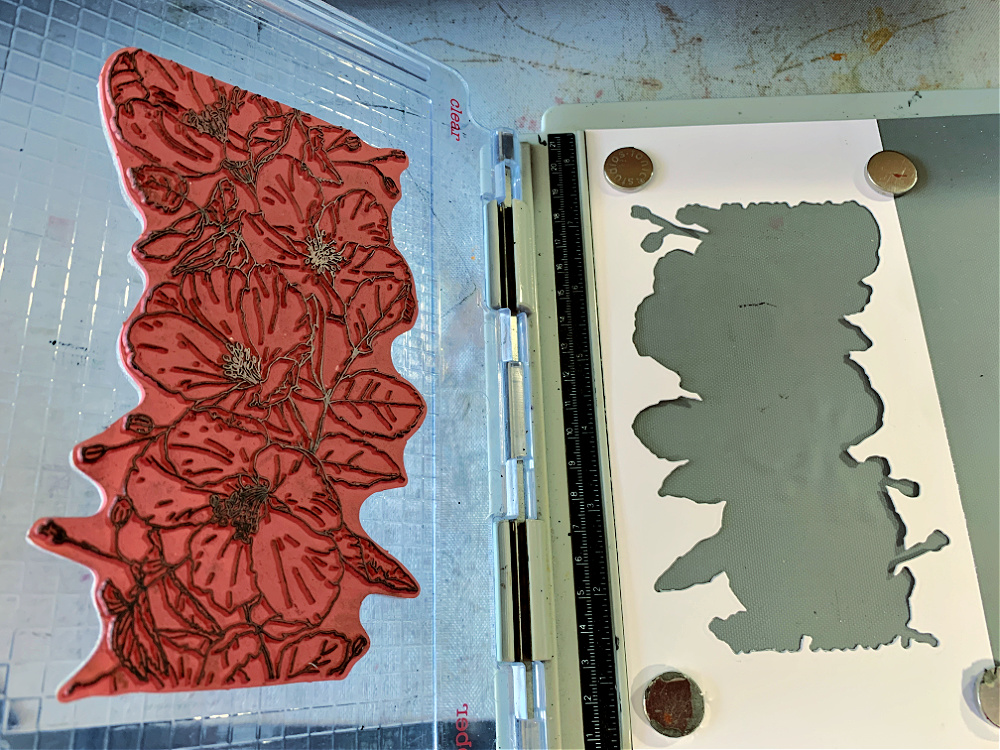
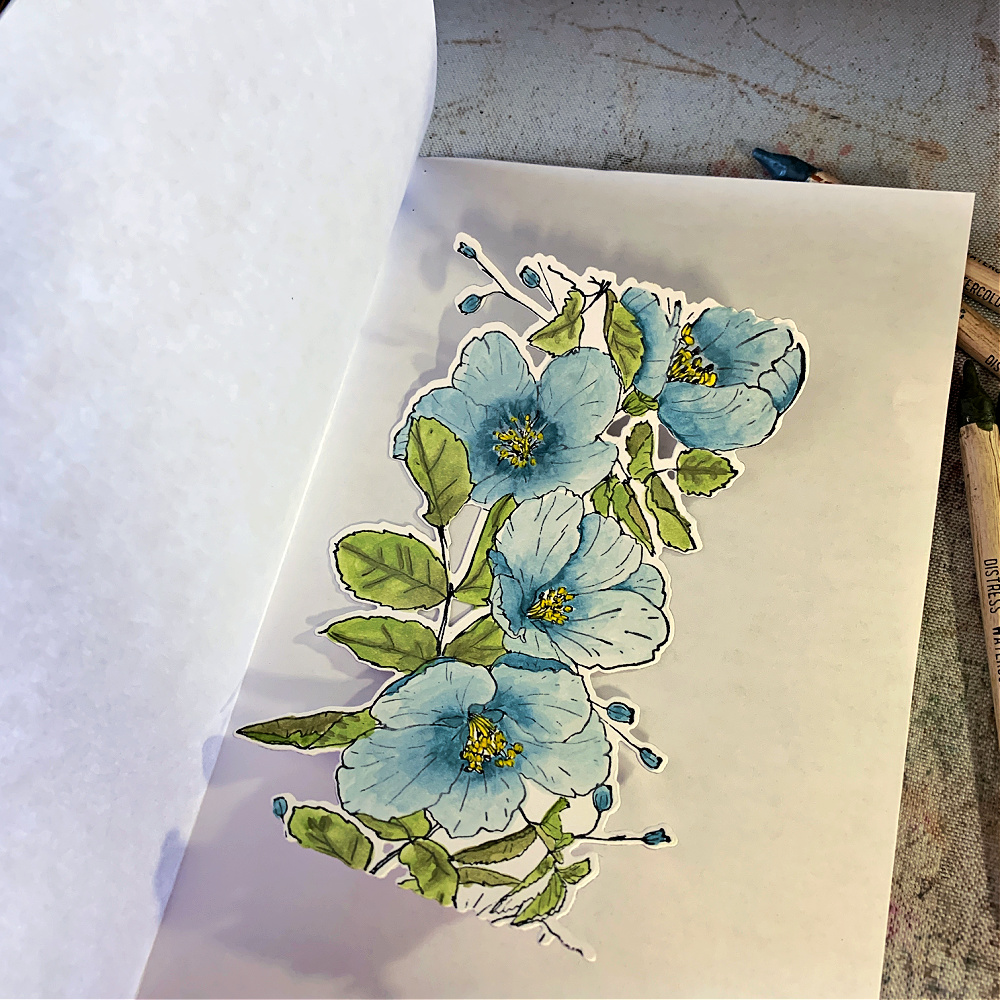
Remove the stamped image from the cut out piece and color.
Step 8:
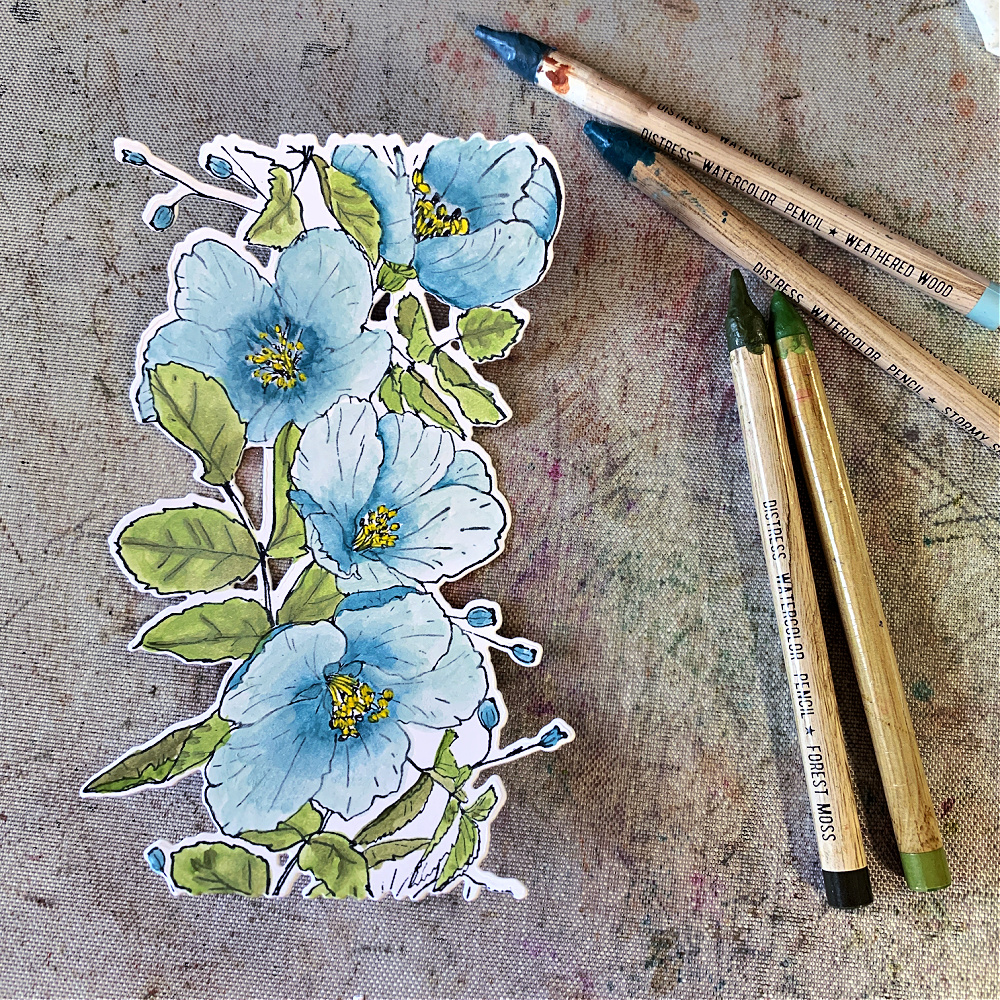
When you are finished coloring your image you will notice that the lines of the stamp have faded behind the pigment of the watercolor pencils. You will also notice that the image has curled. Have no fear, we are going to straighten out those curls and we are going to get that beautiful black inked image back.
Step 9:
Fold a piece of copy paper in half and place your colored image between the fold.
Step 10:
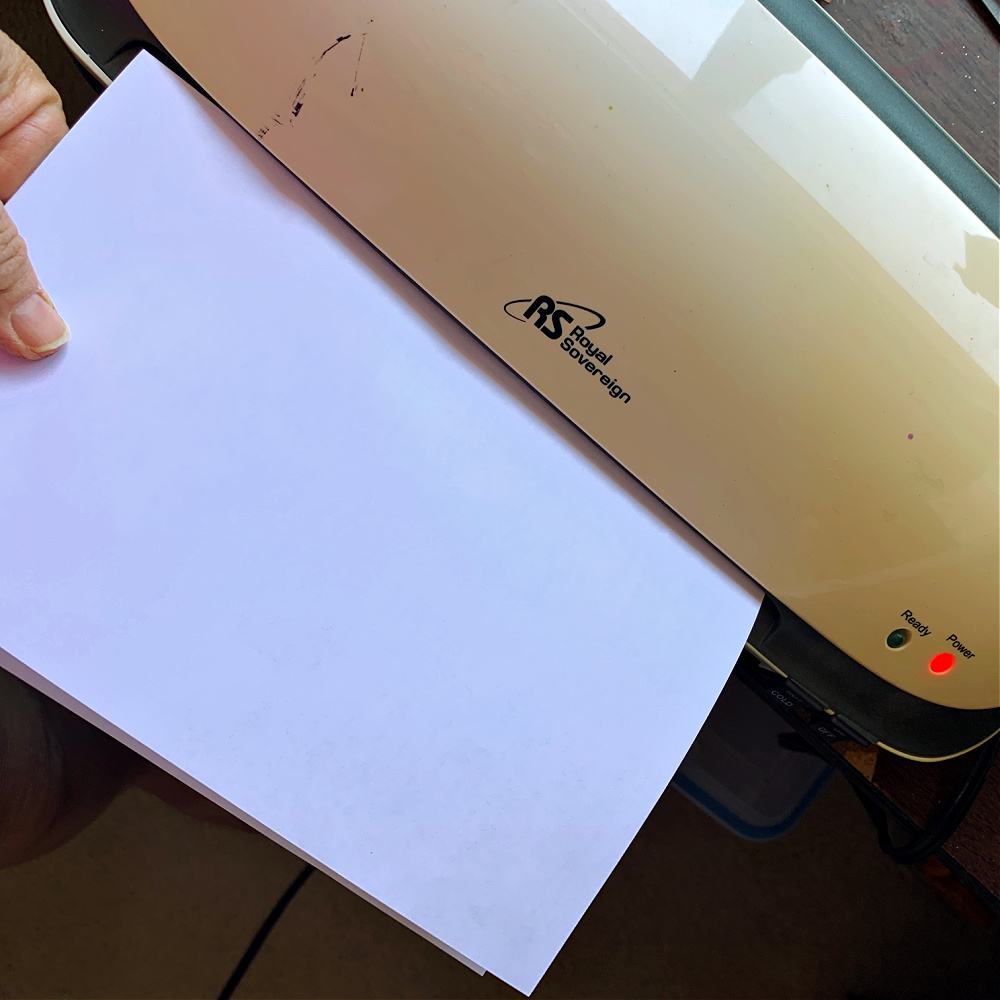
Run your colored image through a heated laminator. This will straighten out the curls.
Step 11:
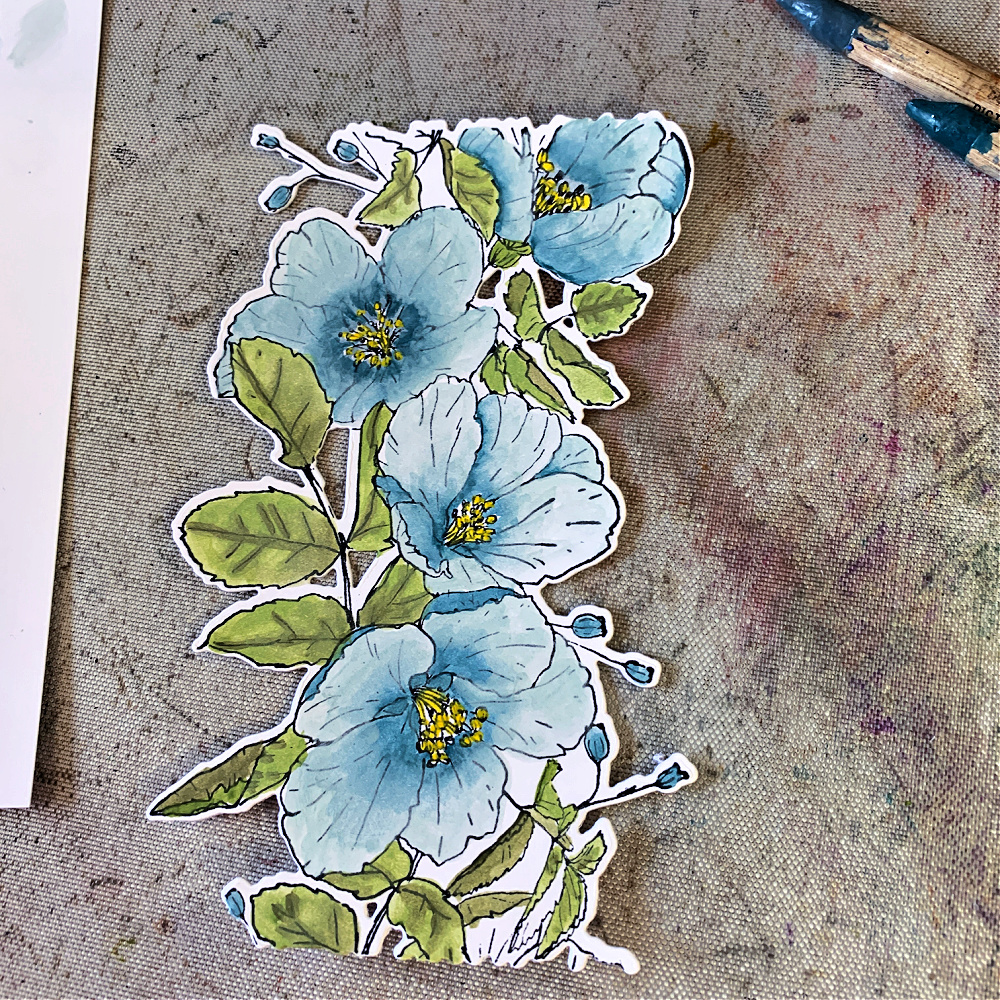
Your image is now straight and ready for the next step. (For those of you who just felt a jolt of lightening course through your veins at the sight of my craft mat, I’m sorry about that. It is lovingly used and, yes I admit, ready to be replace.)
Step 12:
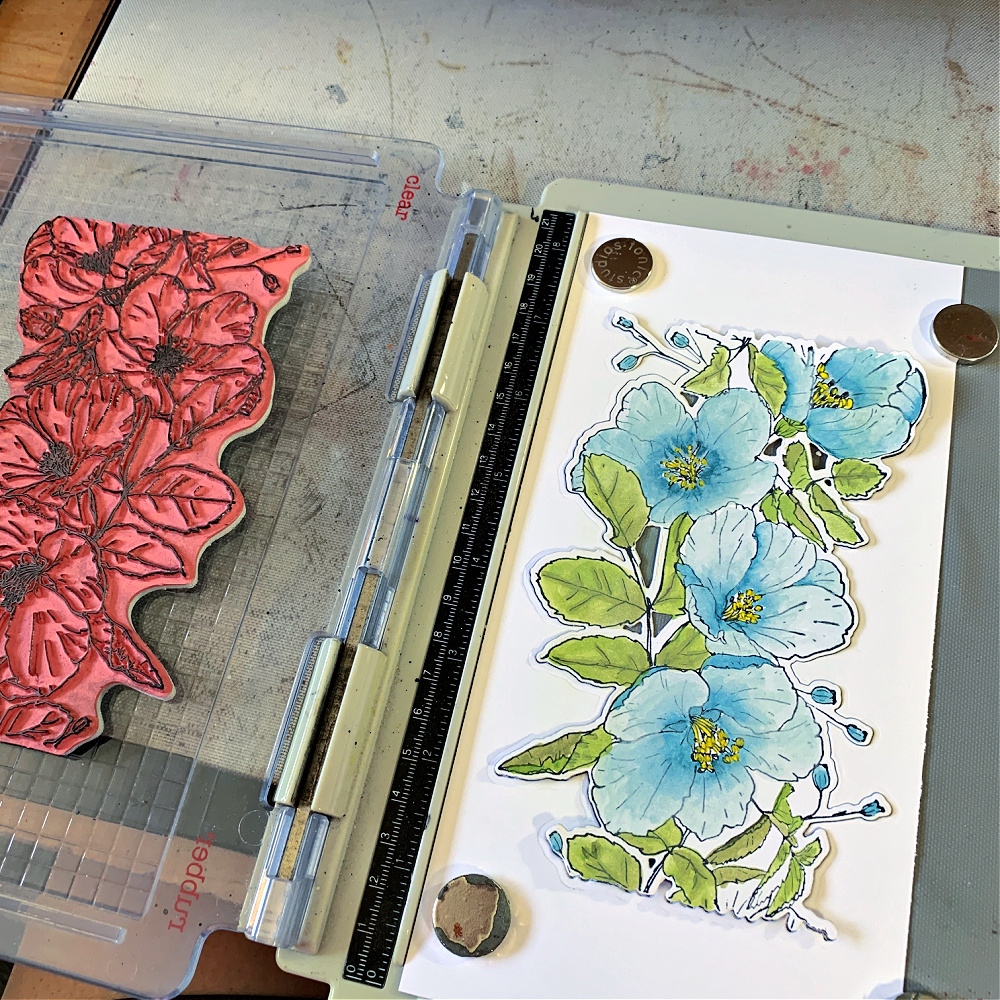
Place your colored image back in the negative cut out space on your stamping tool.
Step 13:
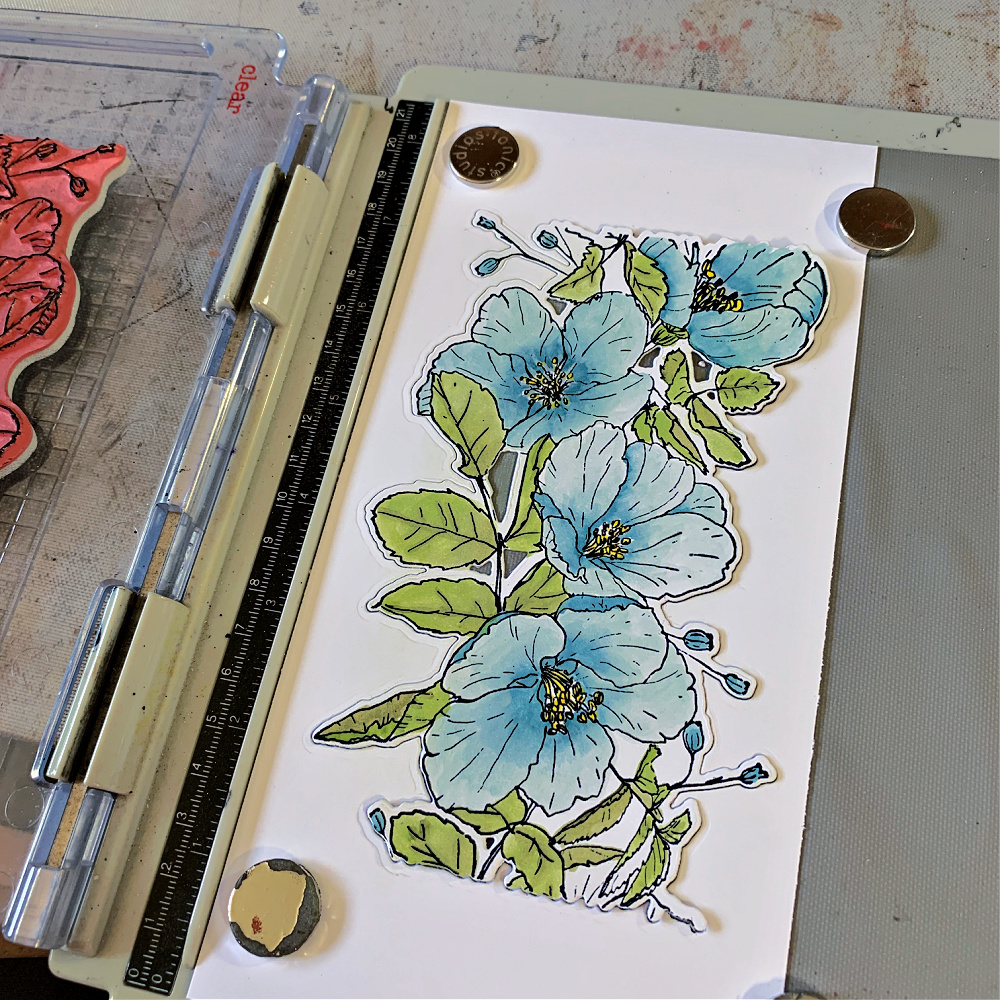
Ink the stamp and stamp the image again to get those beautiful lines back. See how the image pops and looks so crisp. I love these flowers! You are now ready to use this beautiful set of flowers on your project.
Follow these same steps for all the exclusive Simon Says Stamp dies that coordinate with Tim Holtz stamps.
Find this stamp and die set from Simon Says Stamp at the links below:
Simon Says Stamp Wafer Dies and Coordinating Tim Holtz Floral Stamp Bundle
Simon Says Stamp Floral Trims Wafter Dies
**********************************************************************************************************
Find this stamp and die set from Simon Says Stamp at the links below:
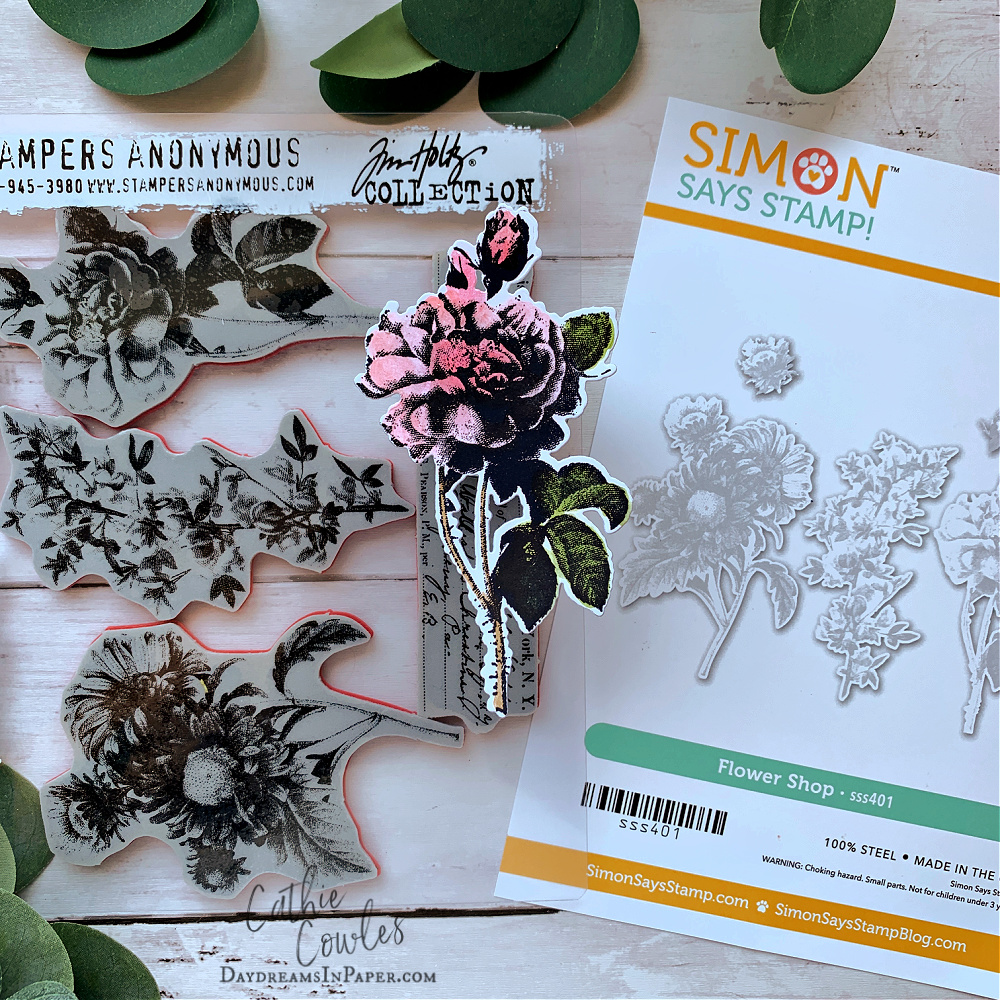
Simon Says Stamp Wafer Dies and Coordinating Tim Holtz Flower Shop Stamp Set
Tim Holtz Stampers Anonymous Flower Shop Stamp Set Only
Simon Says Stamp Flower Shop Wafer Dies Only
Thanks so much for stopping by and sticking with me to the end. I appreciate the time you spend here with me!


Thank you for the tips. This stamp and die set is on it’s way and I cannot wait to try this!