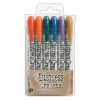
Happy Monday everyone! I’m so happy you stopped by for the new Simon Says Stamp Monday Challenge where our theme this week is, Stencil It. I did some experimenting with this challenge for my background and I hope you like it. I haven’t gotten my Dylusions paints out in a while so I thought I’d take them down from the shelf and start playing. I had so much fun just letting the art go in whatever direction it wanted to go. I hope you enjoy the tutorial I put together and that you pick up a few sparks of inspiration for your next project.
Also, did you see our amazing guest designer’s project last week? Anne created an amazing beach scene with so many adorable elements. I can’t wait to see what she creates this week as I really enjoy the awesome inspiration she brings to the challenge.
I begin creating the background by covering a 5″ x 7″ piece of Neenah Solar White 110 lb. card stock with Dina Wakley white gesso. I allow that to completely dry before moving on to the next step.
Now that the gesso is dry, I use a medium sized dauber to blot on some Dylusions Calypso Teal paint in random areas of the surface.
I continue to add paint using the same technique. Here, I’m adding Dylusions Vibrant Turquoise.
The next addition of paint is Dylusions London Blue.
For the final layer of paint, I switch to a small sized dauber and blot on Dylusions After Midnight paint in random areas.
Now for the fun part. I take a clean baby wipe and gently swipe downward pulling the paint to the bottom of the panel. Next, I get another clean baby wipe and swipe downward next to that section and then turn the panel over so the swipes go in a different direction and do the same on that side.
Here is the result of my experiment. It is very important to use a clean baby wipe with each swipe and to use gentle pressure when pulling the paint downward. You can see above where I applied too much pressure pulling off too much paint on the right side of the panel. But remember, I’m having fun and letting the art take me where it goes so I don’t start over. I allow this to completely dry.
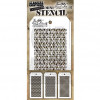
Next, I add some stenciling and stencil on the Grid Dot stencil from the Tim Holtz Mini Stencil Set #27 with Dylusions Lemon Zest paint. I allow that to completely dry.
Now that the first stenciled layer is dry, I stencil over it with the Dot Fade stencil from the Tim Holtz Mini Stencil Set #8 with Dylusions White Linen paint. I allow that to completely dry.
I splatter on some diluted Black Soot Distress Paint with a splatter brush all over the background and let that completely dry.
When the background is completely dry, I stencil on the flowers from the Paper Artsy Jofy PS008 stencil set with Wendy Vecchi White Embossing Paste. I allow that to completely air dry.
Now that the flowers are dry, I begin to color the centers with Fossilized Amber Distress crayon pigment and rub it in with my fingertips.
For the petals, I color them with Barn Door Distress crayon pigment and blend it in with my fingertips leaving the area around the center darker than the outer portion of the petals.
To brighten the white dots, I paint them with a Molotow White Paint pen.
I add the sentiment from the Tim Holtz Big Chat sticker set and outline the words with a black gel pen creating decorative lines. I set the panel aside to completely dry because I’ve had trouble in the past with the gel pen smudging when I haven’t given it enough time to dry. You can use a heat gun to speed up the process.
To complete the background, I go over the edges with Black Soot Distress Paint.
To finish the card, I adhere the panel to a 5-1/2″ x 7-1/2″ piece of Simon Says Stamp Black card stock and my project is done.
I hope you enjoyed seeing the process I used to create my card for the Stencil It challenge and that you join us for this fun challenge by adding your project to Simon Says Stamp’s Monday Challenge Blog for your chance to win a $50 gift voucher to their amazing store.
For more inspiration, tips and tricks for all types of papercraft creations, follow Simon Says Stamp on:
You can find all the following supplies I used to create this project at Simon Says Stamp:


