
Hi friends and welcome to the Tim Holtz Coordinating Dies Blog Hop.
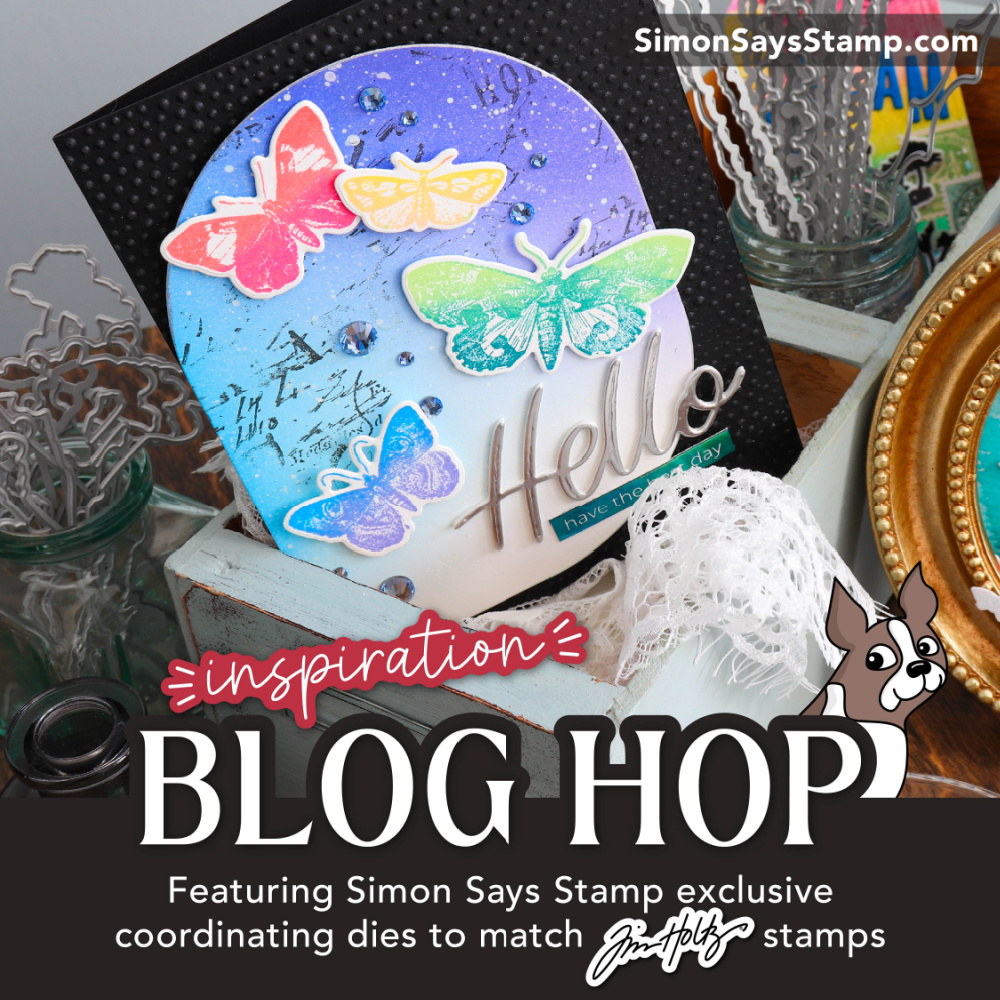
I’m so excited to join in my first Simon Says Stamp Blog Hop. If you’re joining me from Cheiron’s blog, welcome! If not, you may have missed some of the other designers participating in this hop so don’t forget to check out each and every one of them for their amazing inspiration. A list of all the designers with a link to their blog hop post can be found at the end of this post.
You can find all the stamp sets with their coordinating dies as bundles here.
If you already own the Tim Holtz stamp set and only need the coordinating die for that stamp set, you can find them here.
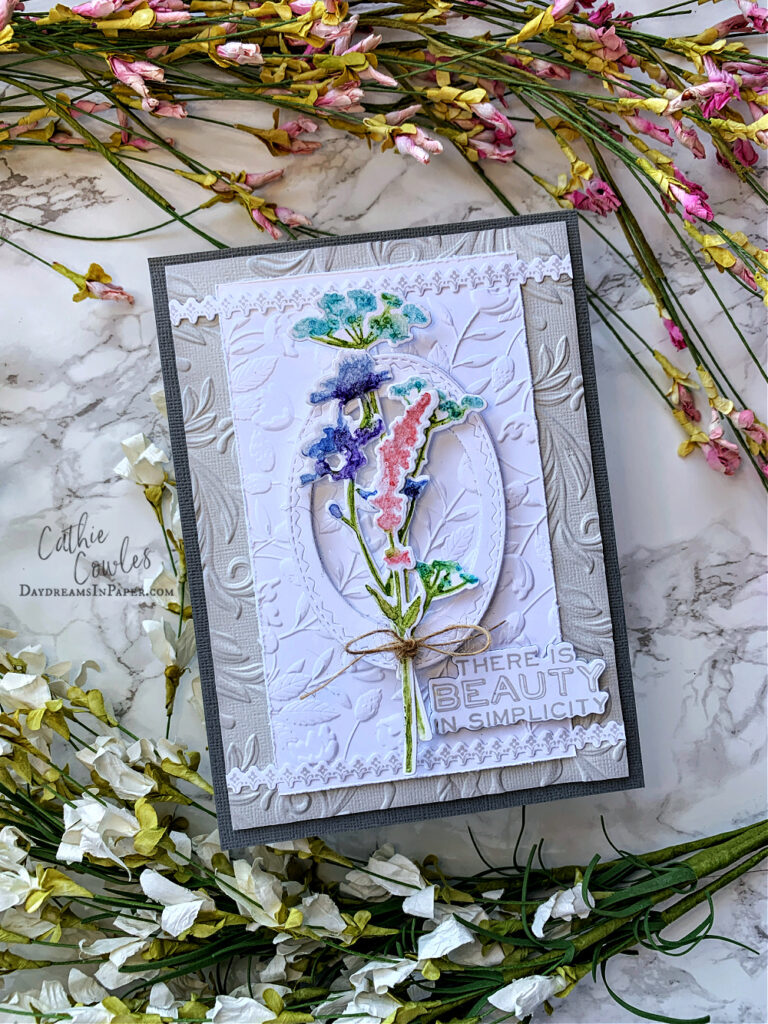
For my card, I used the Tim Holtz Wildflowers, Ornate Trims, and Perspective stamp sets along with their Simon Says Stamp coordinating dies.
There are so many ways to color these amazing stamp sets and a super easy way to make sure the image and their cut outs line up together. In my post, I’ll show you one way to color them and an easy way to assure the image lines up in the center of its coordinating die cut piece perfectly. Let’s get started.
Step 1:
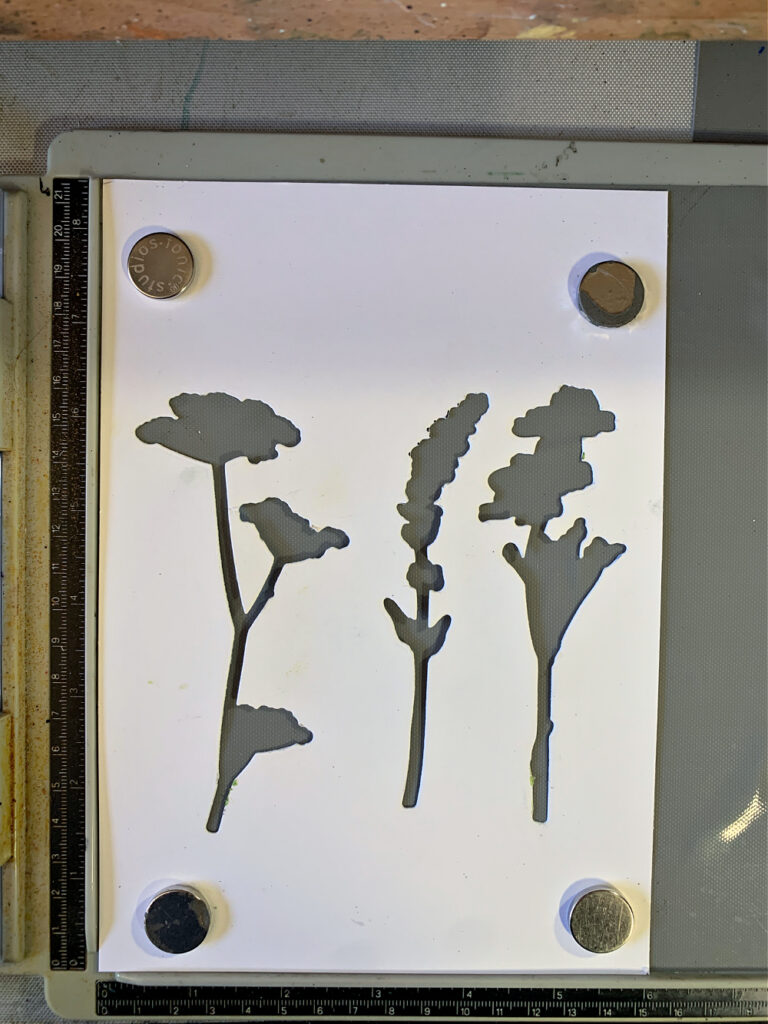
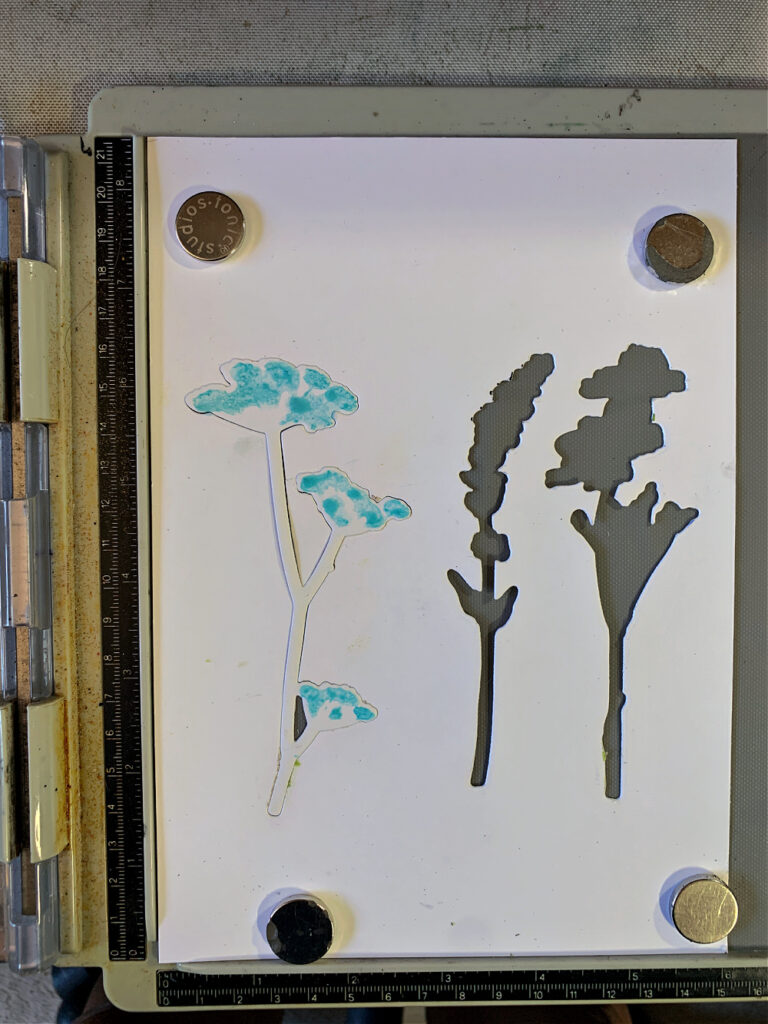
Choose the wildflowers you wish to use and cut them out on a scrap piece of watercolor cardstock that will easily line up in the corner of your stamping tool. Take the piece of watercolor cardstock that you cut the flowers from and place it in the corner of your stamping tool as shown below and set aside the flowers that were cut.
Step 2:
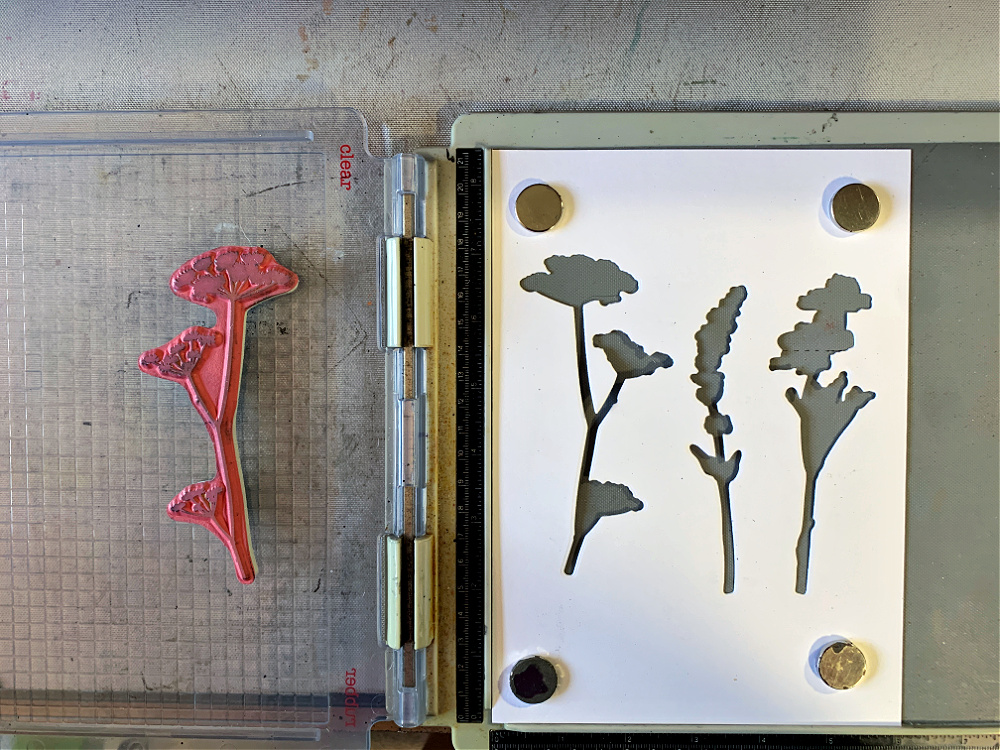
Working with one stamp at a time, fit one of the stamps in its coordinating cut out as shown below. If you wiggle it around a bit you will feel it fall into place.
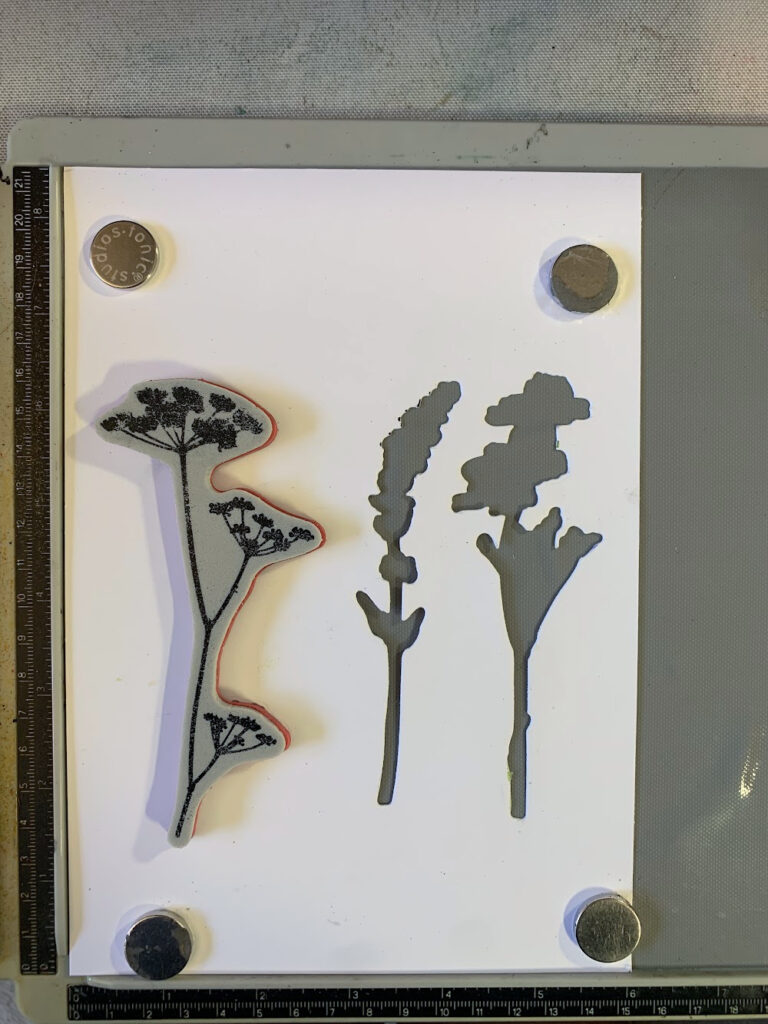
Close the door of your stamping tool to pick up the stamp readying it for stamping. It is very important that you do NOT remove the stamp from the stamping tool or remove the cut out wildflower cardstock piece from the other side of the tool. Leave them both in place.
Step 3:
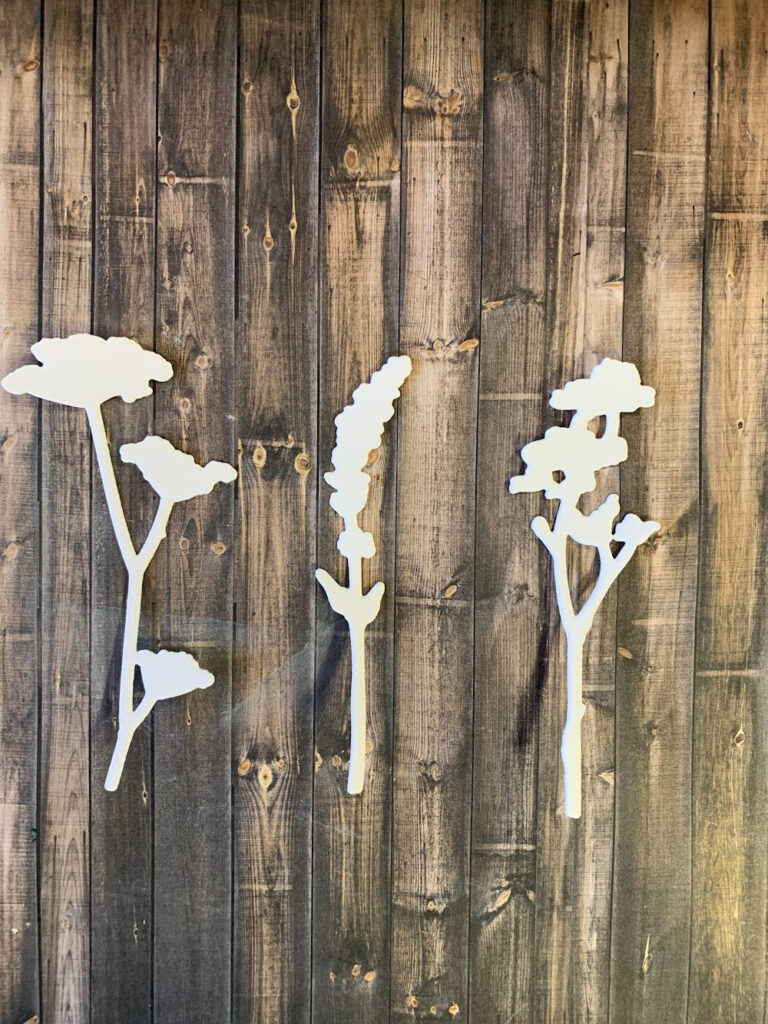
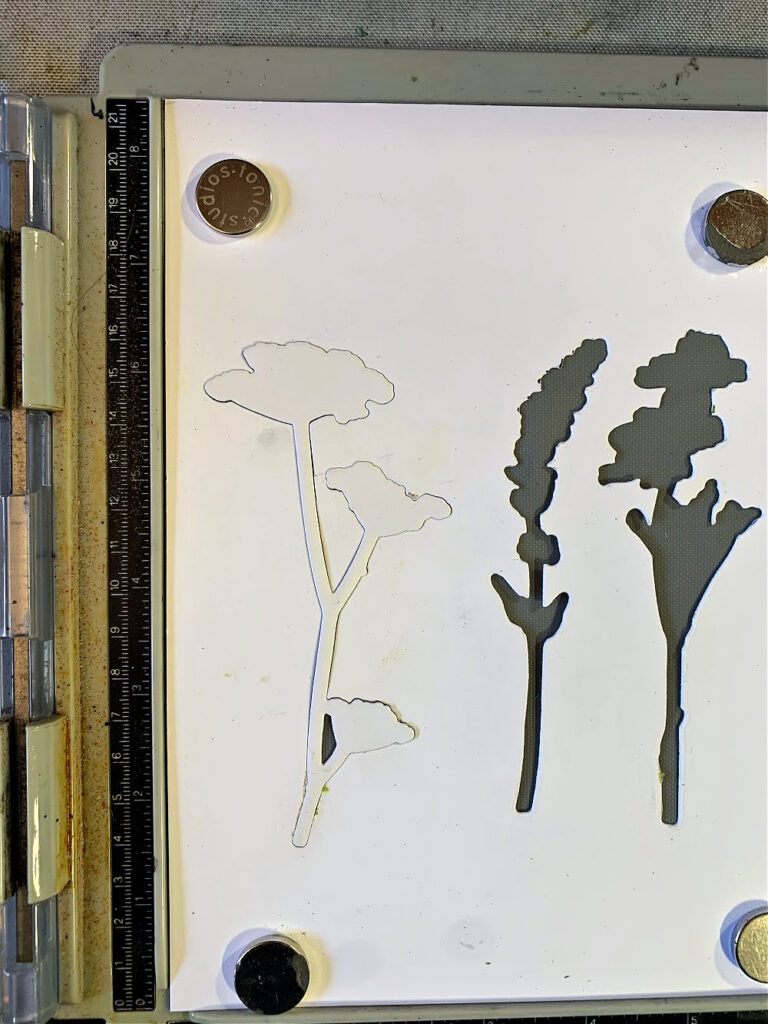
Place the wildflower die cut piece into its coordinating cut out as shown below. Work with only one flower at a time.
Step 4:
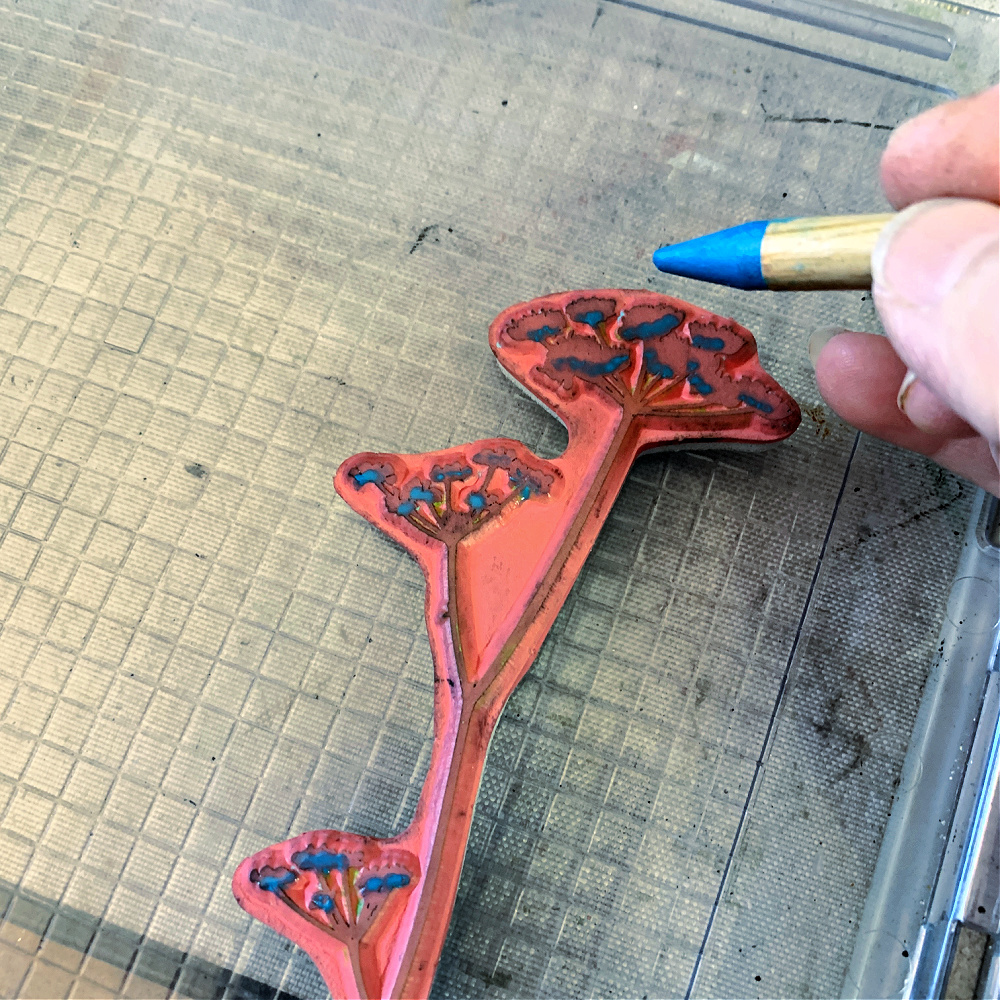
I colored my wildflowers with Distress Crayons. Saturate the tip of the crayon by dipping it in water making sure it’s nice and wet. Color over the area of the image you wish to apply this color.
When you are finished coloring the areas with this color, close the stamping tool door to transfer the image you just colored onto the wildflower die cut piece as shown below.
Continue coloring the image using the same method.
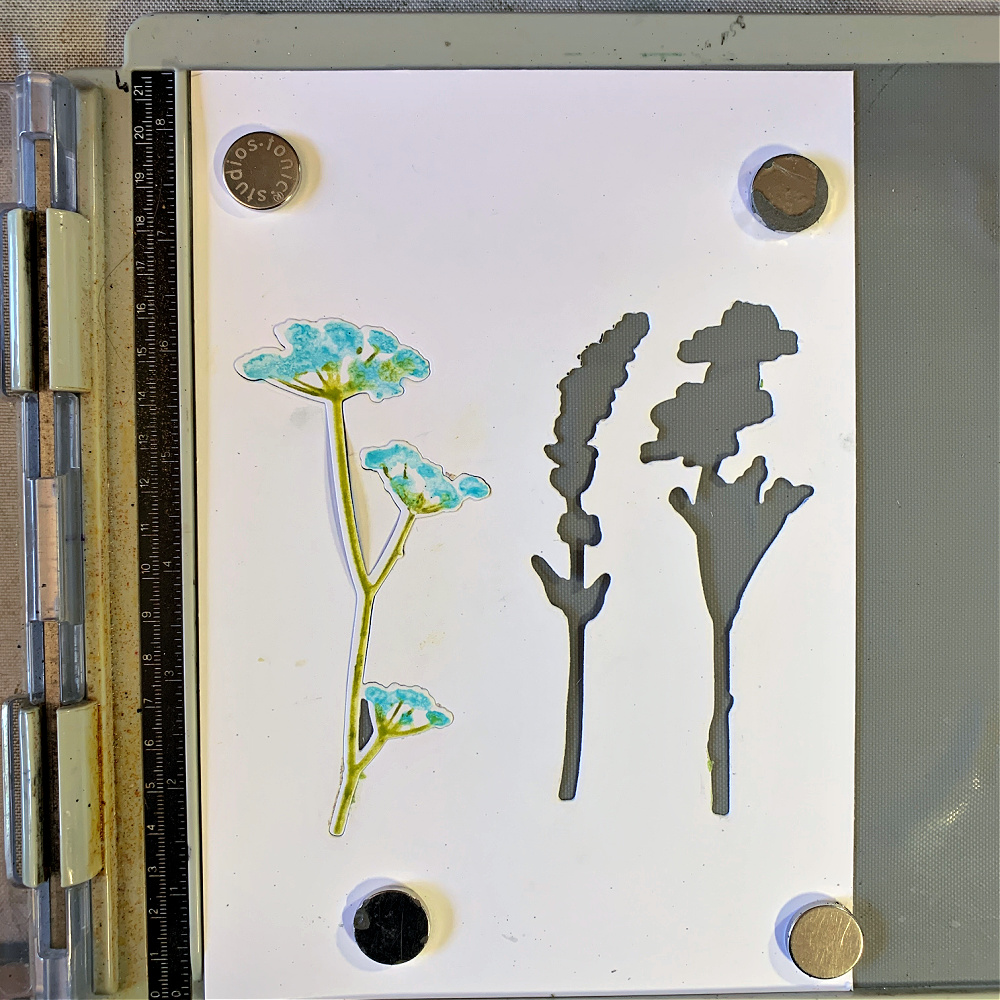
To give the flower and stem more depth, add a deeper color of the same shade to the bottom of the flower and stem.

You can now remove your flower from the cut out cardstock area and move on to the next wildflower using this same process.
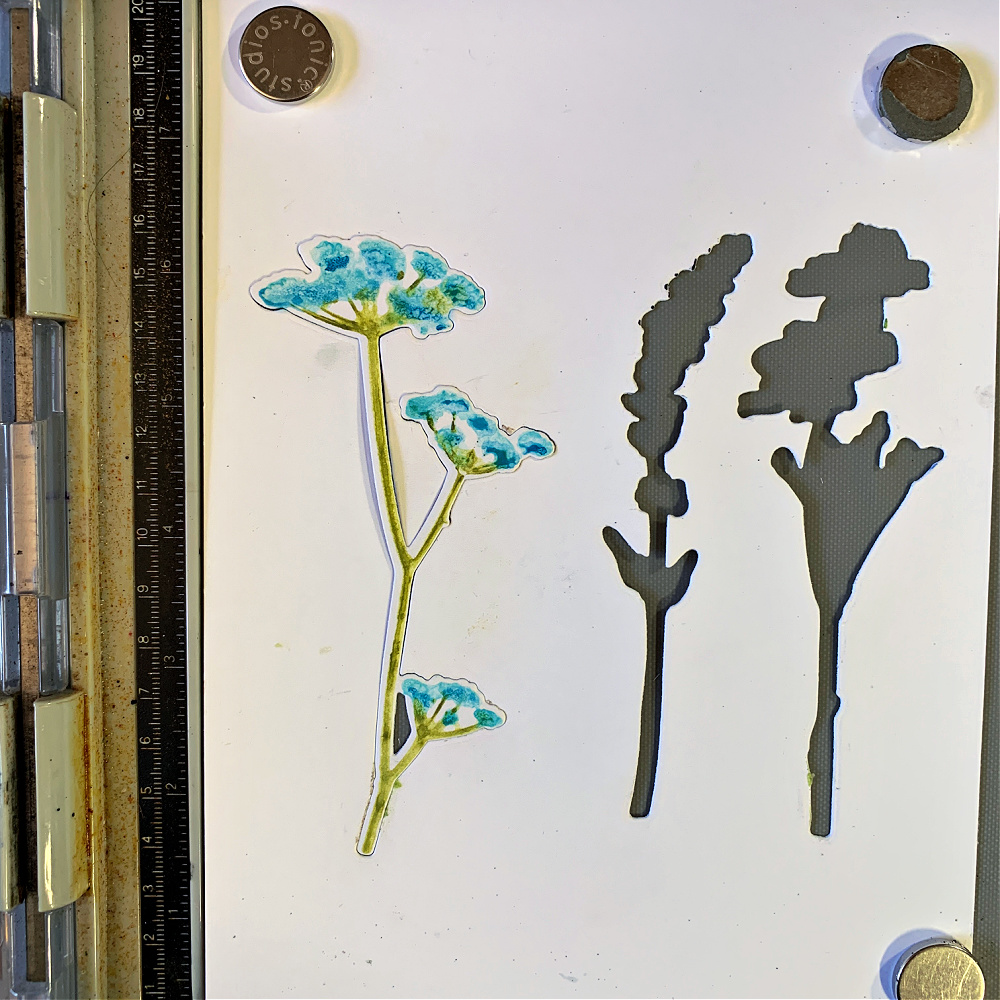
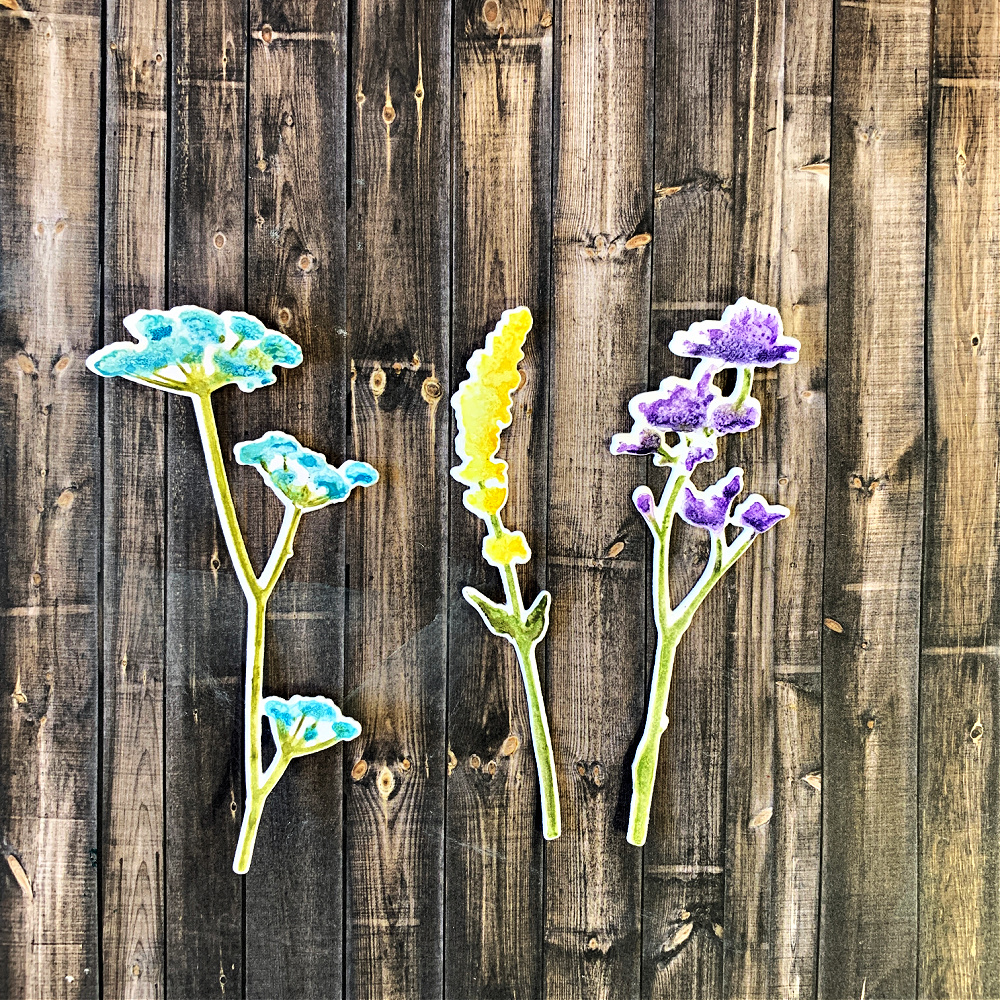
Below are all my colored wildflowers ready for this project. You probably notice that I didn’t use the yellow flower on my project. I felt that a soft pink wildflower would go better with the color palette I had in mind for my card so I created a pink one and saved the yellow wildflower for a different project.
The method I shared for getting a centered image inside its coordinating die cut piece is one I follow for all the coordinating die sets. I used the same method for the Ornate Trims and the sentiment from the Perspective stamp set.
Here again is my completed card:
These wildflowers are perfect for making little bouquets tied together with some dainty burlap string. The Ornate Trims stamp set creates perfect little borders wherever you want them and adds so much character. The Perspective stamp set has some awsome sentiments and sayings that can be easily cut out with their coordinating dies. I’m in love with all the coordinating die sets that Simon Says Stamp has come out with for so many of my Tim Holtz stamp sets.
I hope you enjoyed seeing how I colored and cut the wildflowers for my card. The coordinating Tim Holtz stamp dies are so fun to work with and I’m head over heals in love with the Ornate Trims coordinating die set. I’ve put an ornate trim on every card I’ve created since receiving them. They are perfection!
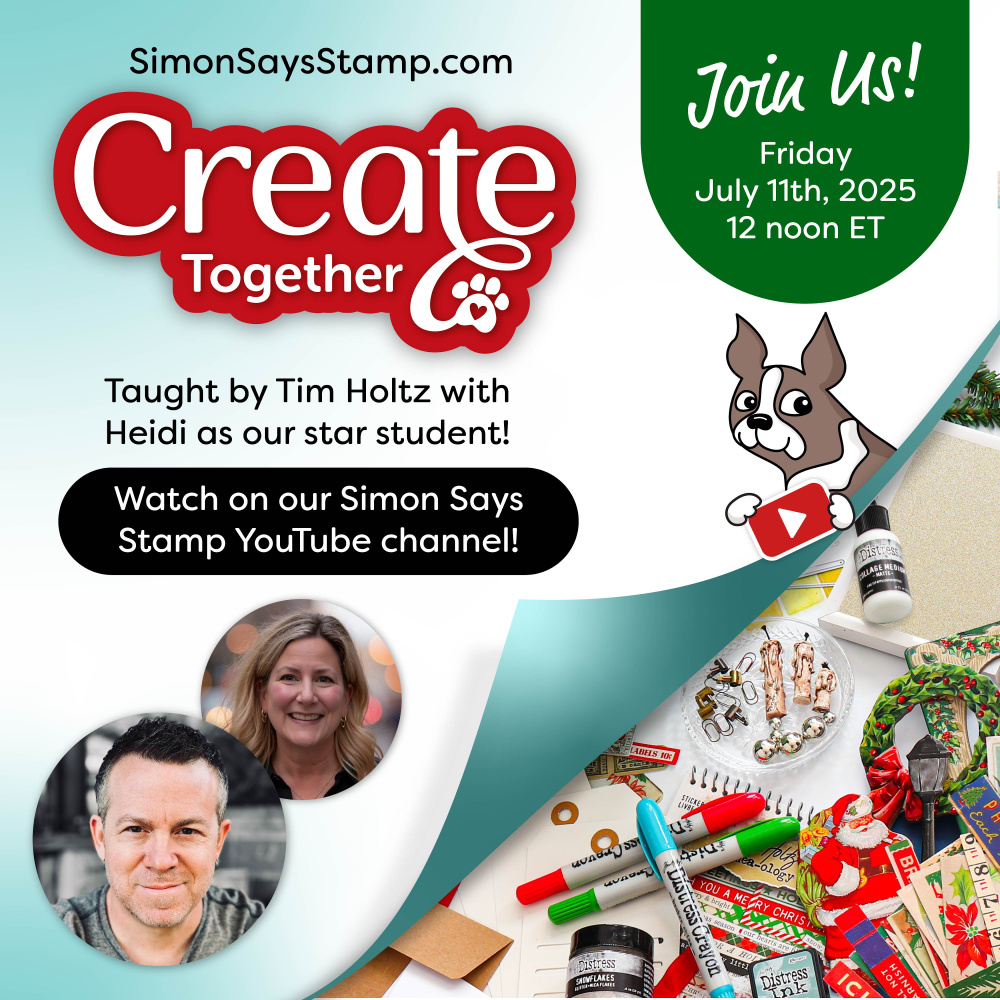
Also, join Heidi and Tim tomorrow, Friday, July 11th at 12 noon EDT on the Simon Says Stamp YouTube Channel for a fun time of creating together for the virtual LIVE class, Holiday Collage. This class will be taught by Tim Holtz. Please join in for all the fun. Details are in the graphic below.
Thank you so much for spending your time with me here today and enjoy the rest of this fun blog hop!
Hop Order
Cathie Cowles (You are here)

Here’s what I used for this card:
Tim Holtz Wildflowers Stamps with Simons Says Stamp Dies Bundle – setwf25
Wildflowers Coordinating Die Set Only:
Simon Says Stamp Wildflowers Wafer Dies 253sss
Tim Holtz Ornate Trims Stamps with Simon Says Stamp Dies Bundle setot25
Ornate Trims Coordinating Die Set Only:
Simon Says Stamp Ornate Trims Wafer Dies 326sss
Tim Holtz Perspective Stamps with Simon Says Stamp Dies Bundle setps25
Perspective Coordinating Die Set Only:
Simon Says Stamp Perspective Wafer Dies 213sss
Tim Holtz Sizzix 3D Large A5 Embossing Folder Botanical 666888
Simon Says Stamp Embossing Folder Floral Festoon sf289
Ranger Tim Holtz Distress Crayons: Wilted Violet, Shaded Lilac, Spun Sugar, Saltwater Taffy, Tumbled Glass, Mermaid Lagoon, Peeled Paint, Forest Moss, Squeezed Lemonade, Mustard Seed and Fossilized Amber
Tim Holtz Distress Ink Pad Pumice Stone Ranger TIM27140
Tim Holtz Distress 8.5 x 11 Watercolor Cardstock Ranger TDA53927
Simon Says Stamp Cardstock 100lb Fog Gray FG27
Sizzix ECLECTIC COLORS Cardstock Surfacez 664873 (Color Used: Racing Car – Dark Gray)
May Arts NATURAL Twine String Burlap
I used the Tim Holtz Sizzix Stitched Ovals die set for the frame under the wilderflowers. This die set is retired. Below is a comparable die set that would work just the same:


That’s Gorgeous!!!
I like how delicate the flowers are. And the colors you chose look really pretty. Nice job.
Thank you for the die cut/stamping technique – I am ready to try it out! Your card is beautiful!
Wow! This is a great technique! I can’t wait to try it!
Wow! Nobody does color and texture quite like you AND then explains how to do it. Picture your blog getting stained and curled corners as I spend hours paging back and forth through it trying out all of your fun ideas!
Such a pretty card
Beautiful card! Love the delicate nature of your design. It’s so great to be able to die cut Tim holtz images💖
So elegant, I feel like this would be a great wedding card as well!
Beautiful floral card!
I’ve always struggled with getting my die cuts lined up just right, so your tip about using the cut-out as a stencil is a game changer! Thanks for explaining it so clearly—it’s little tricks like this that make a big difference in the process.
Your watercolor wild flowers are so soft and delicate looking. The background of your card is elegant and the combo of the two makes for a gorgeous card.
Beautiful card ❤️
Very, very lovey card and colors.. I just love this..
Thank you
Hi, Cathie –
Your card is stunning! Thanks for the step-by-step directions.
Lori S in PA
Love your colors on all the wild flowers!
So dainty. So delightful. Fantastic design and I adore all of that glorious texture!
Gorgeous card!