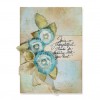
Hi Friends! Thanks for stopping by to see my latest design for Tammy Tutterow. I created a fun card using some of her flower dies, an embossing folder and one of her stamps. I hope you enjoy the tutorial I put together so you can see how I created my card and that it gives you some inspiration on how you can use her amazing products to make beautiful cards.
To create the background for my card, I emboss a 4-3/4″ x 6-3/4″ piece of Neenah Solar White 110 lb. card stock with the Tammy Tutterow Blistered embossing folder.
After embossing the card stock, I color over the raised areas with a Peeled Paint Distress Crayon and blend the pigment in gently with my fingertips.
Next, I distress the edges with a Prima Distressing Tool.
After distressing the edges, I ink them with Peeled Paint Distress Ink and a mini blending tool. I set the background aside and begin making the flowers for my card.
To create the flowers for my card, I take a sheet of light pink tissue paper and stamp on the Tammy Tutterow Dear Ruby stamp in random areas all over the tissue with Simon Says Stamp Rose Apple premium ink.
When the ink is dry, I fold the tissue paper over several times to create several layers of petals. I’m using the Tammy Tutterow Pinked Posies dies.
Here you can see the tissue paper flower petals after cutting them out with the dies. There are several layers for each petal.
I separate each petal before building the flower.
I begin building the flower by placing one piece on top of another making sure to offset each petal as I build the flower from the bottom up.
I want to put a small brad in the center of the flower so I poke a hole through all the layers using the Tim Holtz Craft Pick Retractable Needle.
I poke the brad through the layers and gently fluff all the layers of petals until I’m happy with the way the flower looks.
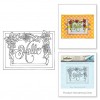
To create the sentiment for my card, I stamp the Tammy Tutterow Framed Hello stamp and color the word Hello using Copic markers. I then cut the word Hello out following the lines of the word and ink the edges with Peeled Paint Distress Ink.
I take some ribbon from my stash that is a very light pink in color and ink on some Simon Says Stamp Rose Apple premium ink in random areas with a mini ink blending tool.
To finish the card, I create some leaves for the flowers from the Tammy Tutterow Pom Pom Posies dies and attach them along with the flowers to the card. I place the ribbon on a thin strip of Gumdrop Bazzill card stock and adhere that to the background along with some green flat pearls. The sentiment is attached with dimension using 3d foam tape. The entire panel is placed atop a 5″ x 7″ piece of Gundrop Bazzill card stock and my card is done.
I hope you enjoyed seeing how I put my card together using many of Tammy’s amazing products and I thank you so much for sticking with me to the end. I hope you were able to get some inspiration for your next project and I’ll see you again soon!


