
Hi friends! Today I’m sharing a fun project I created out of a glass dome I found while I made a quick shopping run. It was in the dollar section where items are anywhere from $1 to $3 and I couldn’t pass it up. It originally had a bright orange base and I was going to use it for Halloween after I grunged it up a bit, of course. I never got around to it so I decided to paint it and create something for Christmas. I only wish I had bought several more of these domes. They are amazing. I have been doing more with Idea-ology and find it so relaxing to create scenes and put pieces together. I hope you enjoy this piece as I go through a little of how I put it all together. Enjoy!

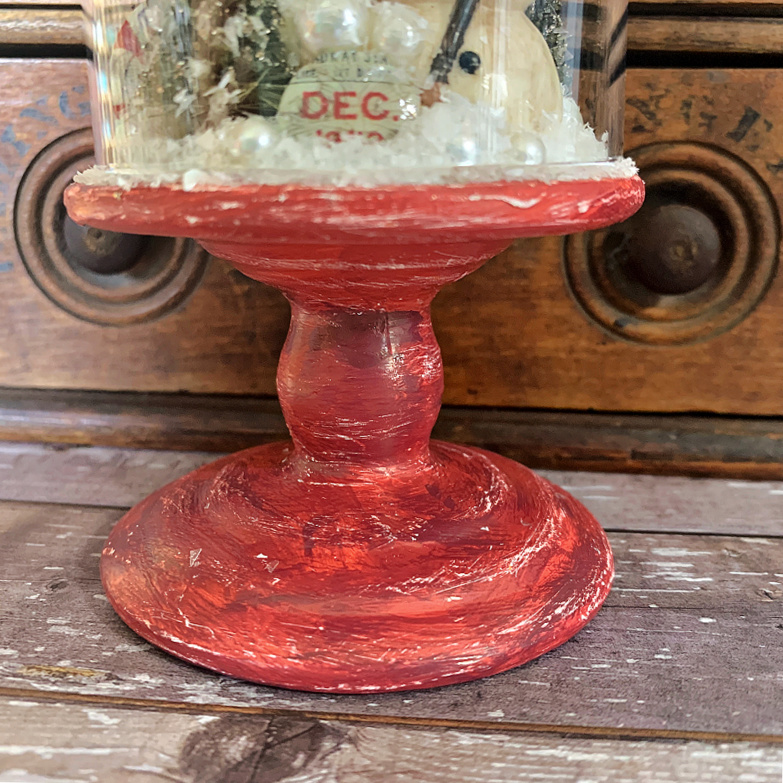
Like I mentioned above, the base of this glass dome when I purchased it was bright orange. To make it more fitting for a Christmas make, I painted the entire base with two coats of white gesso making sure to thouroughly dry the first coat of gesso before applying the second coat. When the gesso is completely dry, I paint the entire base with Candied Apple Distress Paint and allow that to completely dry. When the paint is dry, I dry brush on a bit of Distress Aged Mahogany Paint and allow it to completely dry. When the base is completely dry, I scratch the base up a bit with sand paper to give it an old vintage look.
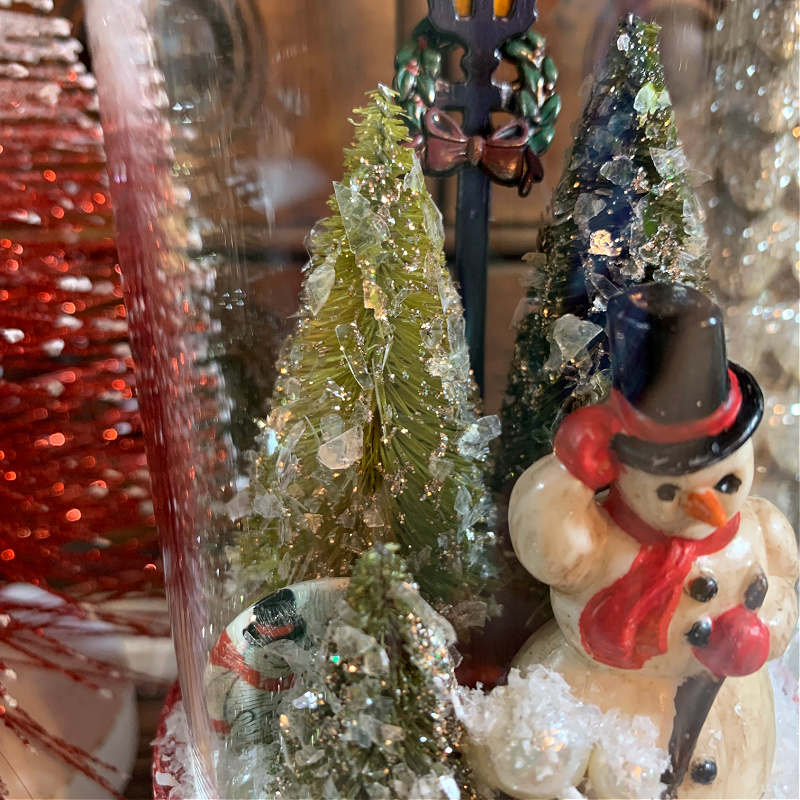
I chose three sizes of trees for the scene and colored them with three different shades of Distrtess spray stain. For the smallest tree I used Peeled Paint, for the medium tree I used Shabby Shutters and for the largest tree I used Bundled Sage. Before adding the mica flakes and glitter to the trees make sure the spray stains are completely dry. When the trees are completely dry, work in sections and dab a bit of collage medium along one section of the tree with your fingertips and sprinkle on the mica flakes. Then immediately dust on some platiumn glitter using a glitter duster and move on to another section.
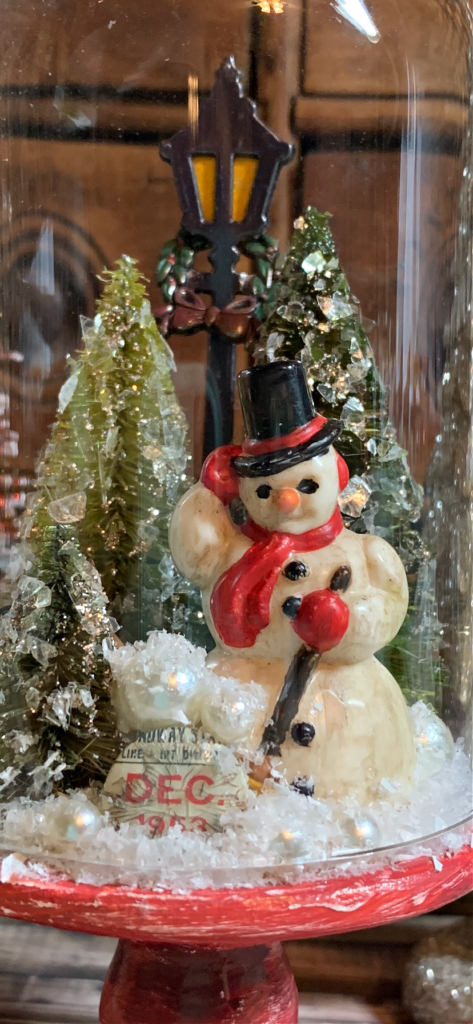
For the snowman I used the adorable little guy from the Salvaged Santa and Snowman set from Idea-ology. I painted the ear muffs, mittens, scarf and top hat ribbon with Candied Applie Distress Paint. The top hat, buttons and eyes are painted with Black Soot Distress Paint. The snowman’s nose is painted with Carved Pumpkin Distress Paint. The Broom handle is painted with Ground Espresso Distress Paint, the bristles of the broom with Brushed Corduroy Distress Paint and the broom bristle tie is painted with Fossilized Amber Distress Paint. I use very detailed brushes to do this intricate type of painting and allow the snowman to dry overnight. In the morning, I scribble some Walnut Stain Distress Crayon onto a craft mat and spritz a paintbrush with a bit of water. I pick up the pigment with the paint brush and brush it all over the snowman to give him a vintage, aged look.
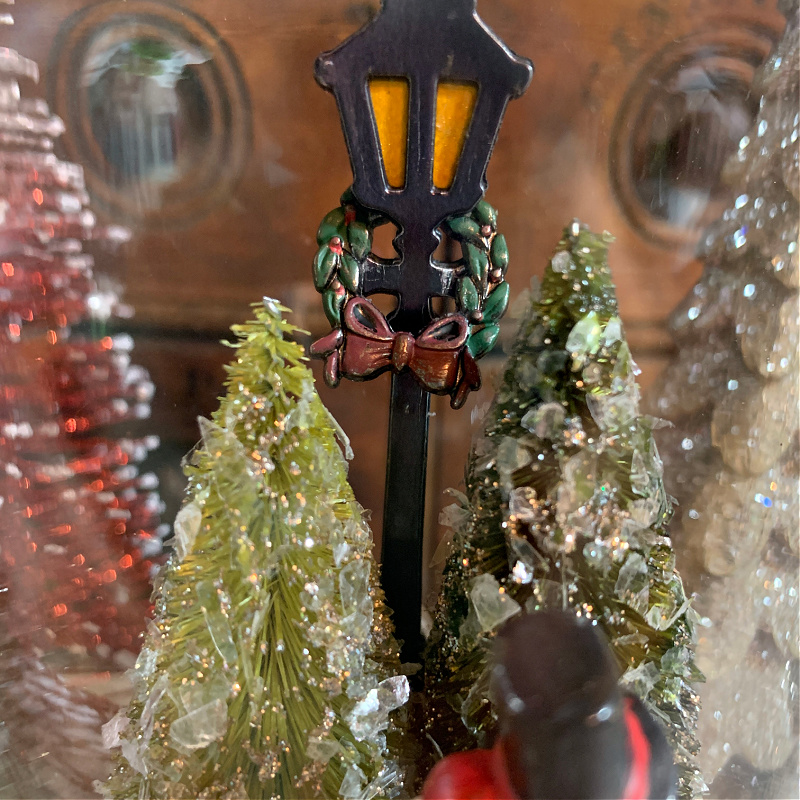
For the lampost, I used the lampost die from the Tim Holtz Vault Series Christmas 2021 die set from Sizzix. The lampost needs to be sturdy, so cut 4 lamposts out of black cardstock and 2 out of black metallic cardstock. Create a piece of cardstock that is yellow or colored yellow and cut it big enough to fit over the lights in the lampost when you put it together. Take one of the black cardstock lamposts and lay the yellow light piece over the light area. Next, adhere another black cardstock lampost on top of that. Add the two remaining black cardstock lamposts to the front and back and then add the black metallic lamposts to the front and back of that piece. Your lampost should have 6 layers where the outermost lamposts are cut from the black metallic cardstock and the four inner pieces are from the black cardstock with the yellow or (light) cardstock piece in the center of it all. I hope this makes sense. To fit the lampost into my dome I had to cut a bit off the bottom but I doesn’t show anyway so it’s okay. I painted a wreath from the Idea-ology Ornament Yuletide set with Rustic Wilderness, Fired Brick and Aged Mahogany Distress Paints. I cut off the jump ring with a wire cutter before adhering it to the lampost.
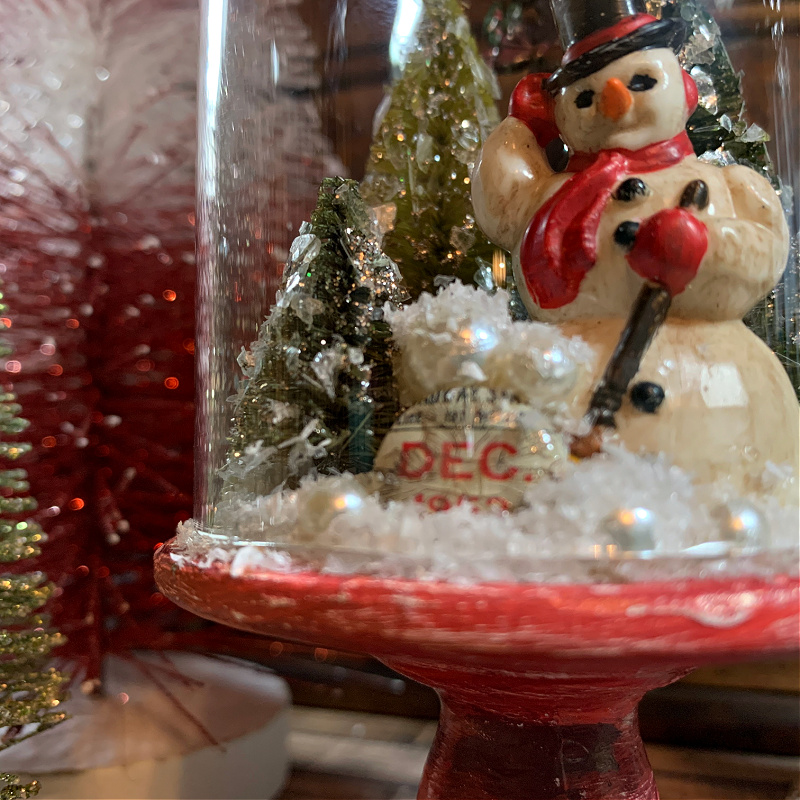
The two pieces of Quote Flair are from the Tim Holtz Idea-ology Quote Flair Christmas Noel and Mini Flair set. I painted them with Distress Crackle Paint Clear Rock Candy and allowed that to dry. When I began to see cracks I completed the drying process with a heat tool and let them sit overnight. In the morning, I rubbed a bit of Walnut Stain Distress Crayon onto a craft mat and picked it up with a very damp fingertip and rubbed the pigment over the quote flair pieces to give them an aged look. To create snow volume, I painted a few baubles in different sizes glossy accents and dusted them with fake snow which I will adhere atop the fluffy snow.
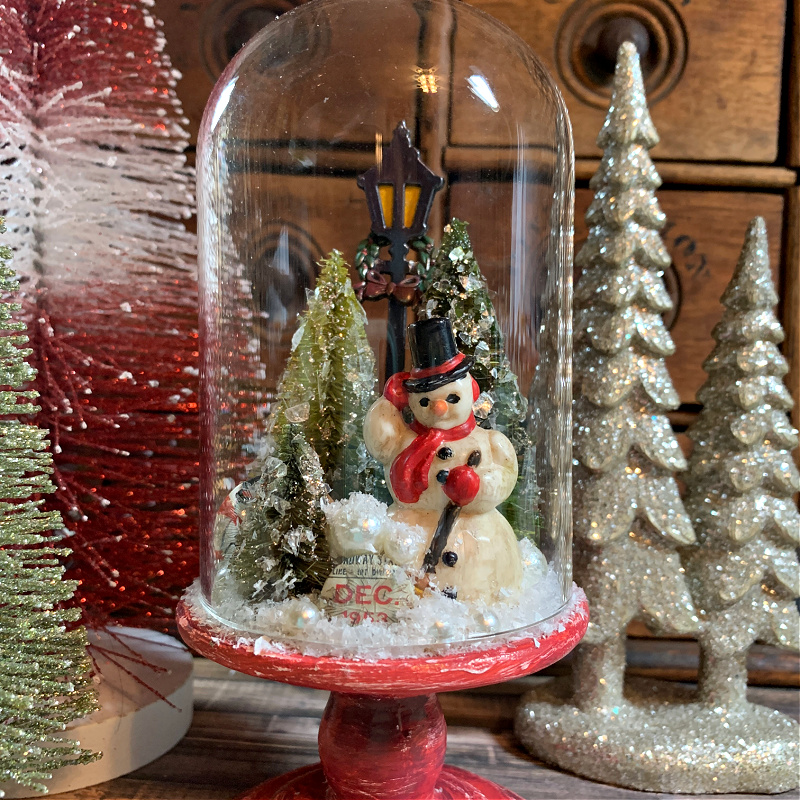
To put it all together, I adhered the trees, snowman, lampost, and flair pieces to the base of the pedastal with matte medium from Ranger and allowed that all to dry overnight. In the morning, I brushed all the open areas of the base with glossy accents and sprinkled fake snow around the base. I adhered the baubles in random areas around the trees and snowman and dusted on more fake snow. I carefully placed the dome over the entire scene to finish the piece.
I hope you enjoyed seeing how I created my Snowman snow globe. Thanks so much for sticking with me to the end and I hope you were inspired to get those Tim Holtz Idea-ology pieces out and start creating a fun winter scene.

Tim Holtz Idea-ology Salvaged Santa and Snowman
Tim Holtz Idea-ology Woodland Tree Lot
Tim Holtz Idea-ology Woodland Tree Large
Tim Holtz Idea-ology Yuletide Adornments
Tim Holtz Idea-ology Christmas Quote Flair
Tim Holtz Idea-ology Christmas Mini Flair
Distress Paints
Snowman: Candied Apple, Carved Pumpkin, Black Soot, Ground Espresso, Brushed Corduory and Fossilized Amber
Wreath: Rustic Wilderness, Fired Brick and Aged Mahogany
Distress Spray Stains
Bundled Sage, Peeled Paint and Shabby Shutters
Tim Holtz Ranger Distress Mica Flakes
Tim Holtz Distress Glitter Dust Vintage Platinum
Stampers Anonymous Glitter Duster


Ohhh, I love this, questions please…what is the size of the dome? height and width please, and where were you shopping to find this….I must make one…I love it!!!
Hi Sherry, Thank you for your sweet comments. I found the pedestal dome at Target in their dollar section that every Target has when you walk in the door. It was at Halloween time and I wish I had purchased more of them. It was only $3. I’ve searched high and low to find something similar but can’t find them anywhere. It measures 7″ in height from the bottom of the pedestal to the top of the dome and it is 3″ in diameter. The dome area itself measures 4-1/2″ tall and 3″ in diameter.
Thank you so much for thaking the time to answer my questions…we do not have a Target, so the search is on….LOL….maybe can find something is that general size that will work…have to carry my “baby” tape measure with me now….thanks a bunch….Happy Thanksgiving…
Hi Sherry, You’re welcome, it’s my pleasure to help. Happy Thanksgiving! ♥