
Hi friends! I was so excited when I learned of a new product coming to the Distress line. When Tim unveiled them on our Zoom meeting, I think you could have heard me squeel all the way around the world. My Distress Watercolor Markers dried up long ago and I tried to revive them to no avail. I loved coloring stamps with them in so many different ways and was so sad to see them discontinued. Alas, we all should have known Tim had something up his sleeve in this regard and was working on these amazing pencils for quite a while. So I was assigned to do my overview of the pencils at the end of the month and I knew there wouldn’t be much left that everyone hadn’t done with them or tried. Being that was the case, I wondered what in the world I could do that would be different from what was already out there. So I decided what I was going to do was to just play with them. I let the pencils show me how they worked their magic. I decided to sit down and whatever came to my mind first was what I did with them. That’s how my process went and I stuck with it throughout my playtime. Some of the things that came to my mind you may find inspirational or you may find completely worthless. If you take away something from this blog post, that’s great! If not, that’s okay too. These pencils are pure magic and I know if you just let go of preconceived rules in your head and just let your imagination drive your playtime, the pencils will guide you to discover their magic.
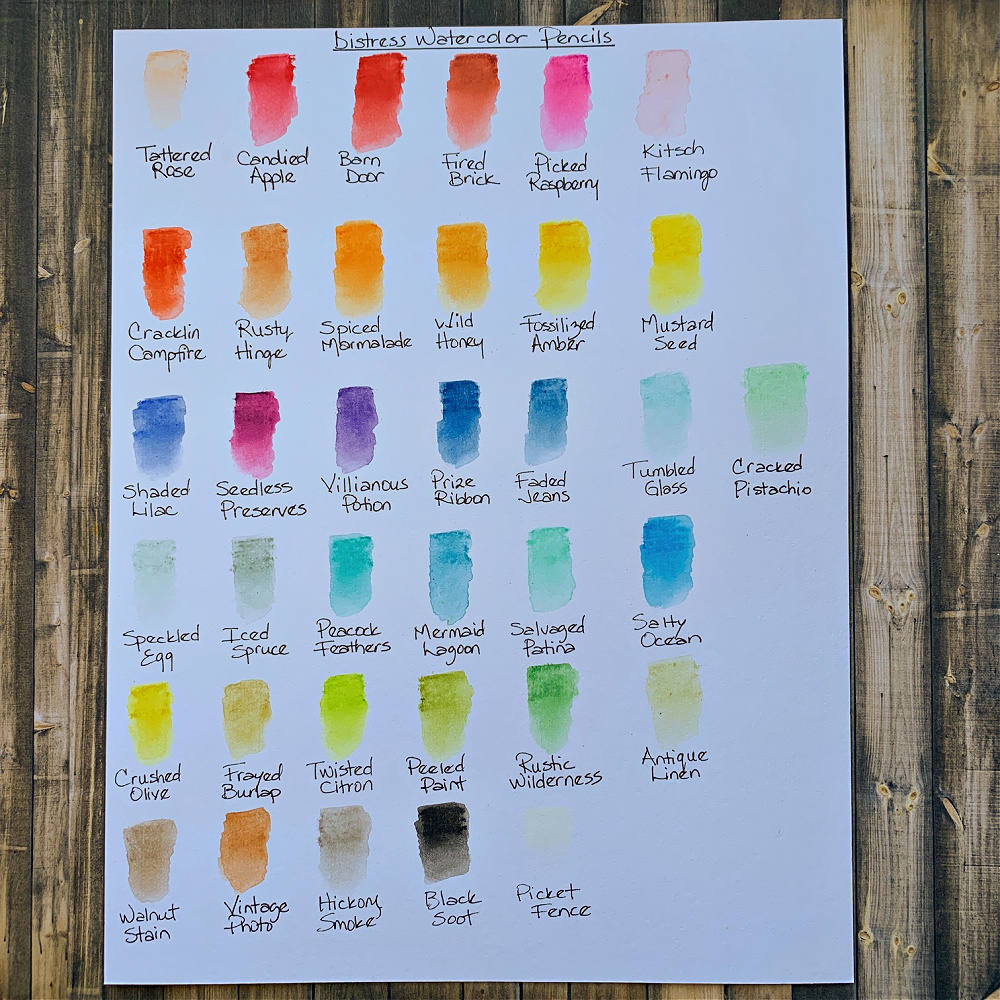
My first impression of the Distress Watercolor Pencils right out of the box is they looked creamy but they aren’t. They’re just like a regular watercolor pencil. I have a few sets of different watercolor pencils, Derwent Inktense just to name one. There are things I like about the Derwent Inktense pencils and things I don’t so I was eager to play with these new watercolor pencils and see how they behaved. First thing I wanted to do was make a swatch of all the colors on watercolor paper to see how well they reacted with water and they were everything I hoped and thought they would be. It was time to let my imagination and ideas just run through my head so here we go. Enjoy!
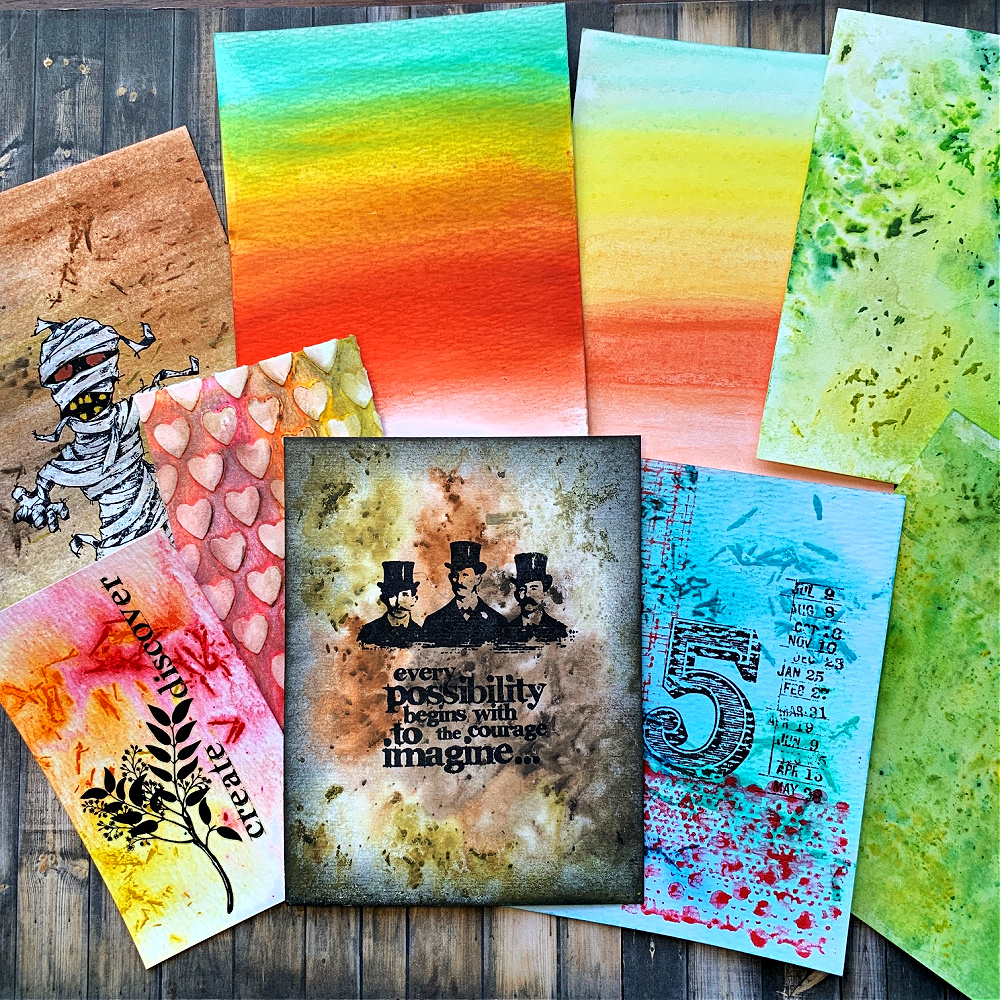
As you can see, I created a lot of different samples of my thoughts and ideas and to say I had fun would be an understatement. There’s something about just playing with your supplies with no end project in sight and I wish I had more time to do just that. There’s a lot here, so pull up a chair, grab a cup of coffee or my favorite, a bowl of Sour Patch Kids and enjoy!
My first experiment was to see what would happen if I used them by coloring straight onto a piece of watercolor paper or if using the shaved bits would result in brighter more vibrant colors . Knowing pigment and that the more you have the more vibrant the colors will be I was pretty sure I already knew the outcome. But remember, I decided to do what came to my mind first and I stuck to the rules and went with it.
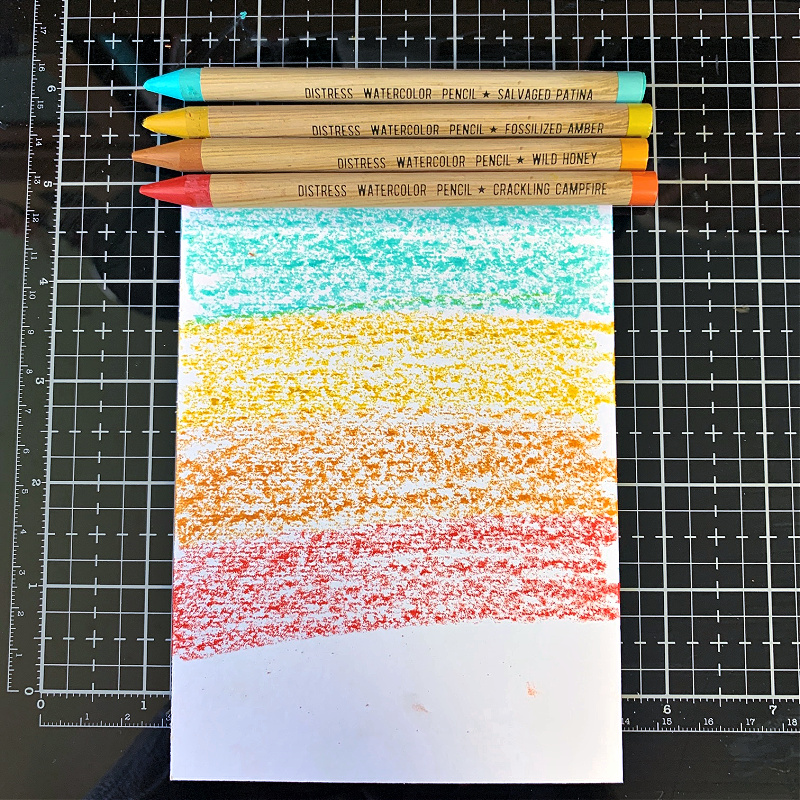
I took a piece of Distress Watercolor cardstock and colored Salvaged Patina, Fossilized Amber, Wild Honey and Crackling Campfire onto the surface. I decided to start from the top with a watercolor paintbrush and blend the colors together all the way to the bottom.
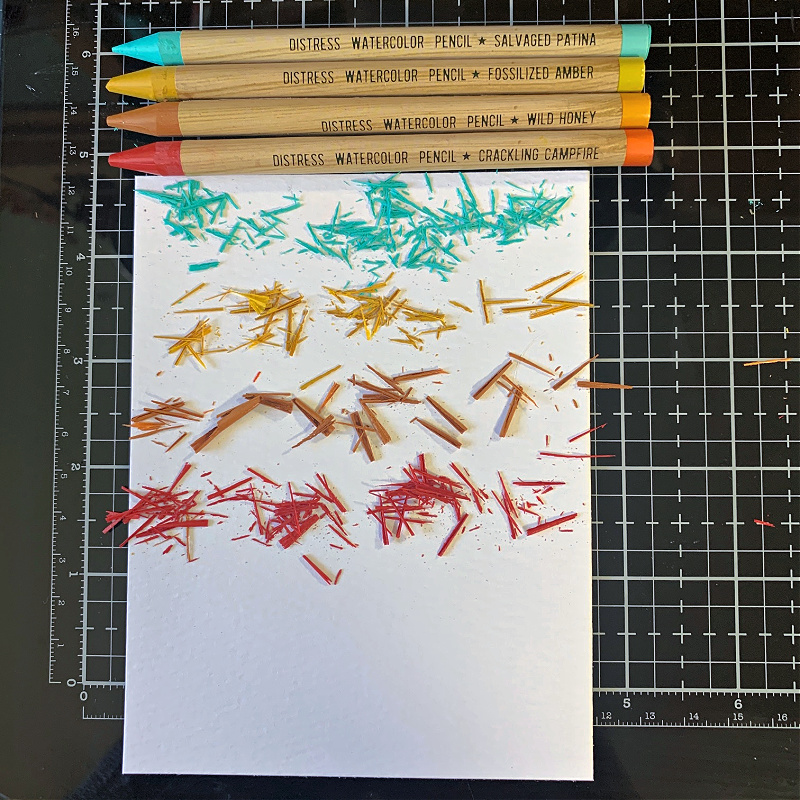
On this piece of Distress Watercolor cardstock, I decided to sprinkle shavings from the pencils with the same colors. For this process, I sprinkled on the shavings, spritzed it with water and gently ran a watercolor paintbrush from top to bottom to blend the colors together.
Here’s a little trick I used to easily sprinkle Distress watercolor pencil shaved bits onto a piece of cardstock. I use the Prismacolor pencil sharpener. The Prismacolor pencil sharpener is designed so the shaver mechanism pops off the top and the catcher is on the bottom. I pop off the shaver and shave the bits directly onto the cardstock.
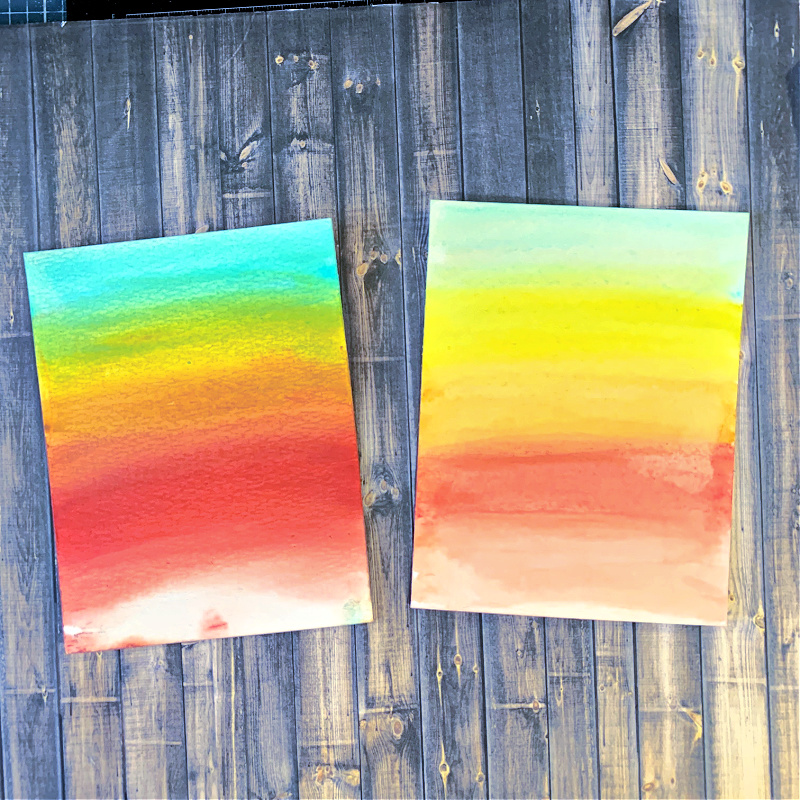
I’m sure you can guess which one is which. The one on the left is the result of the pencil shavings and the one on the right is one that was colored with the pencils. To break up the shavings I had to go over and over the cardstock with water many times which led me to my next idea.
Having gone through the process of dissolving the shaving bits on my last experiment I saw how beautiful those shavings looked when they weren’t completely dissolved. So I thought, what if I used the same process by sprinkling the shavings onto a piece of dry watercolor cardstock, spritzed it with water but didn’t allow the shaved bits to completely dissolve. That is what I did for this experiment and the results were amazing. But I wondered if those shaved bits would eventually fall off the cardstock so I had an idea to spritz the whole thing once it was completely dry with Distress Resist Spray and it worked wonderfully the bits of shaved pigment were “glued” in place.
Here’s the process for a shaved bits background: dry method:
- Apply watercolor pencil shavings onto a piece of dry Distress watercolor cardstock.
- Spritz the cardstock with water using a Distress Sprayer.
- Move the paper around to allow the colors to blend together.
- Dry the cardstock completely with heat tool.
- Run the cardstock piece through a laminator to flatten the cardstock and to flatten the shaved bits.
- Spray with Distress Resist Spray.
- Dry completely with a heat tool or air dry.
- Add remnant rub over the surface.
What I discovered during the process is that I needed the shaved bits to flatten so I could stamp or apply a remnant rub over the top. That is what led me to use the laminator. The heat from the laminator did not disrupt the pigment at all, it just flattened it which is exactly what I was hoping it would do.
I was in love with the shaved bits and this led me to wonder what would happen if I applied them to wet watercolor cardstock instead of dry. Sticking to my plan, I took that idea on to my next experiment.

Using another piece of Distress watercolor cardstock, I spritzed it with water and sprinkled on shaved bits and spritzed it again. I allowed the water to dissolve the bits for a few seconds and then moved the paper around to blend the colors together. It looks almost the same but if you focus on the shaved bits you can see the edges are not as sharp when sprinkled onto the cardstock when it’s dry.
Here’s the process for a shaved bits background: wet method:
- Mist a piece of Distress Watercolor cardstock liberally with water and sprinkle shaved bits in random areas on the cardstock.
- Allow the shaved bits to dissolve a bit and spritz on a bit more water, if needed.
- Move the paper around to blend the colors.
- Dry the cardstock completely with a heat tool.
- Run the cardstock piece through a laminator to flatten the cardstock and to flatten the shaved bits.
- Spray the cardstock with Distress Resist Spray.
- Dry completely with heat tool or air dry.
This led me to wonder what would happen if I used the smooshing method with the pencils to create a background. Afterall, when I unboxed the pencils there was a lovely thick piece of acetate protective covering over the pencils. The first thing I thought was that this piece of acetate could be a great smooshing tool. So, off I went to my next idea.

I sprinkled Crushed Olive, Rustic Wilderness, Peeled Paint and Twisted Citron onto a craft mat.
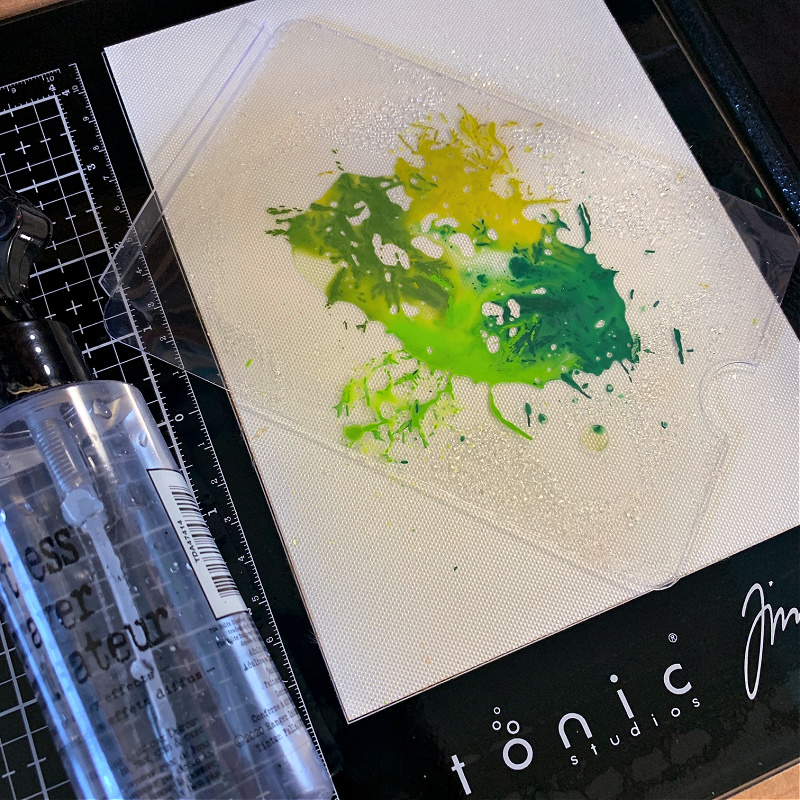
Next, I spritzed the shaved bits with water and smooshed the protective acetate piece that came with the pencils into the shaved bits.
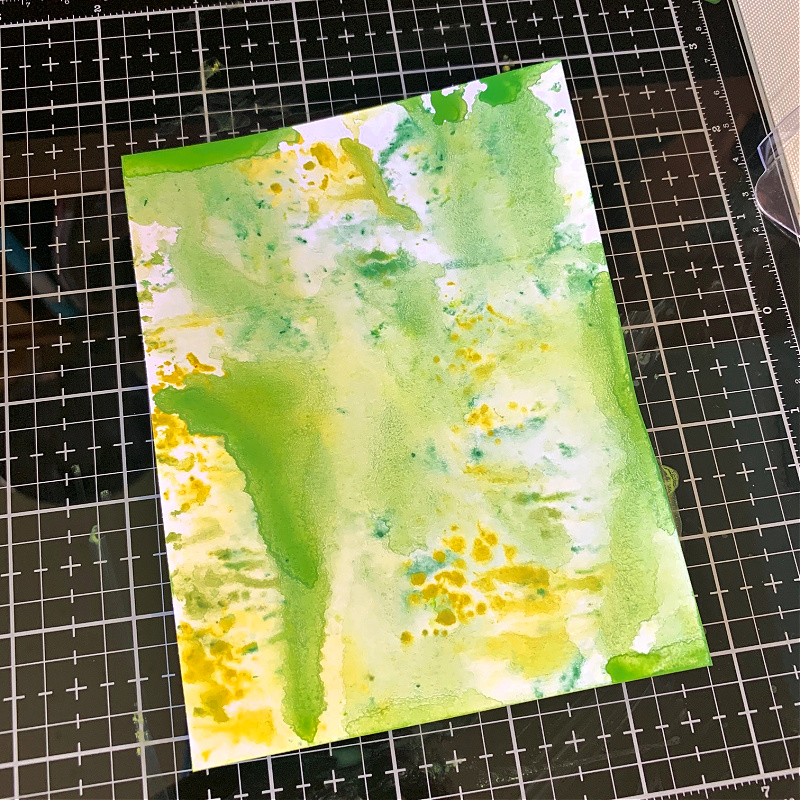
I smooshed the acetate piece onto a wet piece of Distress Watercolor cardstock and this is the result.
Here is the process for a shaved bits smooshed background:
- Sprinkle shaved watercolor pencil bits onto a craft mat.
- Spritz the watercolor piece with water and spritz the shaved bits on the craft mat with water.
- Smoosh the acetate piece into the wet shaved bits and transfer onto the wet watercolor cardstock.
- Dry completely with a heat tool.
- If you’re going to stamp on the background, run it through a laminator to flatten the cardstock and the shaved pencil bits.
This led me to wonder how well I could stamp on these backgrounds. So, on to the next experiment.
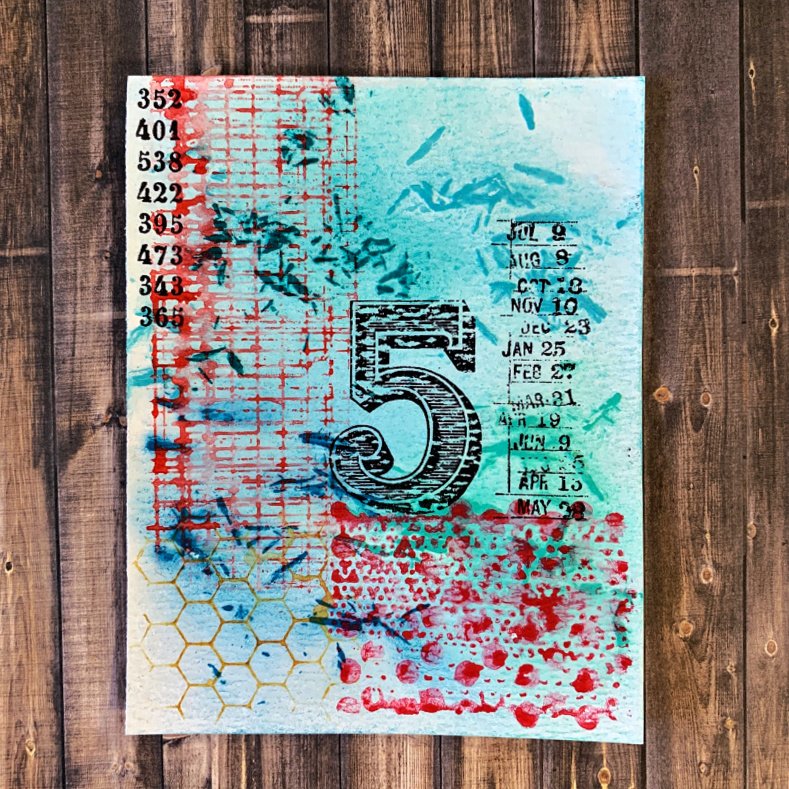
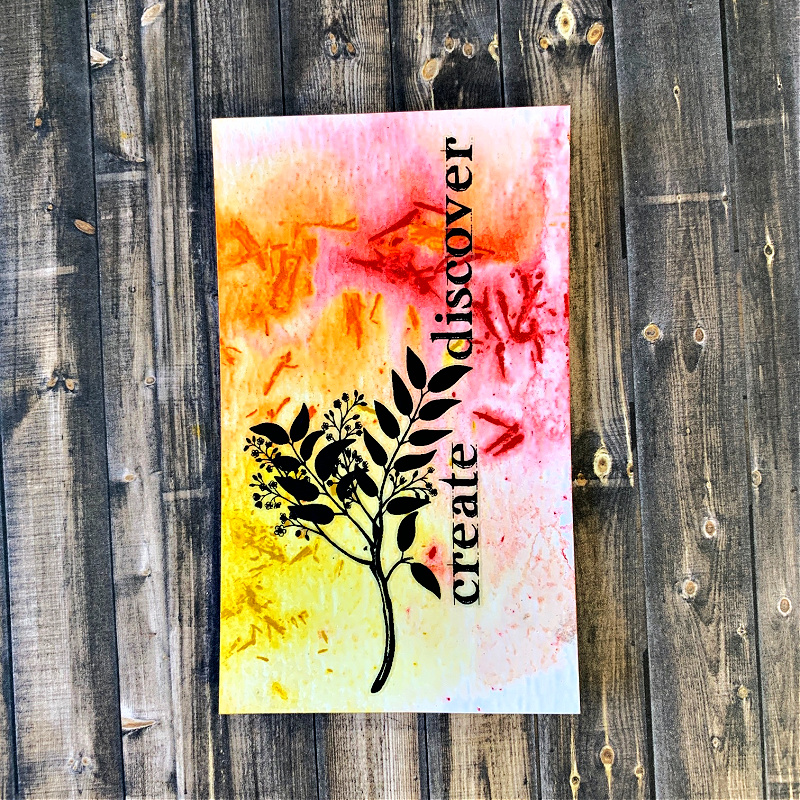
I created a backgound using the shaved bits wet method and allowed it to completely dry. I ran it through a laminator to flatten the cardstock and to flatten the shaved bits. I wanted to stamp with the pencils as well and knew I would need water for this so I sealed the background with Distress Resist Spray because I didn’t want the shaved bits to further dissolve. I spritzed the entire piece with Distress Resist Spray and allowed it to completely dry. Next, I applied some background stamps that were colored with the pencils using the wet watercolor brush method. This method is using a watercolor brush to pick up the pigment from the watercolor pencil and brush it onto the stamps. I dried each image before adding another. I made sure the background was completely dry and stamped on a few images with Black Soot Distress Archival ink. I really liked those shaved bits in the background.
This led me to wonder what a background would look like if I blotted shaved pencil bits in a background. So, on to the next experiment.
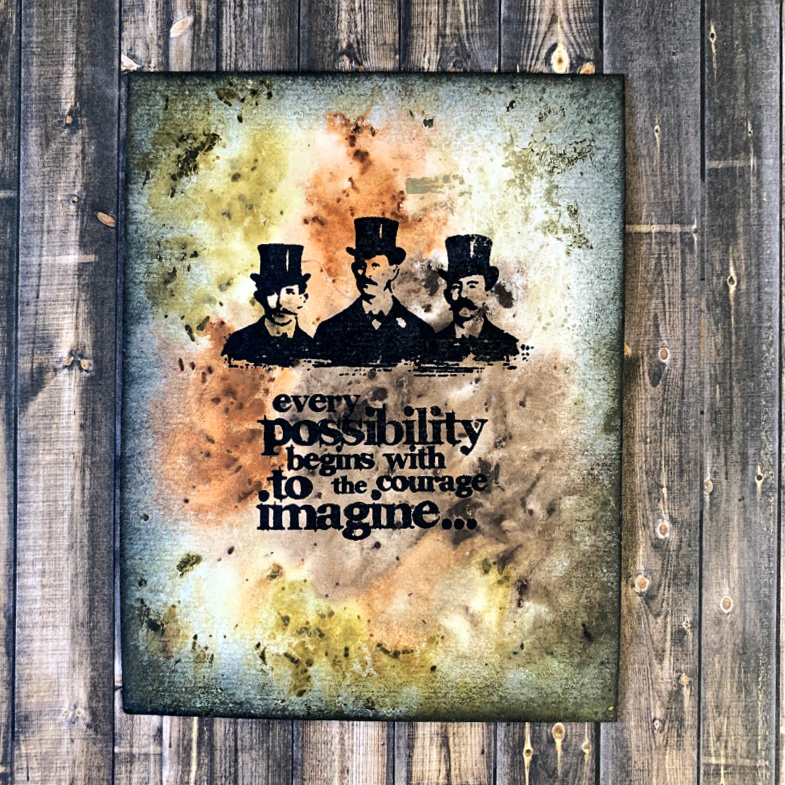
I really loved how this turned out. The blotted method was everything I had hoped for and more.
Here is the method for the shaved bits blotted background method:
- Sprinkle shaved pencil bits onto a wet piece of Distress Watercolor cardstock.
- Blot the shaved bits with water by gently tapping or pouncing on them with a watercolor brush. Make sure to clean some of the pigment off of the watercolor brush between colors as you blend so it doesn’t become a muddy mess.
- Move the paper around to blend the colors.
- Dry completely with a heat tool.
- Run the cardstock piece through a laminator to flatten the cardstock and to flatten the shaved bits.
- Now you can stamp or apply remnant rubs onto the background and ink the edges for a bit of depth.
This led me to wonder what would happen if I used one of these backgrounds to stamp on and then color the image with the watercolor pencils. So, on to the next experiment.
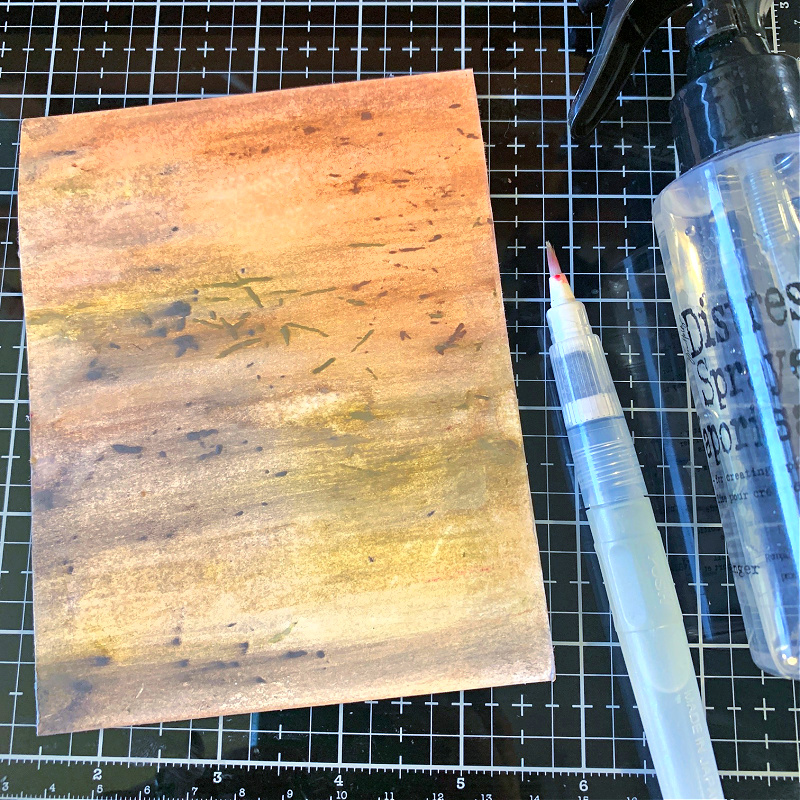
For this background I used the shaved bits wet background method but brushed the background with a watercolor brush from left to right. To be honest, I didn’t like this background at all but I kept it and continued on to see how stamping and coloring with the pencils would work out.
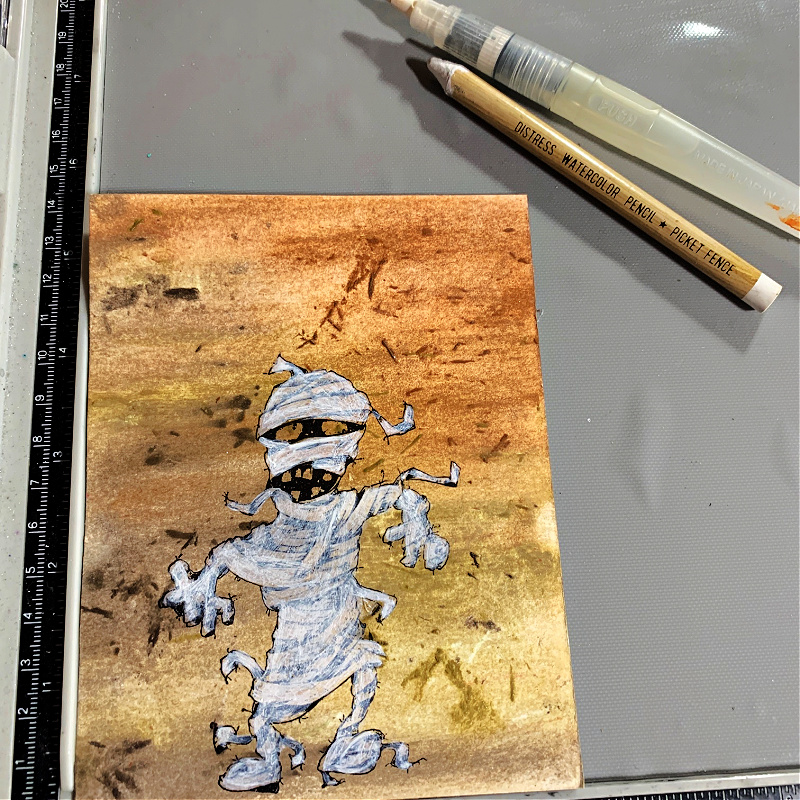
I completely colored the mommy with Picket Fence, even over the black stamped areas. I’m going to restamp the image after the pigment dries so I didn’t need to worry about covering the stamped areas with the pigment. Just remember that you need to use a stamping platform to do this. I found this method of coloring was much faster and the results were wonderful.
When the pigment was completely dry, I restamped the image.
This led me to wonder what would happen if I colored on Distress Mixed Media Kraft cardstock without creating an inked or pigmented background. What would happen if I just stamped on the cardstock and colored the image? So, on to the next experiment.
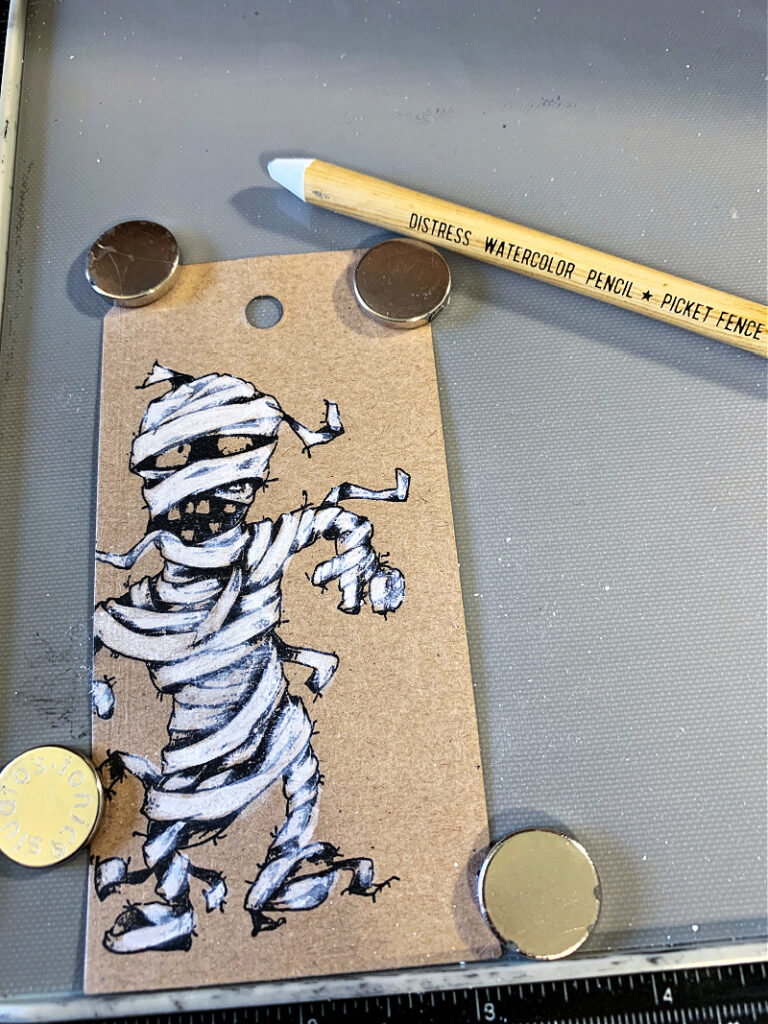
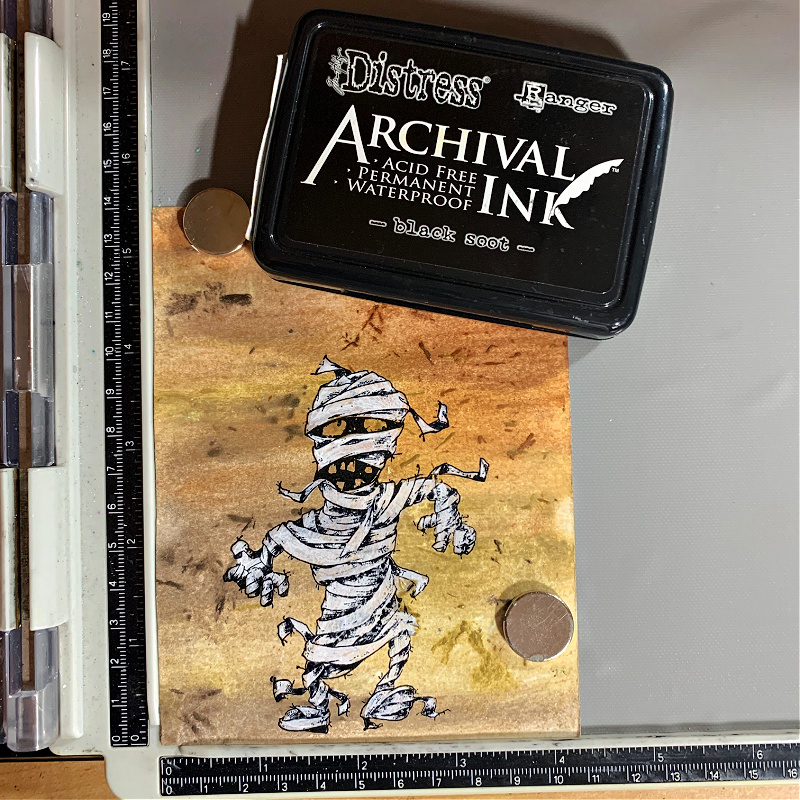
I cut a tag out of Distress Kraft Mixed Media cardstock and stamped the image onto the cardstock using a stamping platform because I knew I would restamp the image after coloring it. I colored the mummy with the Picket Fence watercolor pencil by touching the tip of a waterbrush to the pencil to pick up the pigment. I used the waterbrush to color the image.
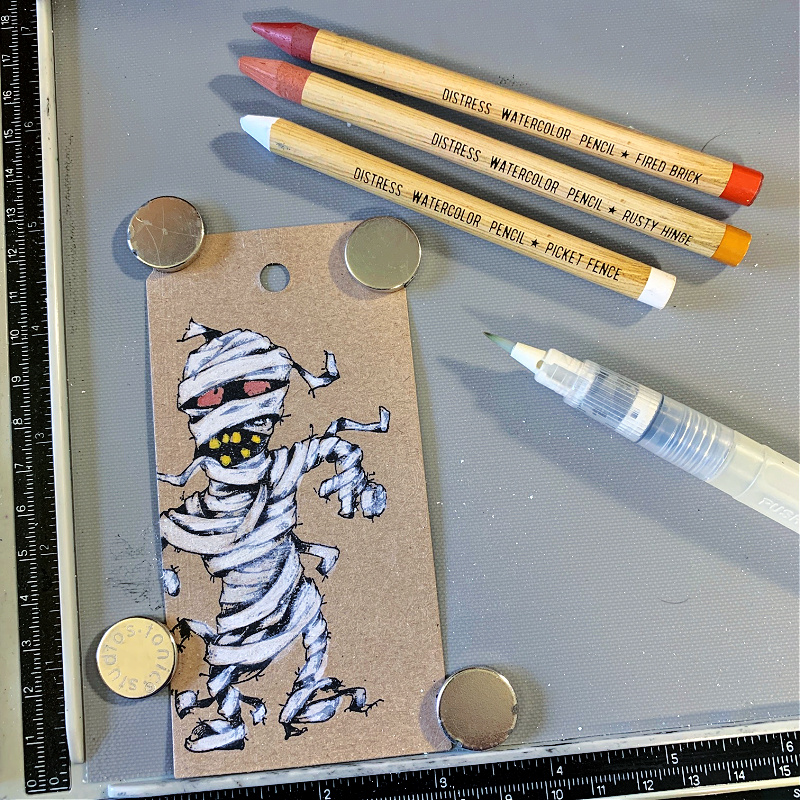
I colored the eyes and teeth using the same method. So far everything looks vibrant and isn’t soaking into the cardstock to the point where it doesn’t show up.
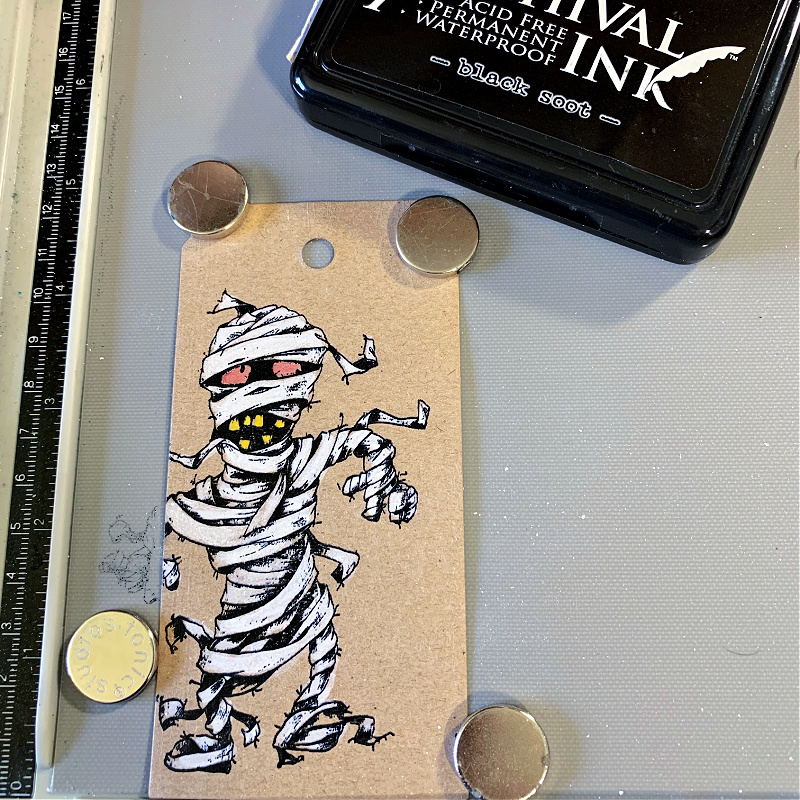
I restamp the image after the pigment is completely dry and I think it’s a definite win!
This led me to wonder if the pigment would bleed through a background if I stenciled using texture paste. I know when I’ve used Distress Ink or Oxide on a background the colors always bled through the texture paste. So, on to the next experiment.
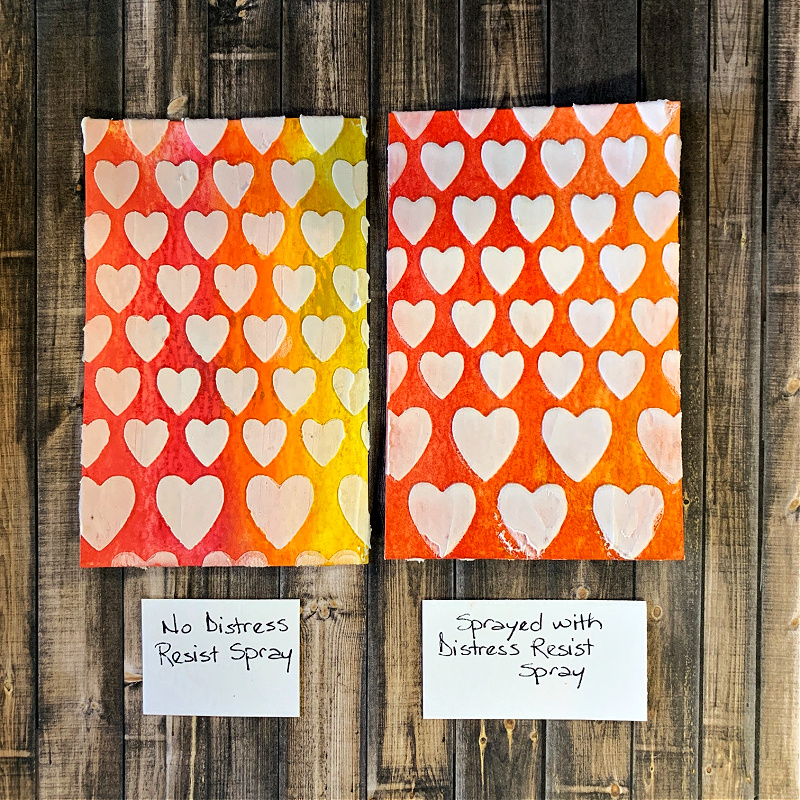
As you can see, I took two pieces of Distress watercolor cardstock and heavily colored the background with the Distress watercolor pencils and water. I allowed this to dry and I left one alone but sprayed the other with Distress Resist Spray. I was pleasantly surprised that the texture paste really stayed true to its white color on both whether the surface was sealed or not. I do have to admit, if you look closely, the hearts on the resist sprayed cardstock is a bit of a brighter white. Is it worth the trouble of sealing the cardstock when using them with a Distress watercolor colored background? Well, that’s up to you but I would be happy either way.
This led me to wonder what would happen if I grunged it up a bit. So, on to the next experiment.
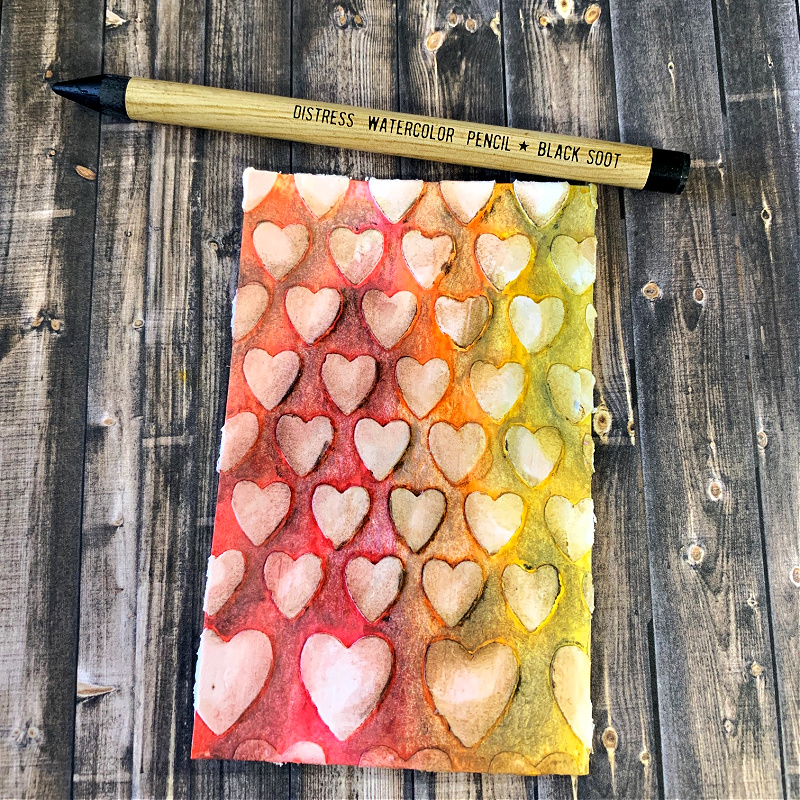
Oh my, isn’t this a wonderful improvement. I love how I was able to grunge up that bright background around the hearts with the Black Soot watercolor pencil. This was done on the unsealed piece, the piece that was not sprayed with resist spray. I tried it on the piece sprayed with resist spray and it didn’t work as well.
I could have gone on for hours trying different things and I wish I had more time so I consider this just the beginning of my journey with these new amazing watercolor pencils.
Thanks so much for sticking with me to the end. If you’re still here, thank you and I hope you have an amazing day!

Tim Holtz Ranger Distress Watercolor Pencils – Set 1
Tim Holtz Ranger Distress Watercolor Pencils – Set 2
Tim Holtz Ranger Distress Watercolor Pencils – Set 3
Tim Holtz Ranger Distress Watercolor Pencils – Sets 1, 2, and 3 Bundle
Tim Holtz Ranger 8.5″ x 11″ Distress Watercolor Cardstock
Tim Holtz Ranger 4.5″ x 5.5 Distress Watercolor Cardstock
Tim Holtz Ranger 8.5″ x 11″ Mixed Media Kraft Heavystock
Tim Holtz Ranger Detailer Water Brush
Tim Holtz Ranger Broad Water Brush
Tim Holtz Ranger Distress Sprayer
Tim Holtz Tonic Glass Media Mat
Tim Holtz Tonic Glass Media Mat Travel Size
Tim Holtz Ranger Opaque Texture Paste
Tim Holtz Ranger Distress Palette Knives
Tim Holtz Stampers Anonymous Layering Stencil – Hearts
Tim Holtz Stampers Anonymous Eccentric Stamp Set – CMS448
Tim Holtz Stampers Anonymous Unraveled Stamp Set – CMS452
Tim Holtz Stampers Anonymous Mixed Media Stamp Set – CMS125
Tim Holtz Stampers Anonymous Warehouse District Stamp Set – CMS124
Tim Holtz Ranger Distress Archival Black Soot Ink


love my watercolor pencils too. more things to try. thanks as always for sharing and the inspiration.