
Hi friends! I know it’s a bit early for Christmas making but is it really too early for Christmas making? If you’re like me then the sooner you get started the better. In years past I’ve waited far too long to get my handmade Christmas tags finished to put on my family and friends gifts. I always end up having to use the ugly store bought ones and every time I tell myself next year I’m making them. Well, this year I’m doing just that! I put together a short tutorial on how I created these tags. Enjoy!

Creating the Sentiments:
I don’t know about you but I LOVE plaid so I came up with an idea on how to use up some of my Tim Holtz Idea-ology Christmas design tape.
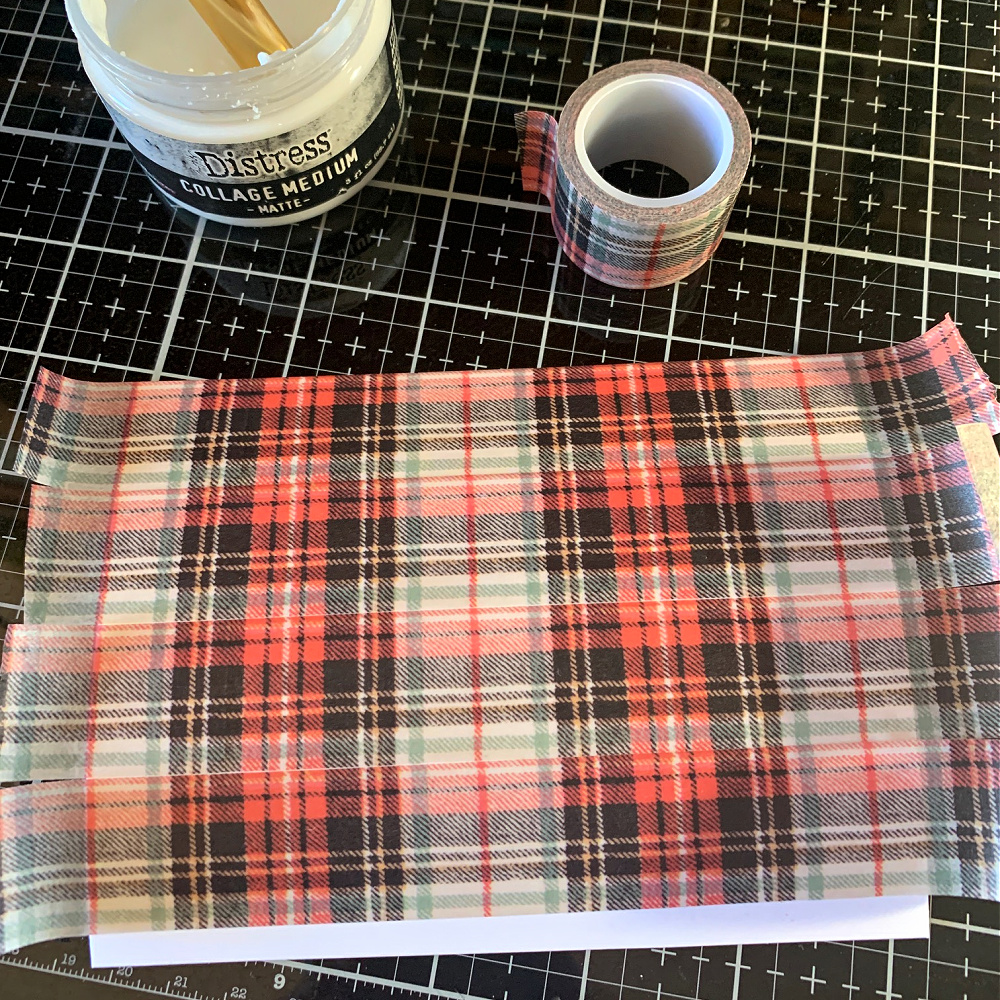
Begin by covering a 4 x 5 piece of heavy cardstock with some of the new plaid Christmas design tape by adhering it to the surface with collage medium. Allow to dry and then cut off the excess from the ends.
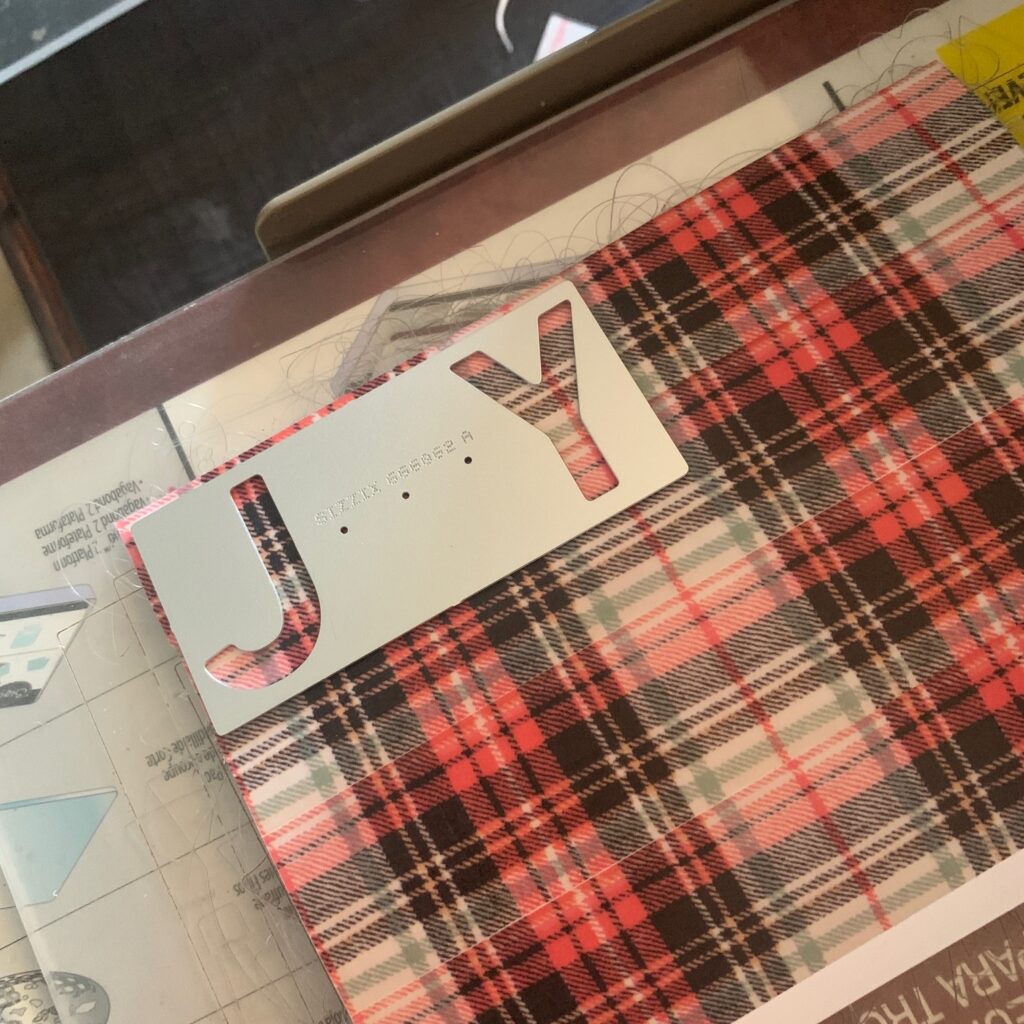
I chose to use the word “Joy” from the new Tim Holtz Sizzix Bold Text Christmas set. Make sure to run it through your die cut machine a few times to be sure the cut goes all the way through.
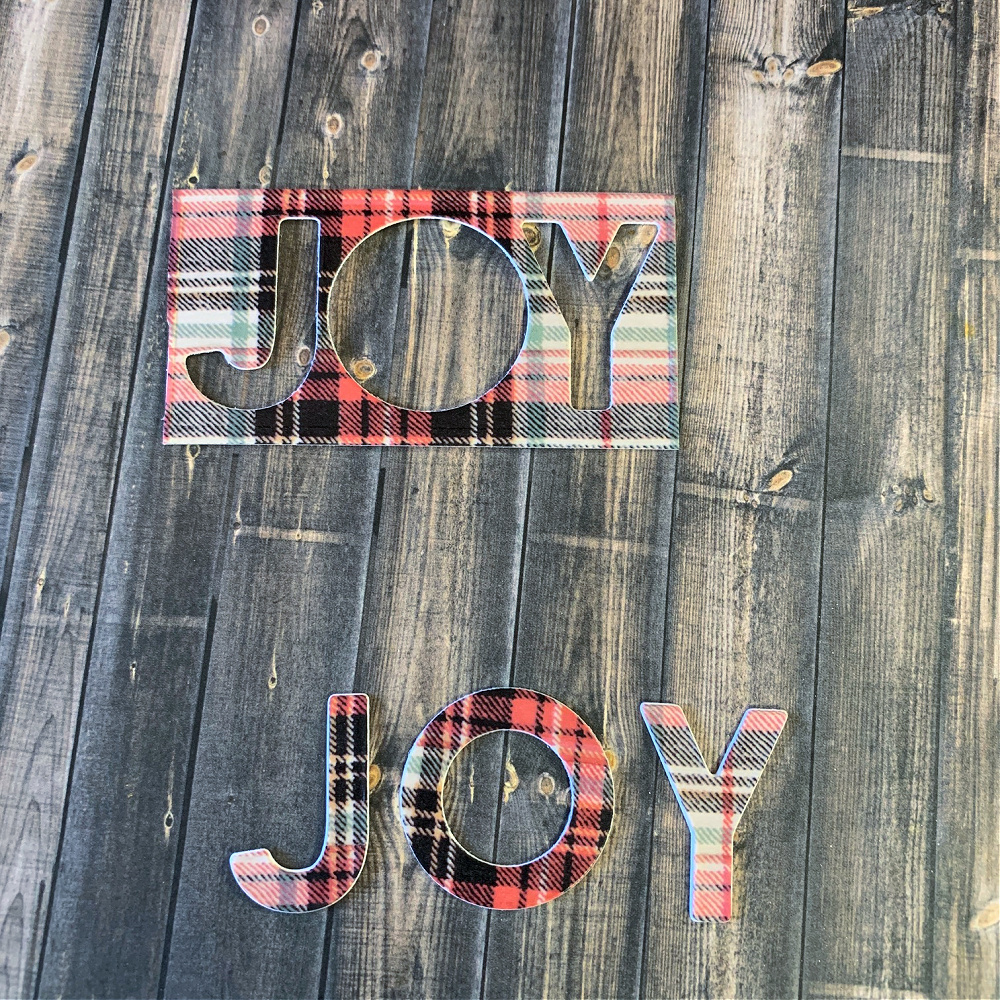
I will be using both the letters and the cut out as shown above and make two tags. In hindsight, I should have used black cardstock instead of white because I can clearly see the white lines around the letters and this is not the look I was going for but I have a solution below.
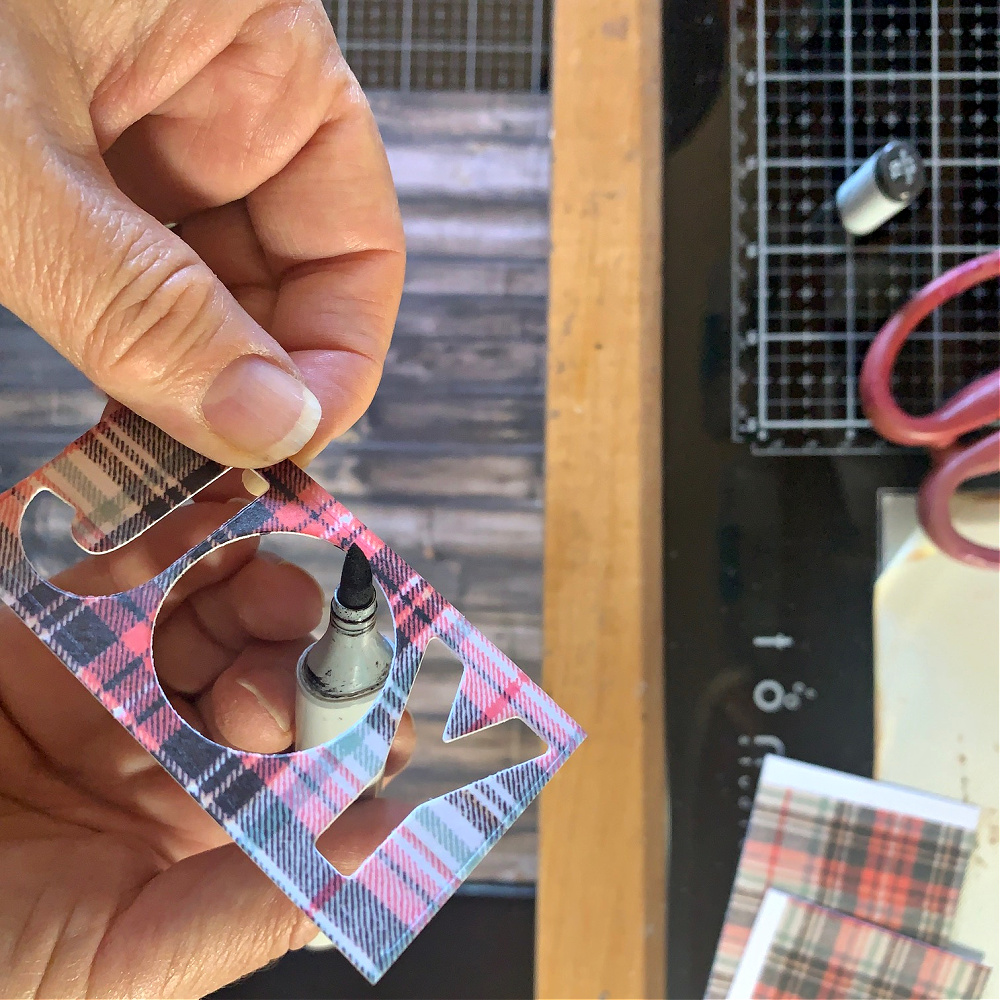
By running a black copic marker around the edges of each letter on the cut out word and along the edges of the individual letters that will fix the problem.
Creating the Background:
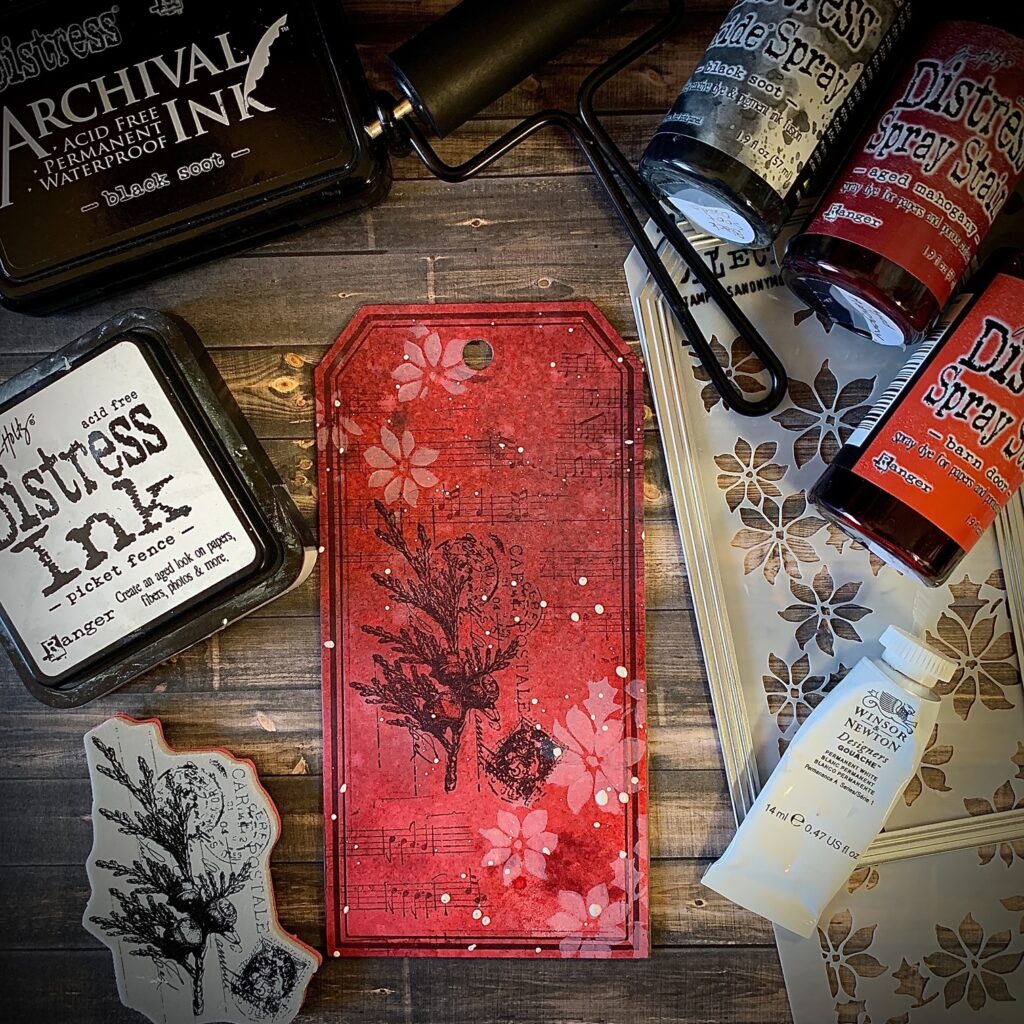
To create the background, spritz a piece of mixed media cardstock with water and then a spritz of Barn Door Distress Spray Stain. Move the color around with water using a spritzer and dry this first layer. Next, spritz on some Aged Mahogany Distress Spray Stain and do the same. Dry completely with heat tool. Next, very carefully spritz on just a bit of Black Soot Distress Oxide Spray in random areas. Spritz with water to move the pigment around and try with a heat tool.
I used the Tim Holtz Framed Tag Die to cut out the tag. Before cutting the tag, I inked the edges of the die with Black Soot Archival Ink using a brayer and ran it through my die cut machine. Next, I used the Tiny Poinsettia mini stencil and inked them on in random areas with Picket Fence Distress Ink. I then added a few musical note stamps from the new Department Store stamp set and the holly branch from the new Festive Collage stamp set in Black Soot Archival Ink. I splattered on some white gouache for a snowy effect.
For the smaller tag, all I did was create a background using the new Christmas Mica Stains and then stamped on one of the trees from the new Bottlebrush stamp set in Black Archival Ink.
To complete the tags, I adhered the sentiments to the tags with collage medium and outlined the letters with a Black Soot Distress watercolor pencil. I inked the edges with Black Soot Distress Ink and added pretty bows made out of seam binding and colored with Hickory Smoke Distress Spray Stain
I hope you enjoyed seeing how I put these tags together. Thank you so much for stopping by and sticking with me to the end. I appreciate the time you spend here with me.

Tim Holtz Sizzix Framed Tags Thinlits Dies
Tim Holtz Sizzix Bold Text Christmas Thinlits Dies
Tim Holtz Stampers Anonymous Tiny Poinsettia Mini Stencil
Tim Holtz Stampers Anonymous Department Store Stamp Set
Tim Holtz Stampers Anonymous Festive Collage Stamp Set
Tim Holtz Idea-ology Christmas Design Tape
Tim Holtz Ranger Aged Mahogany Distress Spray Stain
Tim Holtz Ranger Barn Door Distress Spray Stain
Tim Holtz Ranger Black Soot Distress Oxide Spray
Tim Holtz Ranger Seasonal 2022 Distress Mica Spray Stains
Simon Says Stamp Black Cardstock 110#
Tim Holtz Tonic Deckle Torn Edge Trimmer
Tim Holtz Ranger Black Soot Archival Ink
Tim Holtz Tonic Glass Media Mat
Tim Holtz Ranger Picket Fence Distress Ink


