
Hi friends! Have you ever stamped with paint? I had an idea in my head that would just not go away. I wondered if I could stamp an image, paint it, and then stamp over the image again to restore the details that were painted over. The key to this technique, of course, is a stamping tool. I was pretty sure it would work but wasn’t sure how well it would work. The only way to find out was to give it a try. I encourage everyone to take their ideas and run with them. It may be a disaster or it may be something really amazing. Below I put together a tutorial showing you the entire process I used. Enjoy!
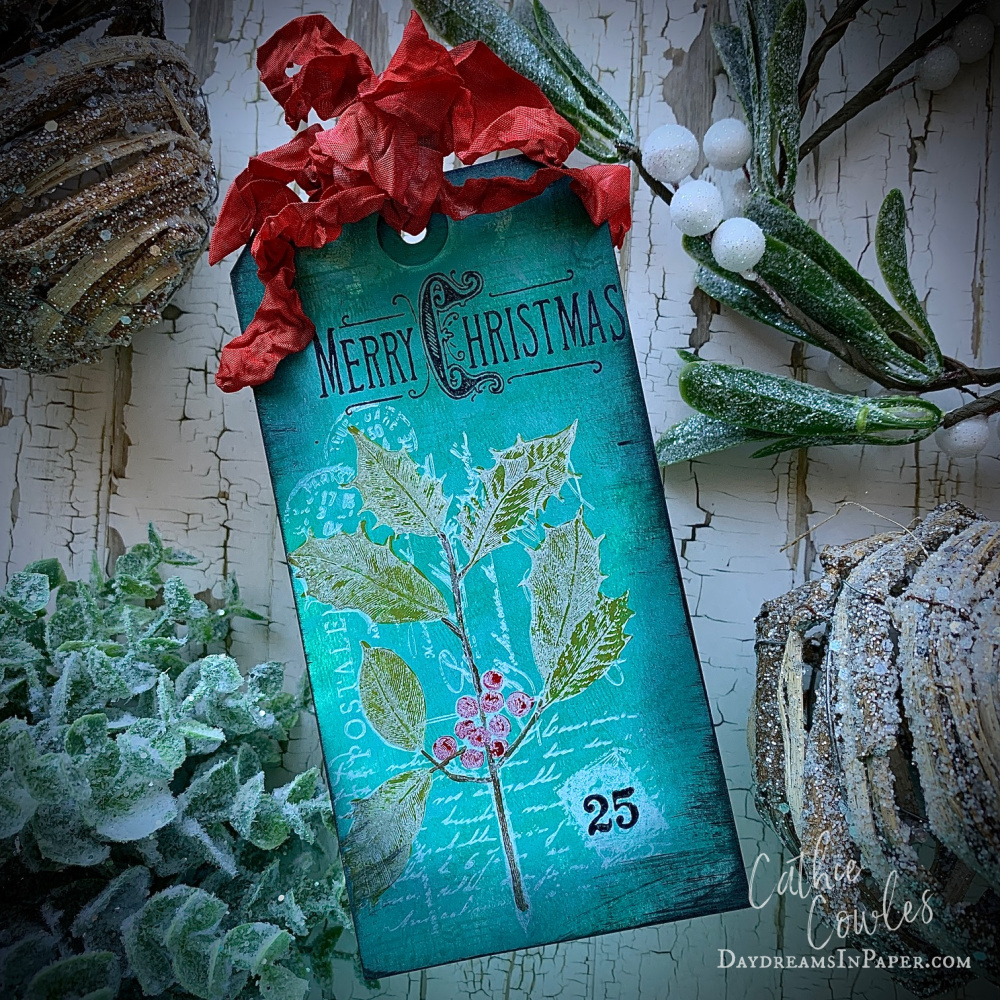
Follow along below to see the steps of how I created the beautiful frosty image of the greenery and berries.
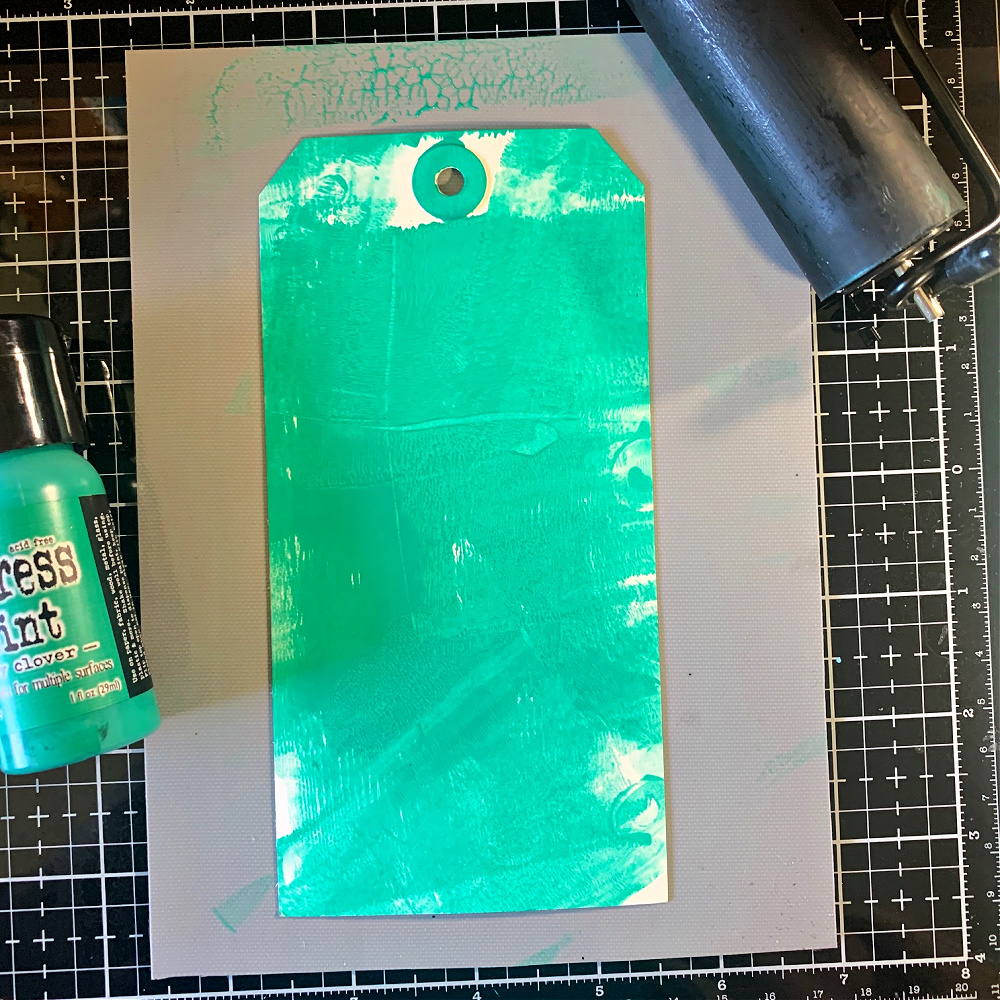
I began by painting the tag with Lucky Clover paint and applying it with a brayer. Just squeeze a tiny amount of paint onto a craft mat, run the brayer through to pick up the paint and roll it over the tag. Dry completely with a heat tool.
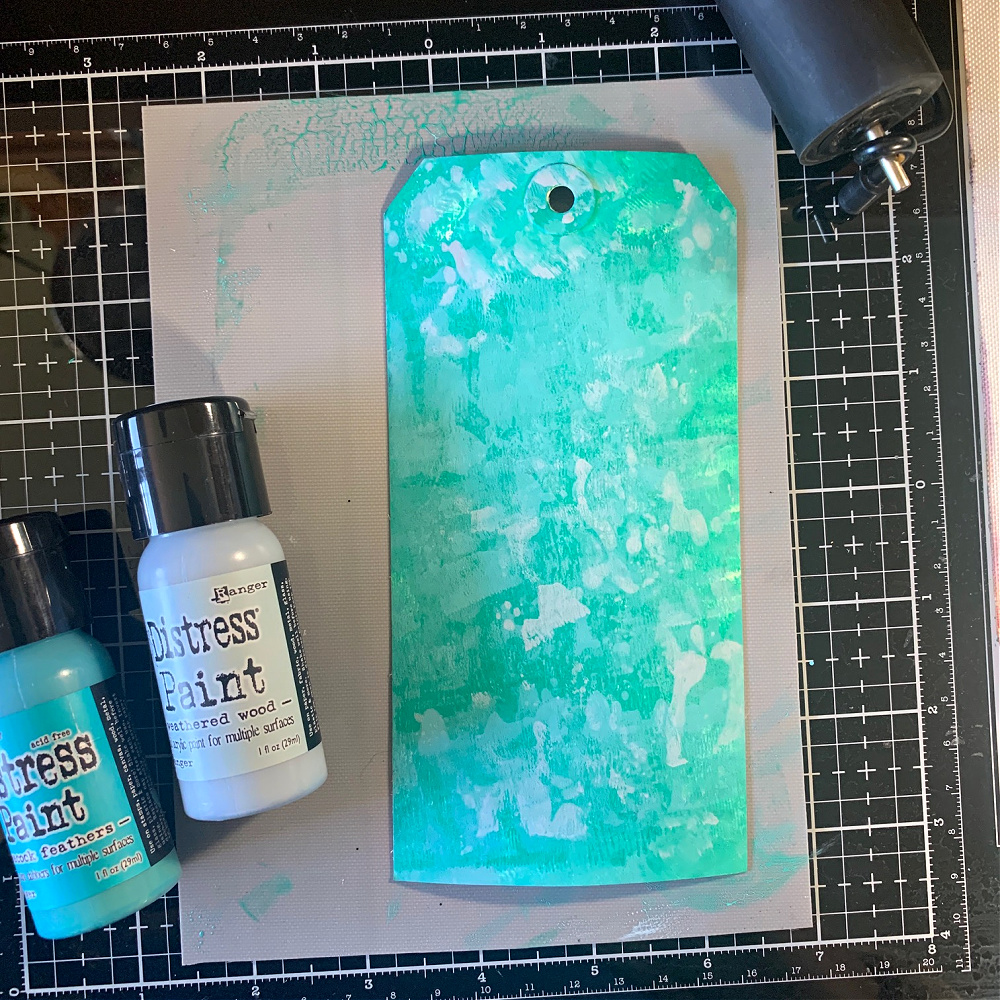
I completed the same process as above with Peacock Feathers and Weathered Wood Distress Paints. Make sure to apply one color at a time and completely dry each layer before adding another color.
Place the painted tag on a stamp platform and align the stamp of your choice over the tag where you want it to stamp. Close the door of the platform to pick up the stamp and leave that stamp in place until you are completely finished with this process. If you line the tag up in the far left corner of the stamp platform you may remove the tag as long as you replace back in the far right corner when you stamp the image the second time. If you place the tag in any other area, you must leave the tag on the platform as well until the entire stamping process is completed.
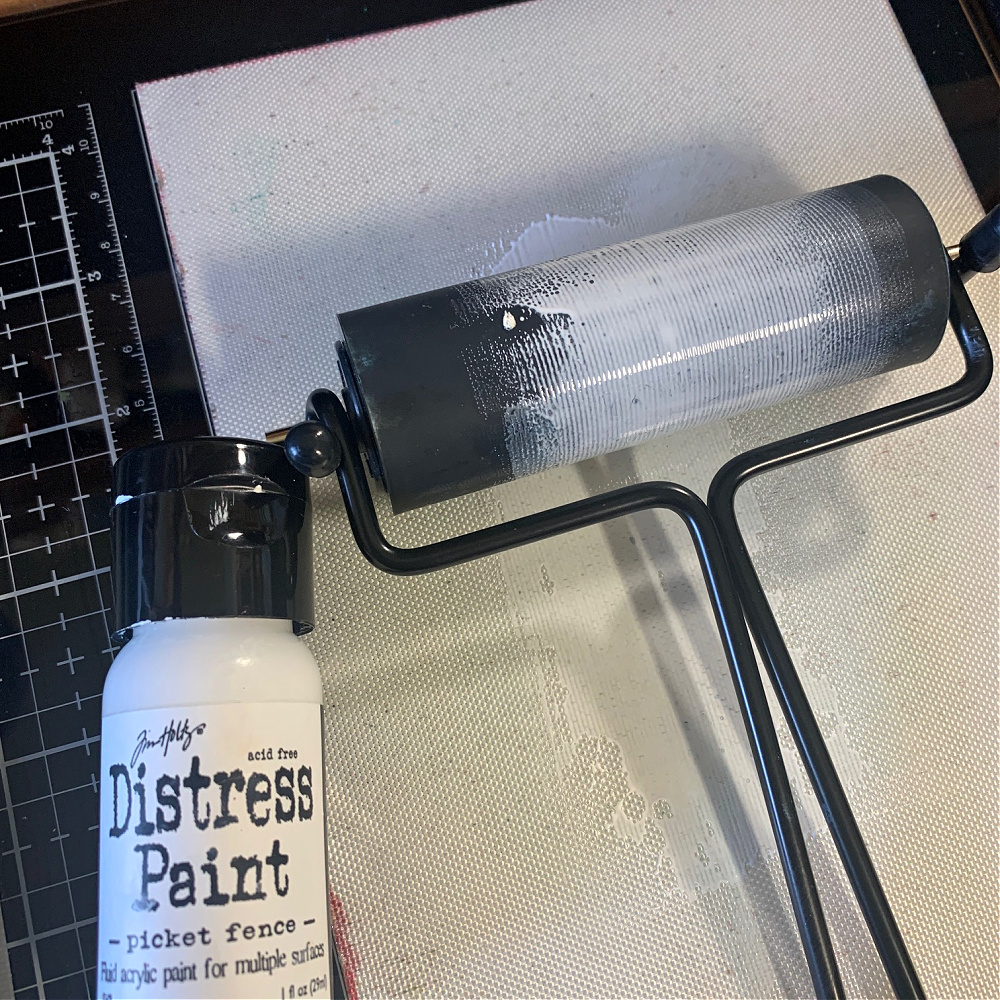
Apply some Picket Fence Distress paint onto a craft mat and run a brayer through the paint. A tiny amount of paint is what you want because if you use too much the image will stamp distored instead of clear and crisp.
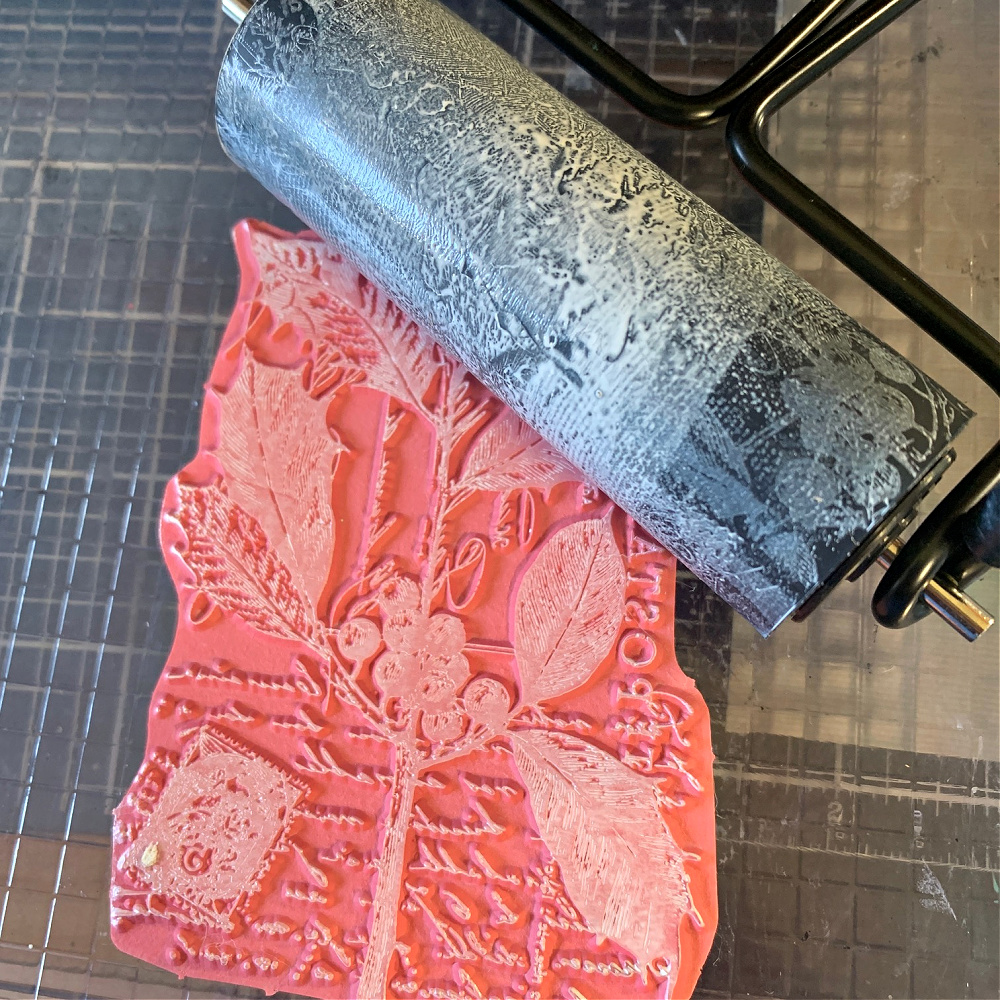
Roll the brayer over the stamp to apply the paint and immediately stamp the image onto the tag. This paint dries very fast. Next, immediately clean off the stamp so the paint doesn’t dry onto the stamp and after cleaning the stamp, clean the brayer.
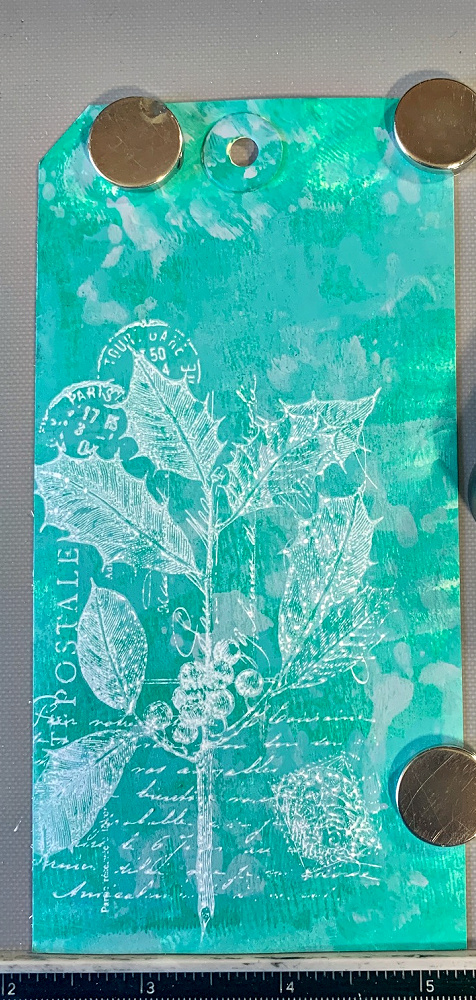
Above is the image after stamping with paint. Make sure to completely dry the image with a heat tool before painting it.
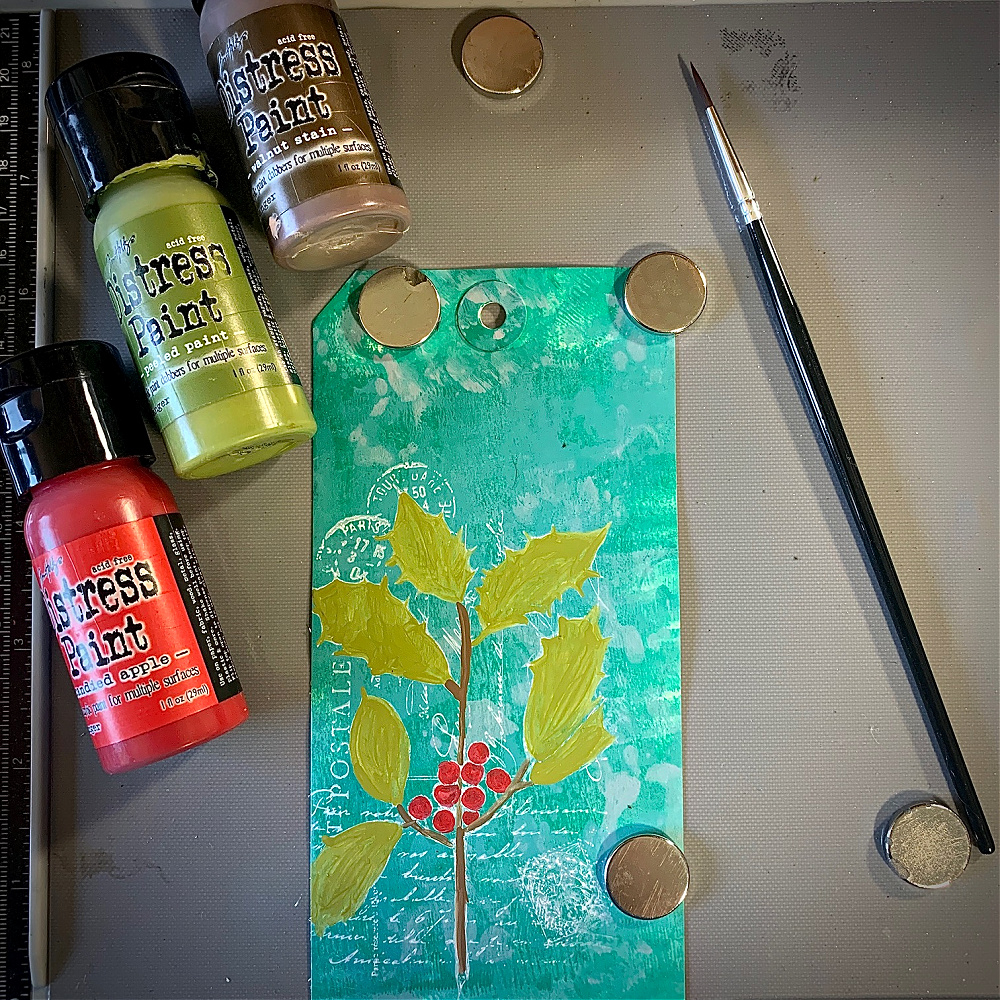
I painted the image with Candied Apple, Peeled Paint and Walnut Stain Distress Paints using a very fine tip paintbrush. I know it looks bad but stick with the process. Dry the image completely before the second stamping.
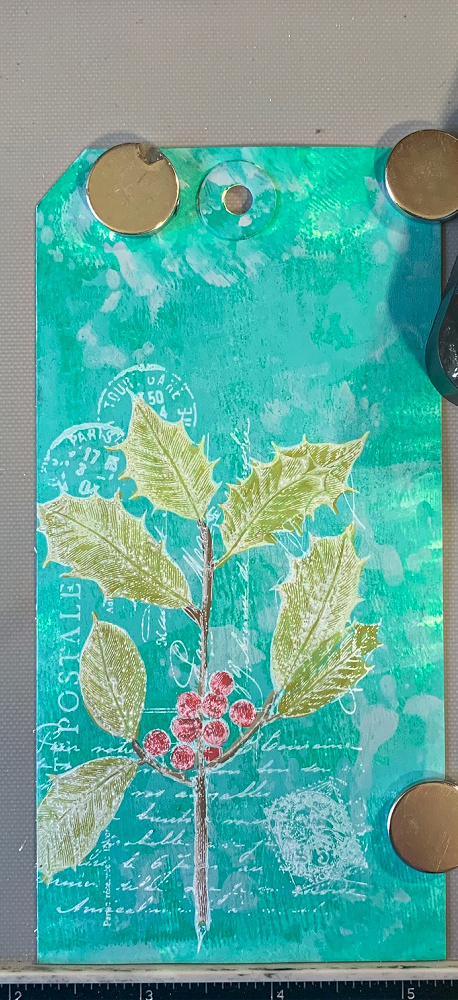
Now complete the process of painting the stamp again using the same process with the brayer and stamping the image onto the tag a second time. Above you can see how beautiful it turned out. It looks frosty and so pretty. Dry the image completely with a heat tool.
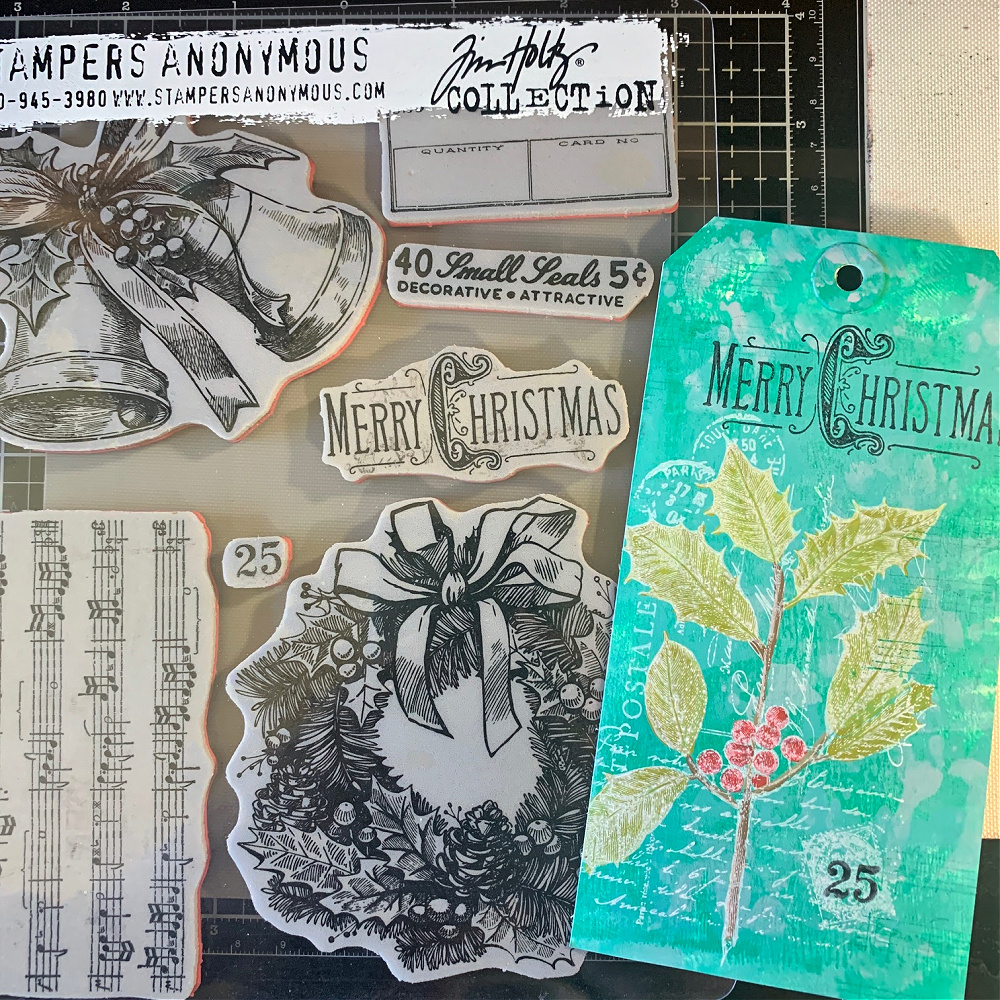
I added a few stamps to the tag from the Tim Holtz Stampers Anonymous Department Store stamp set with Black Soot Archival Ink.
I completed the tag by inking the edges with Black Soot Distress Ink and then lightly applying paint to the edges with Black Soot Distress Paint. The ribbon is one I created from seam binding sprayed with Cocktail Party Mica Stain Spray.
I hope you enjoyed seeing how I put this tag together and that you give this technique a try. Thanks so much for sticking with me to the end. I appreciate the time you spend here with me on my blog.

Tim Holtz Ranger Distress #8 Tag
Tim Holtz Stampers Anonymous Festive Collage Stamp Set
Tim Holtz Stampers Anonymous Department Store Stamp Set
Distress Paints:
Lucky Clover, Peacock Feathers, Weathered Wood, Festive Berries, Peeled Paint, Walnut Stain
Tim Holtz Ranger Medium Distress Brayer


