
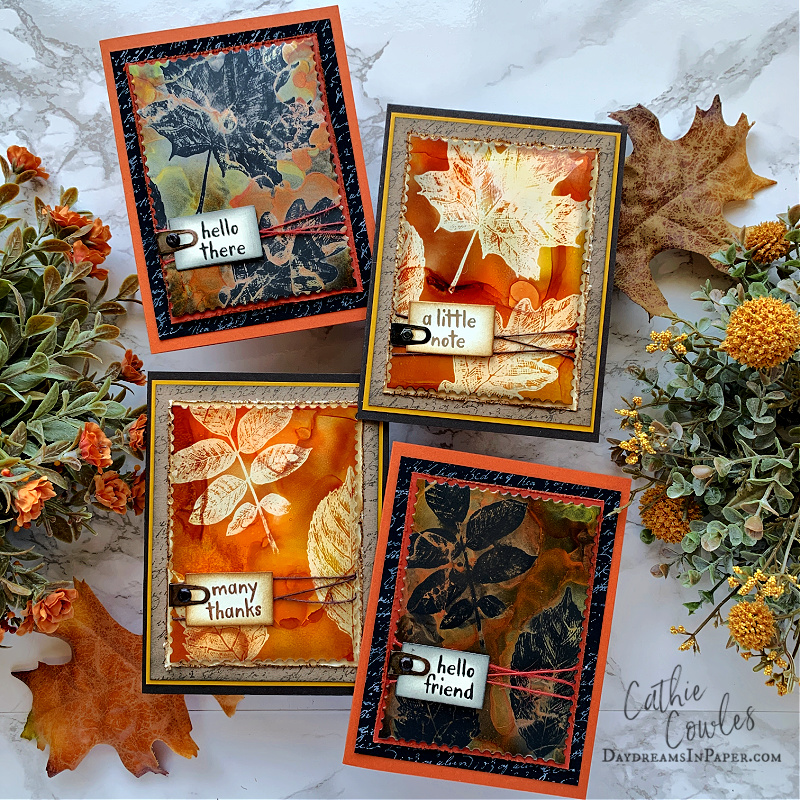
First, before I get started on the tutorial, I want to thank everyone for their kind words on the alcohol lift cards that I made for Tim Holtz Stampers Anonymous Halloween Release for YouTube Live. I truly appreciate all the support and sweet comments that you sent my way! Thank you so much!!
Now on to the tutorial. I’ve had an outpouring of requests to see how I was able to get the results for the cards I created using the Sketchy Leaves stamp set. Most of the questions and requests were for the lift results on the cards where I used the Black Alcohol Ink Dura-Bright. Some crafters prefer tutorials with photos and explanations and some like videos so I’ve put together both. My tutorials usually consist of picture tutorials with explanations so please be kind when commenting on my videos. I did the best I could and I’m not a seasoned videographer like many crafters. Just know I did the best I could with the knowledge I have when it comes to making video tutorials. 🙂 Just below is the picture & explanation tutorial and the video tutorial is at the bottom. If you prefer the video tutorial, jump past the next section and you’ll find it there. Here we go!
.
.
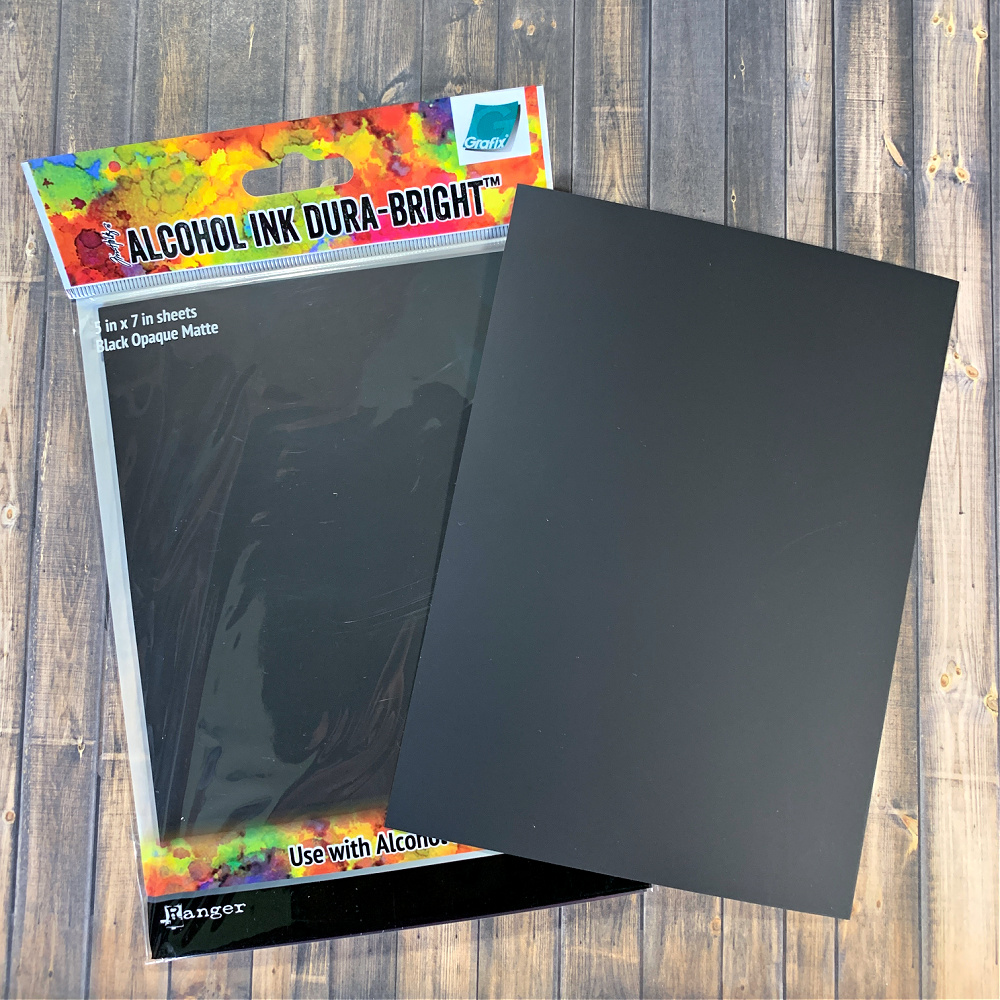
To achieve this technique you will need Alcohol Ink Dura-Bright in Black. I can’t call it paper because it almost feels like very thin plastic. You can find it here.
,
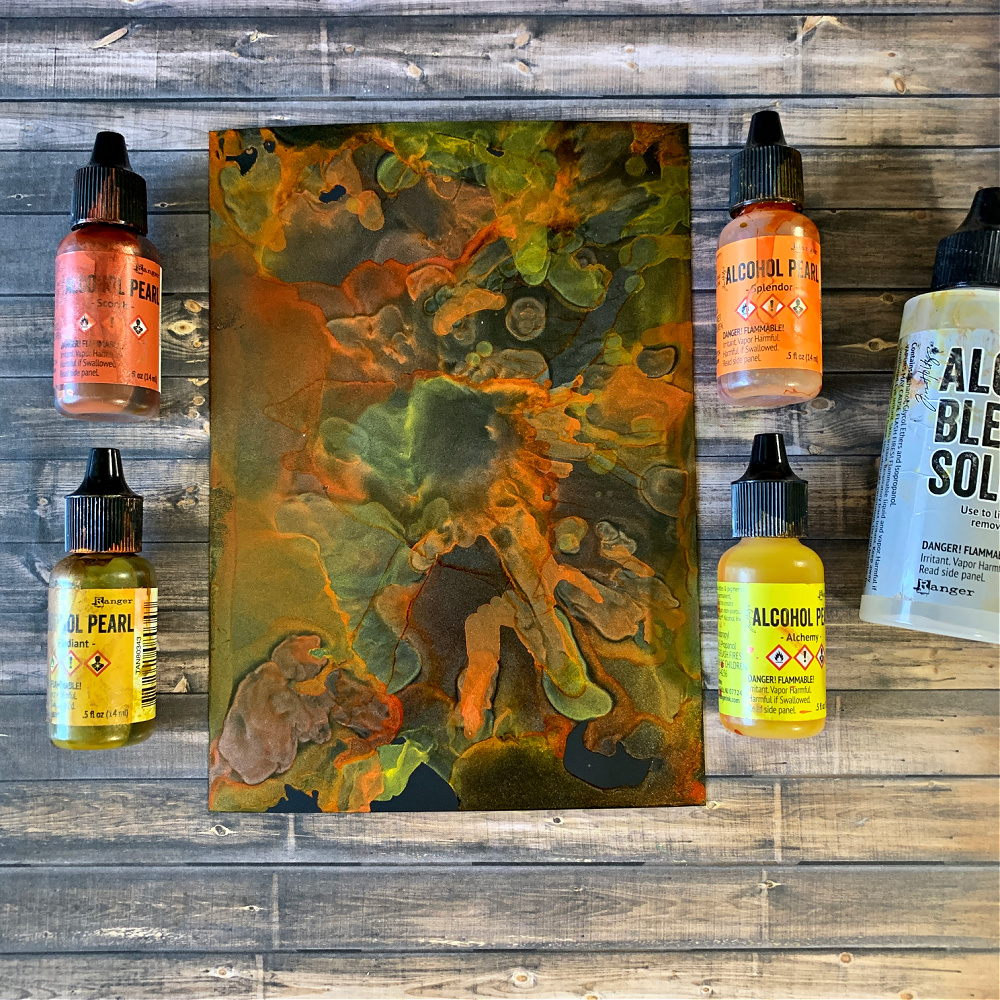
Apply a generous amount of alcohol blending solution to the dura-light cardstock and quickly add the colors of alcohol pearl ink of your choice. To move the inks and blend them together, use a blow dryer or high winded heat tool. Continue this process until you are happy with the background you’ve created. The alcohol pearl inks I used are Radiant, Alchemy, Splendor and Scorch.
.
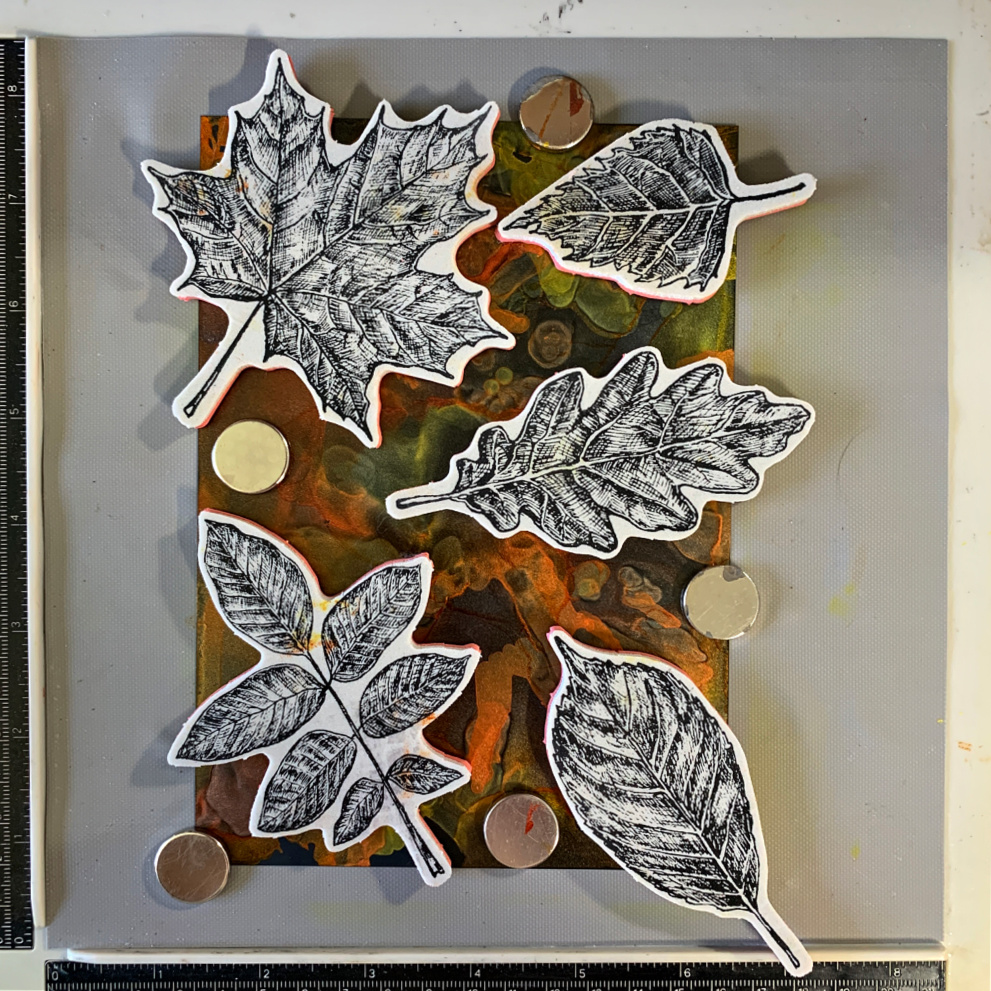
Place the alcohol ink background onto a stamping platform and place the sketchy leaves where you want them to appear on the background. Place magnets in the empty areas to make sure the background will stay put once you start stamping, then you can close the top of the platform over the stamps to pick them up.
.
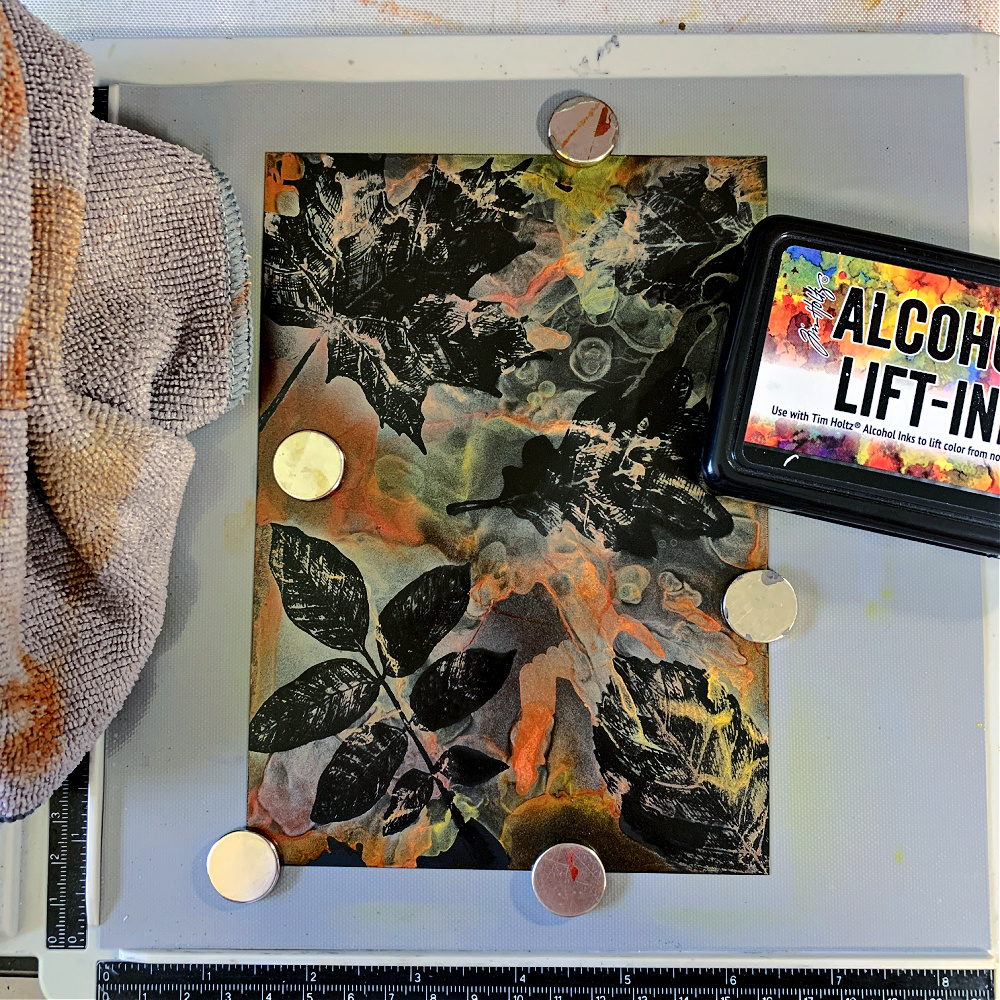
I do one leaf at a time or two at most. You will be applying alcohol lift Ink to the stamp and stamping onto the background multiple times. After stamping with alcohol lift ink gently rub the stamped area with a fiber cloth. As the leaf starts to reveal itself after multiple times of completing this process if you rub too hard it will remove the beautiful fine vein details of the leaf so being gentle is key here. This is a very long process and takes time. Just be patient because as you are doing the lifting, the leaves will start to magically reveal themselves. It’s really fun to watch!!
.
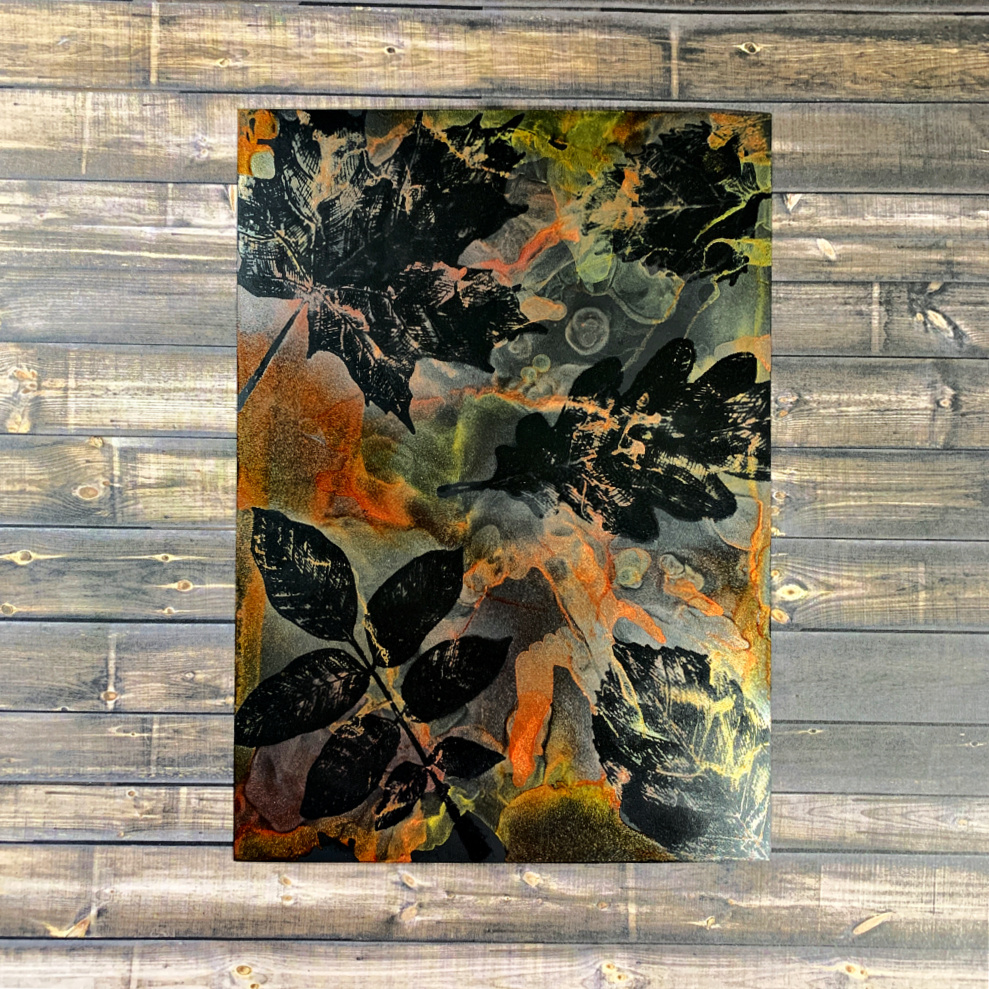
Here is the final result. You can definitely see where I rubbed a little too much or too hard to remove the ink. It’s a very delicate process and one that takes patience if you want to get the best results. I enjoyed it and I think you will too. If you have any questions, maybe the videos below will help to answer those quesitons. If not, please don’t hesitate to contact me. I’d love to help in any way I can.
.
Video Tutorial
The video is sped up quite a bit so you won’t get bored. Like I mentioned in the pictorial tutorial, the process of lifting is a long one and takes time and patience. Be careful not to rub too hard when using the fiber cloth to lift the ink to reveal the image. The veins of the leaves are so magnificent and you don’t want to rub them off. The first video is creating the inky background and the second video shows you the process I used to lift the inks to reveal the images. Enjoy!
.
.
I’m sorry the second video is a little out of frame. One thing I wanted to point out is if you look at the leaf in the center of the background you will see exactly what I mean about the veins disappearing if you rub too much or too hard. Most of the beautiful veining on that leaf was removed by my rush to get this tutorial done. I can’t stress enough about being patient and gentle with this process. It really is fun though when those leaves start to appear.
I hope you enjoyed this tutorial and that you will give this technique a try. If you do give it a try, please let me know. I’d love to see what you create!!


Loved both the photo tutorial and the videos!! Thank you for sharing your talent with us and then going so far above and beyond to help us learn how to do it.
The video inspires me to pull out my alcohol inks and play!!
Again, so many thanks for this!!!!
Thank you so much for sharing your process for these beautiful cards!
These are gorgeous! Thank you for sharing your process.
Thank you so much for your demonstration, I really enjoyed watching this and learning. Love your makes!
Thanks so much for sharing this 🤩🤩🤩
You are so talented! Thank you so much for taking the time (and I know how MUCH time all of that takes) to create the tutorials! I can’t wait to recreate it!