
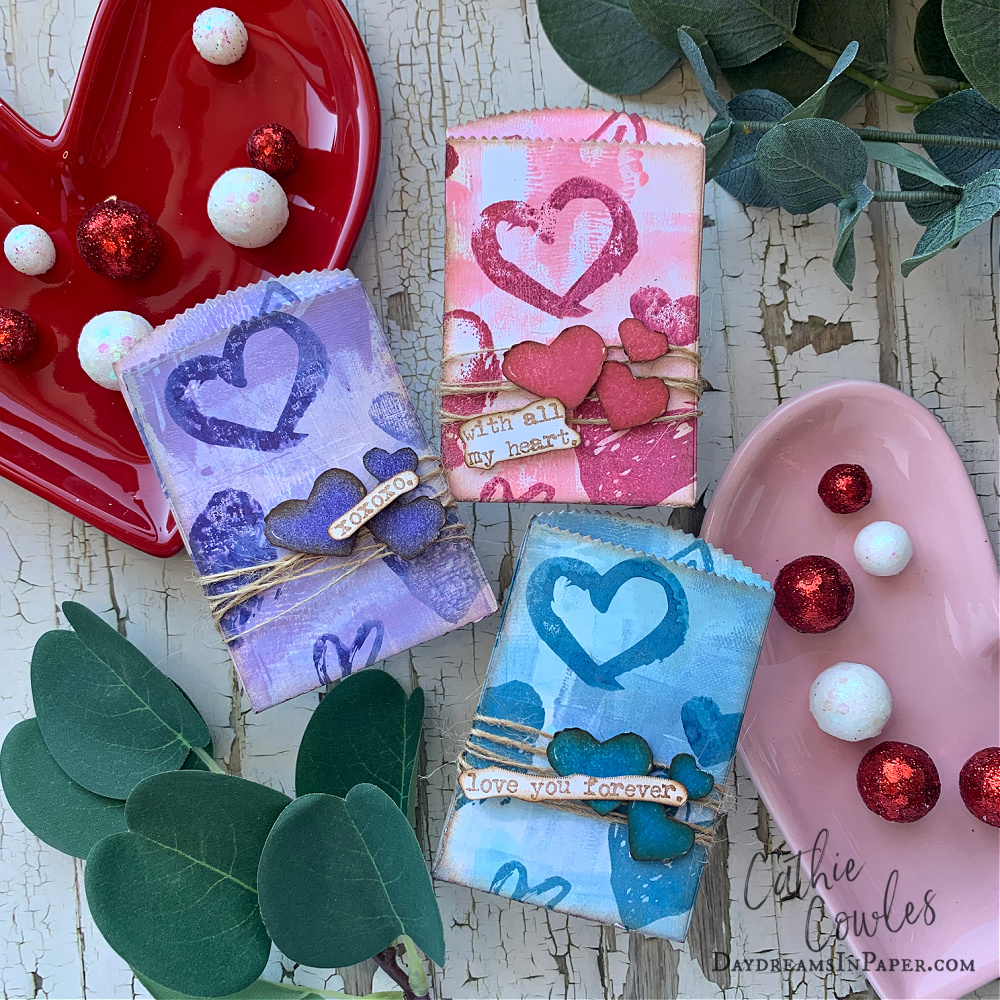
Hello friends! Today I’m sharing gift card holders that I created for the surprise Stampers Anonymous Valentines release from Tim Holtz. The stamp set is called Love Notes and it’s perfect for creating quick and easy Valentines. I was very excited to be a part of this release because Valentine’s Day is one of my favorite holidays. It’s fun to give Valentine’s to all the people in your life that you love to let them know just how much they mean to you. I’ve put together a tutorial on how I created these gift card holders. They are so simple to make and you can whip up several of them in no time at all. Enjoy!
Creating the Background
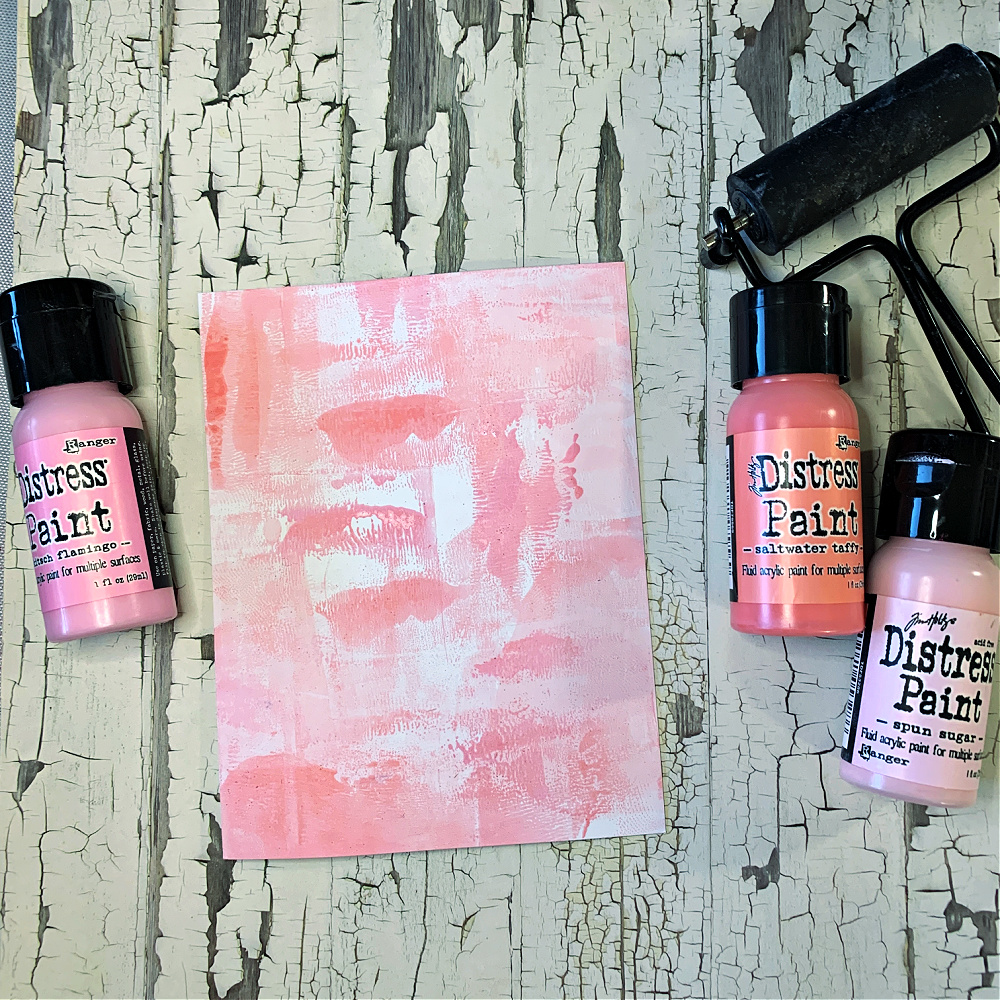
Begin with a 4.25″ x 5.5″ piece of Distress white heavystock cardstock and choose three paints of similar colors in different shades. For my first background I chose, Spun Sugar, Saltwater Taffy and Kitsch Flamingo Distress Paints. Adding one paint color at a time, apply a bit of the paint to a craft mat and run the brayer through the paint to load it onto the brayer. Roll the brayer over the cardstock in random areas going in different directions. Dry this layer with a heat tool and repeat this same process with the other two paint colors.
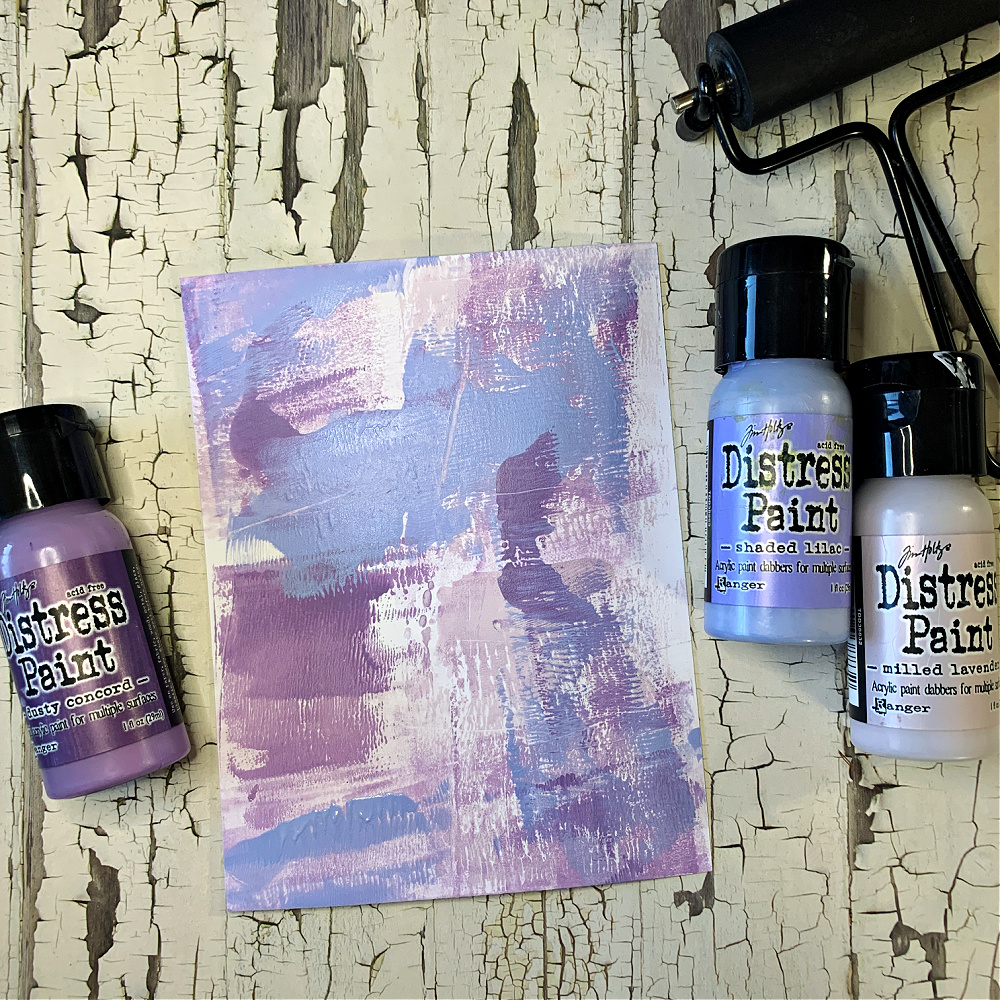
I chose to do other colors that are not traditional to Valentine’s Day. For this background I used Milled Lavender, Shaded Lilac and Dusty Concord Distress paints.
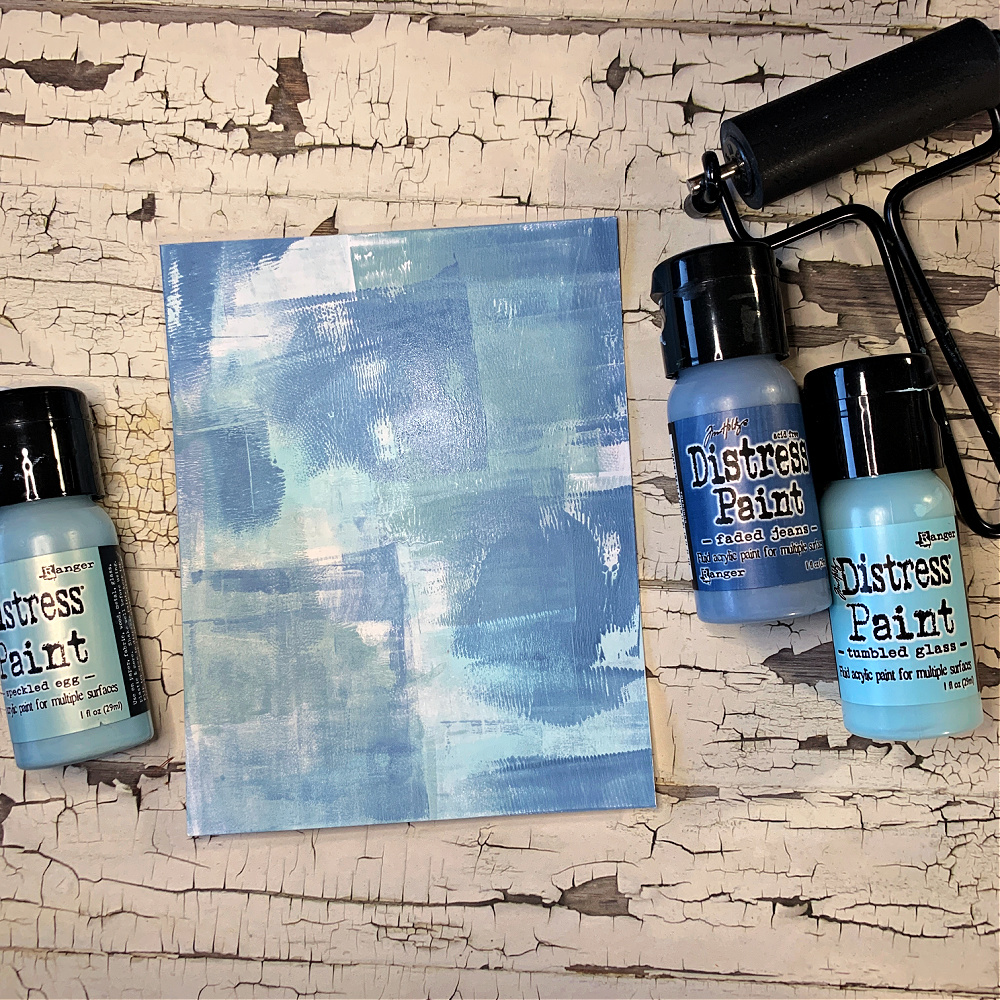
For the third background I chose Tumbled Glass, Faded Jeans and Speckled Egg Distress paints.
All three backgrounds were created using the same process with the brayer and drying each layer before adding another. Set these backgrounds aside to completely dry or you can dry them with a heat tool but they need to be completely dry before moving on to the next step.
Stamping the Images onto the Backgrounds
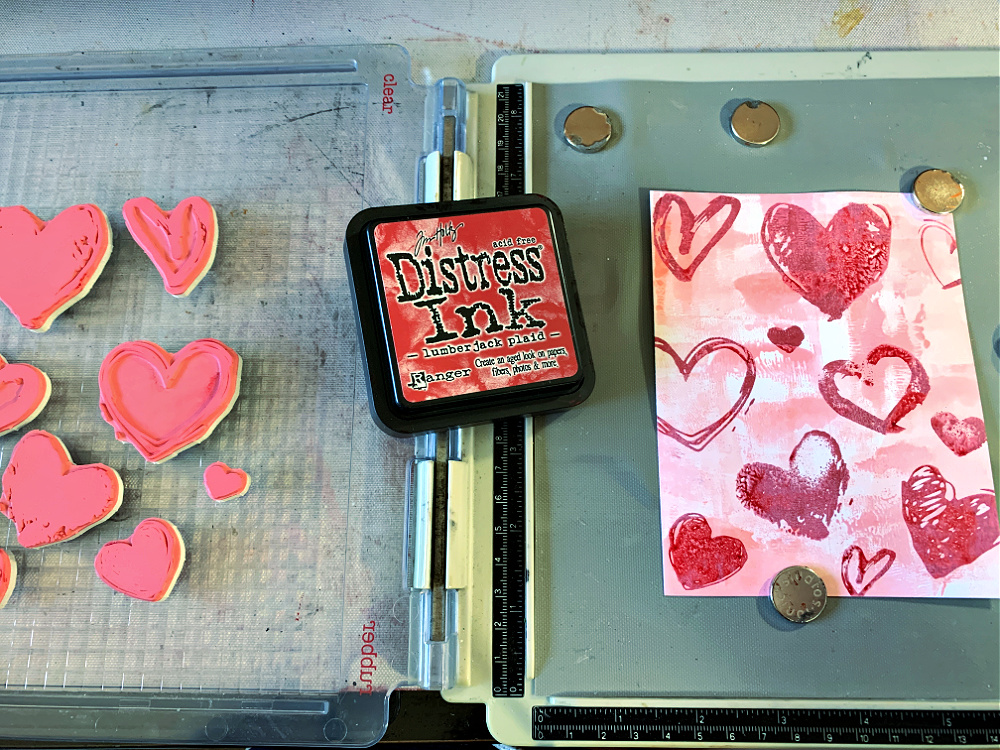
When the brayer painted backgrounds are completely dry, it’s time to stamp the hearts from the stamp set to your background. Place the background onto a stamping tool and chose the stamps you want for your background. Lay them over the cardstock where you want them to go and then pick up the stamps by closing the “door” of the stamping tool to pick them up.
For my traditional pink and red Valentine background I stamp the hearts with Lumberjack Plaid. You will probably need to stamp this several times but it helps to dry each layer before adding more ink. Whatever you do, DO NOT remove the background from the stamping tool.
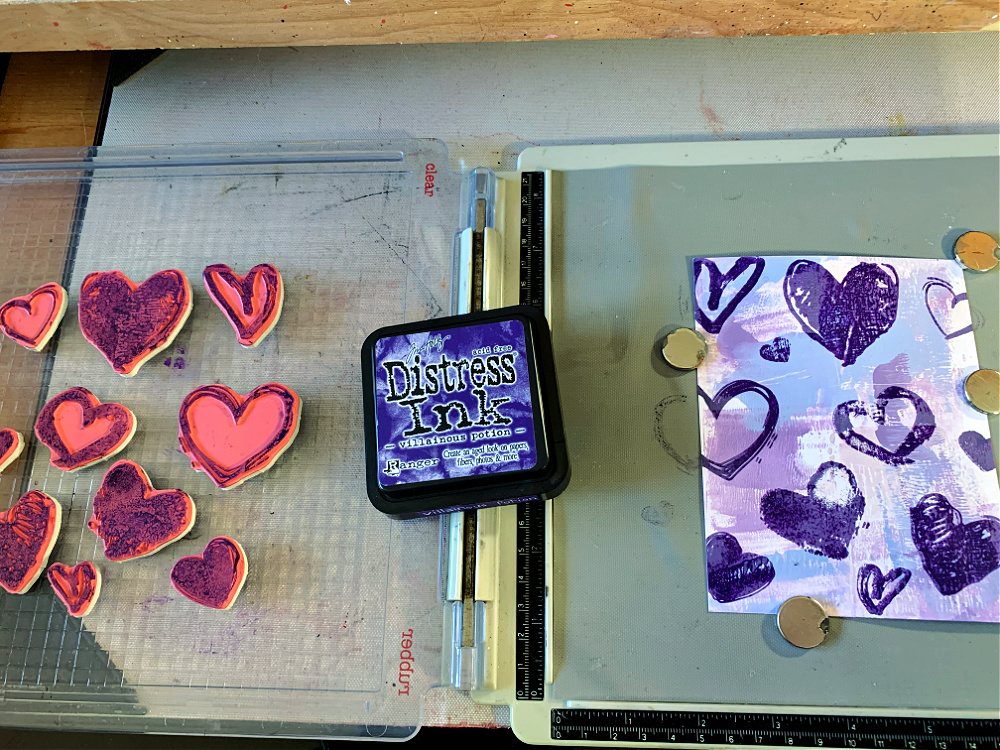
For the purple background I stamped the hearts with Villainous Potion using the same process.
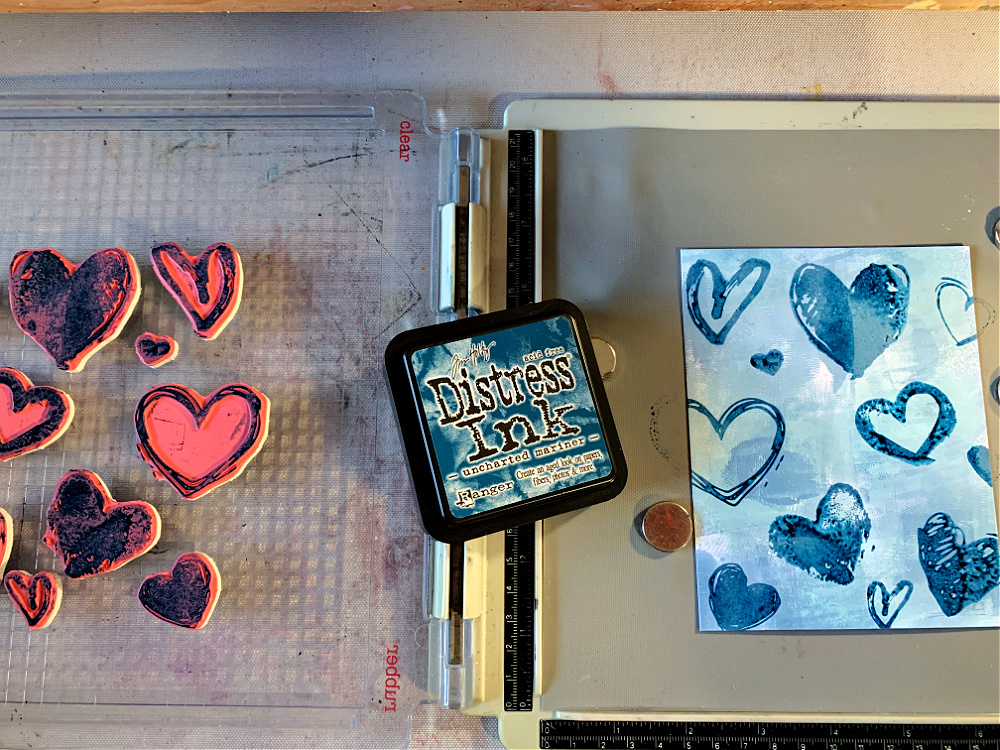
Lastly, for the blue background I stamped the hearts with Uncharted Mariner.
Creating the Gift Card Holders

Cut the gift cards using the new Tim Holtz Sizzix Vault Pillow Box and Bags Thinlits die set. Ink the edges with Vintage Photo Distress Ink. Assemble the gift card holders using the glue of your choice. I used a hot glue gun as I feel they will securely hold the design together with no chance of coming apart.
Added Bonus
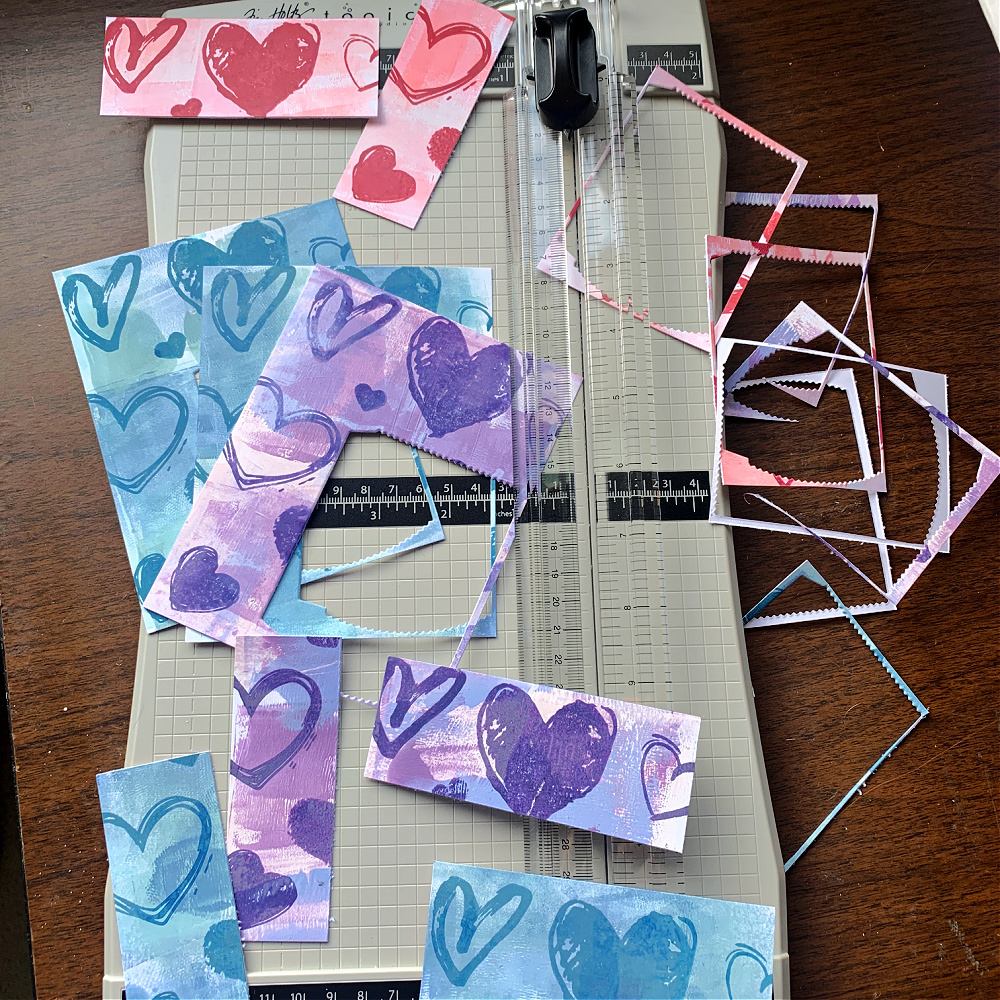
Don’t throw away the background that you used to cut out the gift cards. You can cut the remaining images with a paper trimmer and use those extra pieces on another Valentine or for another project later on.
Finish off your gift card holders however you like. First, I wrapped each holder with burlap twine. Next, I stamped three of the smallest hearts from the same stamp set in the same colors I used to stamp on the hearts in the background for each coordinating holder. I cut them out and applied them over the burlap string with 3D foam squares. I then stamped a few of the images from the stamp set and cut them out and applied them to the holders. For the blue holder, I used only a partial section of one of the sentiment stamps which is always fun to do. You don’t need to use the entire sentiment. Just stamp the entire image and cut out the part you want or only ink that area before stamping.
I hope you enjoyed seeing how I put these gift card holders together. This is such a fun stamp set that I’m going to create more and in the next day or two will have more to share. Watch my Instagram account for those. Thanks for sticking with me to the end. I appreciate the time you spend here with me more than you know.
You can find all the supplies I used to create this card at Simon Says Stamp (links below).

Tim Holtz Stampers Anonymous Love Notes Stamp Set (CMS477)
Tim Holtz Sizzix Vault Pillow Box and Bag Thinlits Die Set
Tim Holtz Ranger Distress Heavystock Cardstock
Distress Paints: Spun Sugar, Saltwater Taffy, Kitsch Flamingo
Distress Paints: Tumbled Glass, Faded Jeans, Speckled Egg
Distress Paints: Milled Lavender, Shaded Lilac, Dusty Concord
Distress Inks: Lumberjack Plaid, Villainous Potion, Uncharted Mariner and Vintage Photo


