
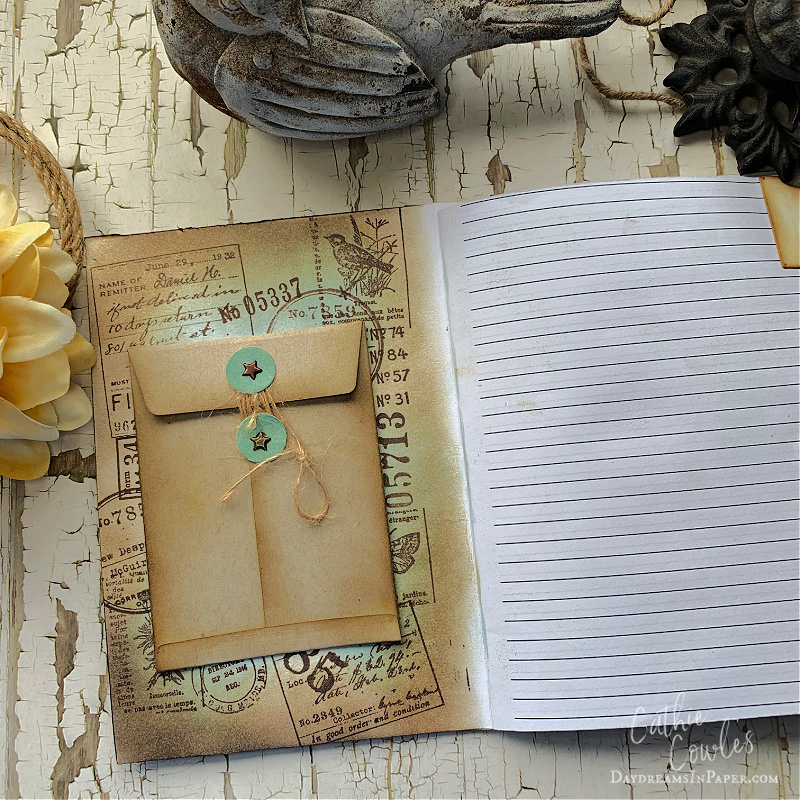
I love to make notebooks and the new Chapter 3 release from Tim Holtz and Sizzix is the perfect collection of dies to create awesome notebooks so I plan on making a ton more. For my first notebook I decided to use the Numbered 3D Texture Fade embossing folder. The tutorial focuses on how I created the notebook. Enjoy!

Let’s Begin:
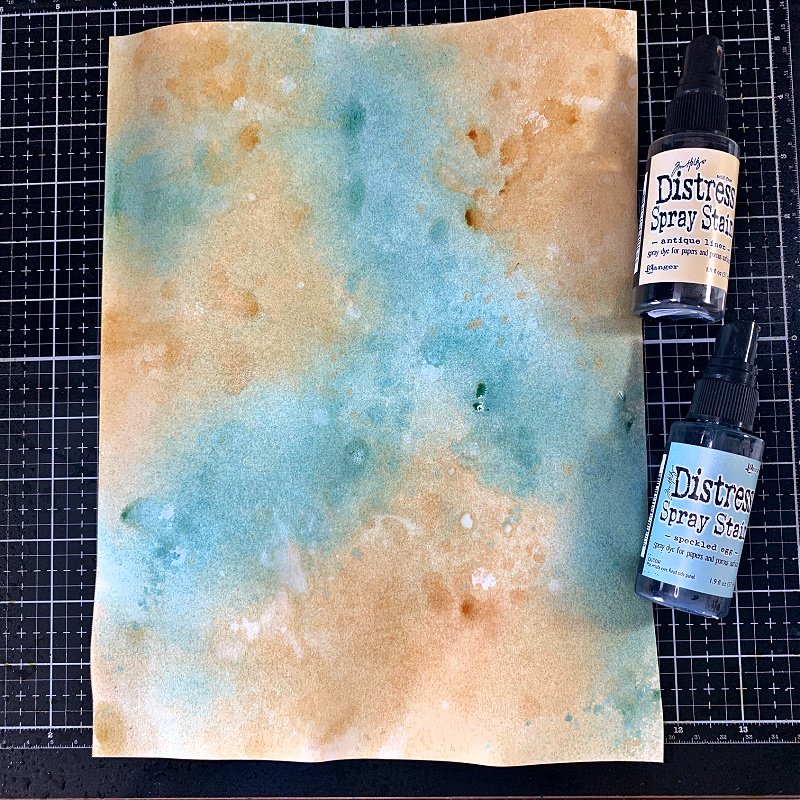
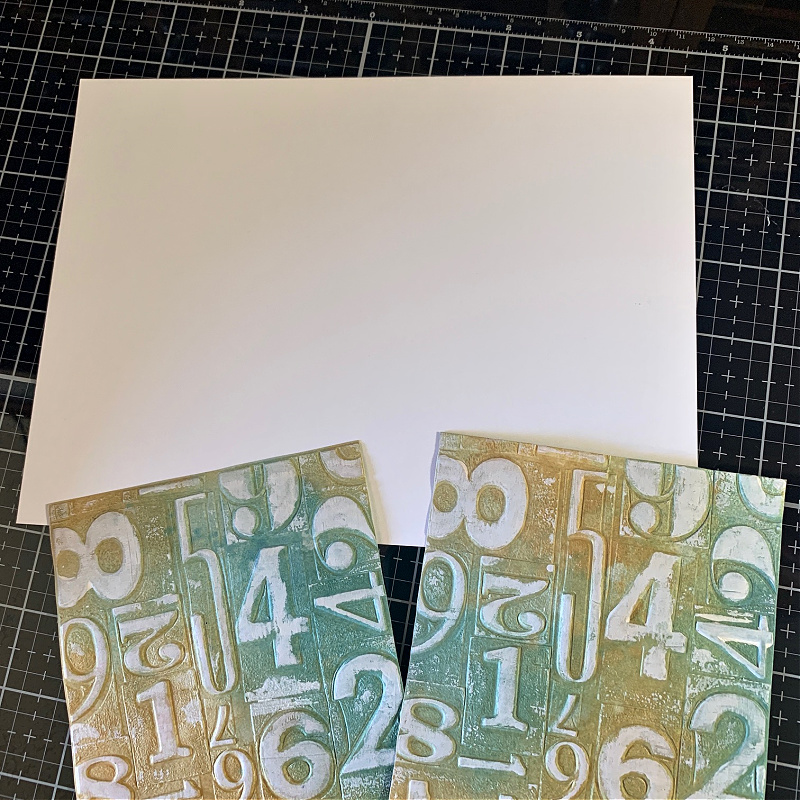
I begin by spraying an 8.5″ x 11″ piece of Canson Mixed Media 98 lb. cardstock with Antique Linen and Speckled Egg Distress Spray Stain. I spritzed the cardstock with the sprays and a little water and continued this process about three times when I was finally happy with the outcome. Make sure to dry each layer of spritzing before adding another layer.
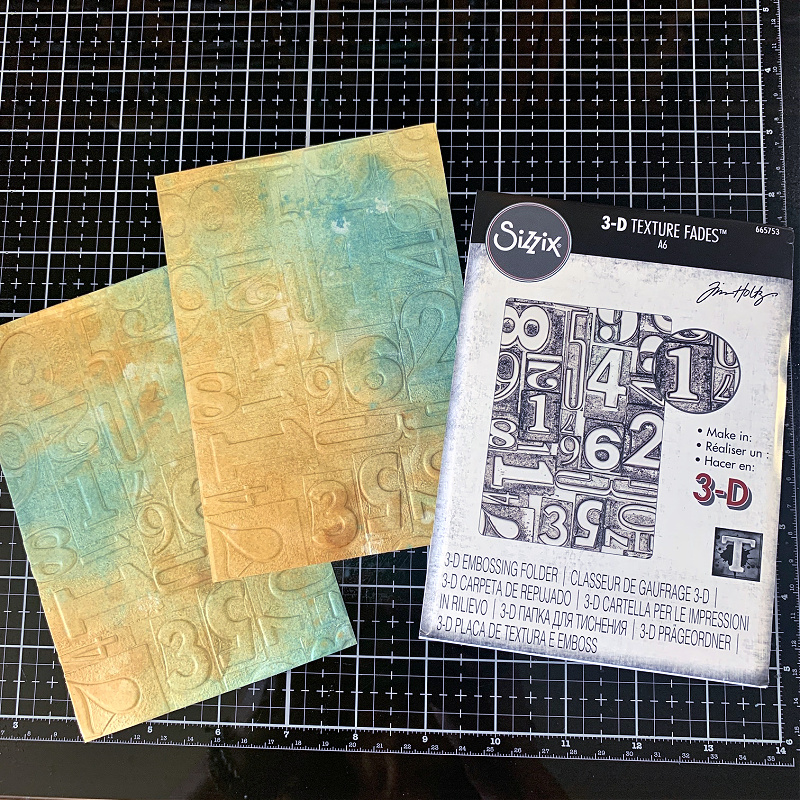
I cut the cardstock down to the size of the embossing folder and embossed two pieces with the Tim Holtz Numbered 3D Texture Fade embossing folder. One piece will be for the front cover and the other for the back cover of the notebook.
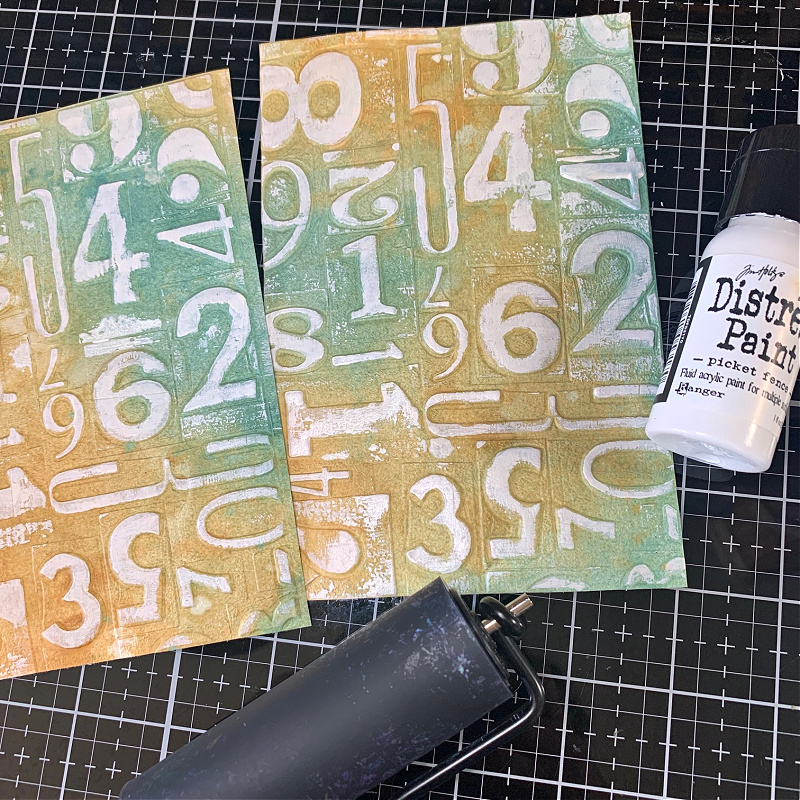
After embossing the cardstock pieces, I added Picket Fence Distress Paint over the raised areas of the image. I did this by picking up a bit of paint with a brayer and lightly rolling it over the cardstock to cover the raised areas. This makes the numbers pop.
To create the notebook, cut a piece of heavy cardstock to 8.75″ x 6.25″.

Use a bone folder to crease the 8.75″ x 6.25″ notebook cover in half as shown above.
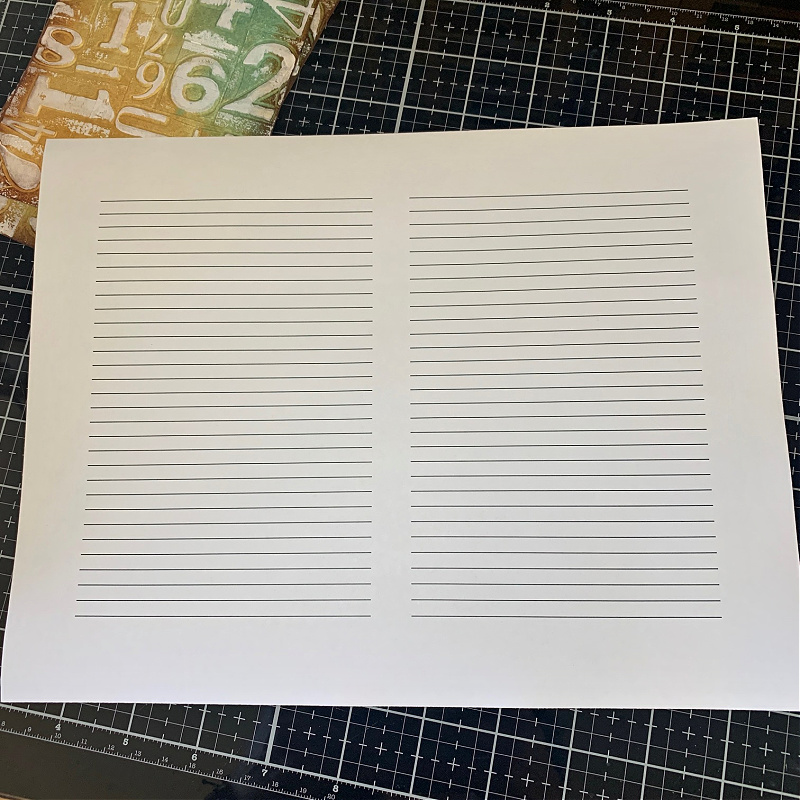
Using your computer create double-sided 2-column notebook sheets as shown above. Print them out onto regular computer paper.
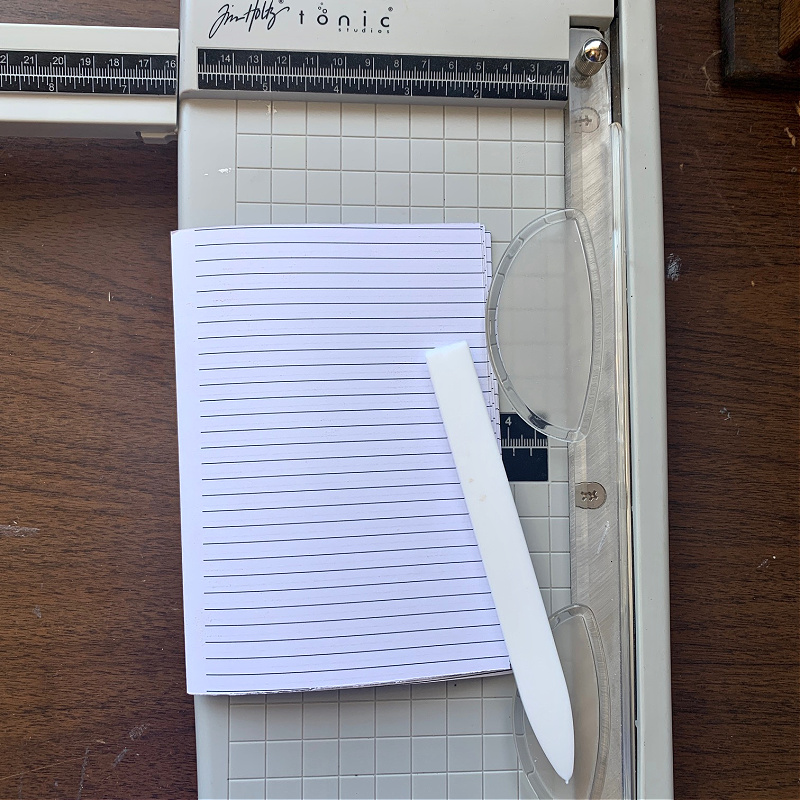
Cut the top and bottom just above the first and last lines of the paper. Cut the open edge at the end of the lines that run across the page. Fold the sheets of lined notebook paper in half and crease the edge with a bone folder as shown above.
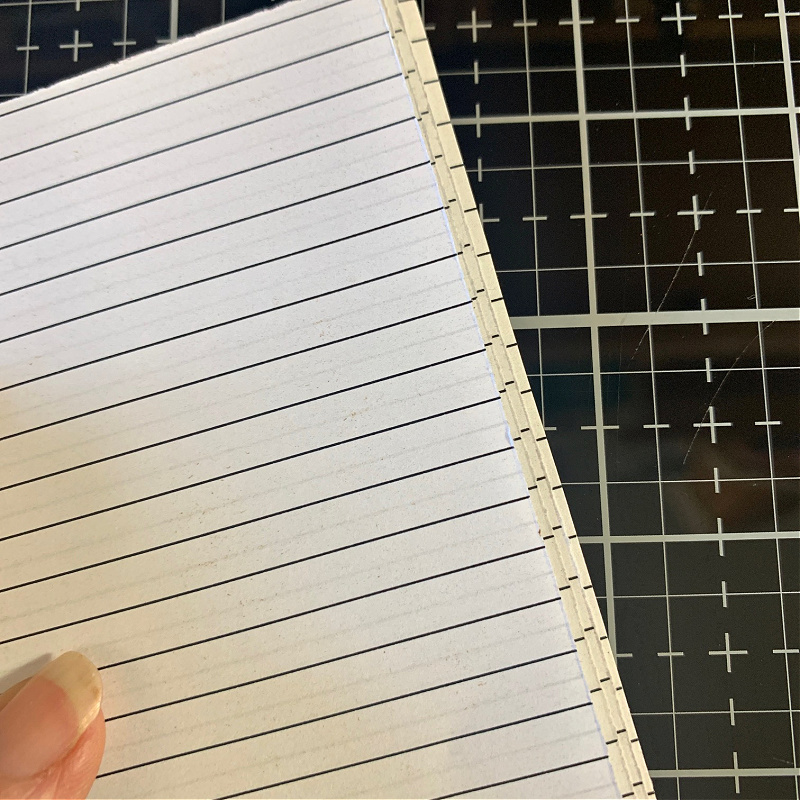
The edges will be uneven as shown above but don’t worry about that now. (You will cut those down to size once the embossed front and back are attached.) Place these lined sheets inside the 8.75″ x 6.25″ piece of heavy cardstock that was created in steps 4 & 5.
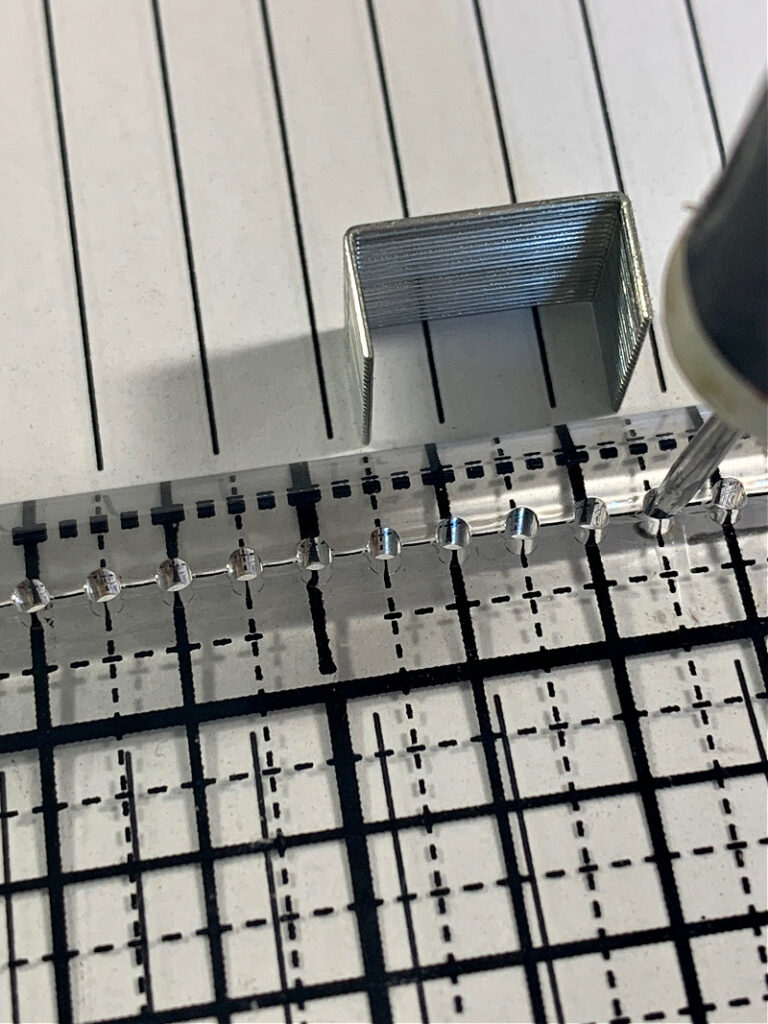
I don’t have a long armed stapler so I’ll show you how to staple the pages together using standard staples that you probably have on hand. Take a pack of staples and break a small stack as shown above. Open the folded lined paper you just created and place the holes of the Tim Holt design ruler along the folded line. Line the of ends of the staples up with the holes on the ruler and punch a hole through the lined paper.
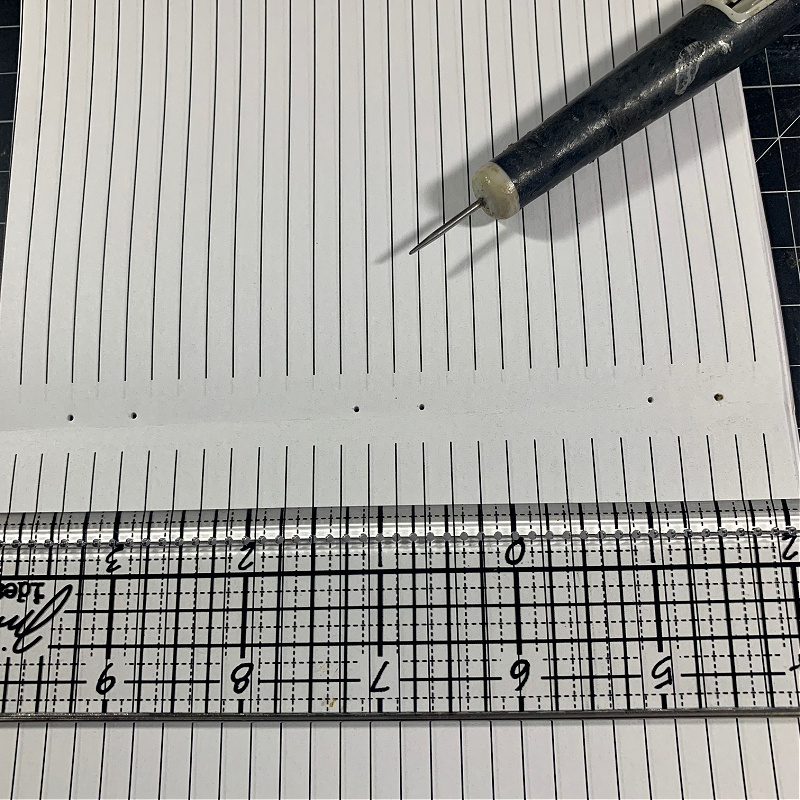
Create three sets of holes for the staples as shown above. You will want one staple at the top, in the center and on the bottom.
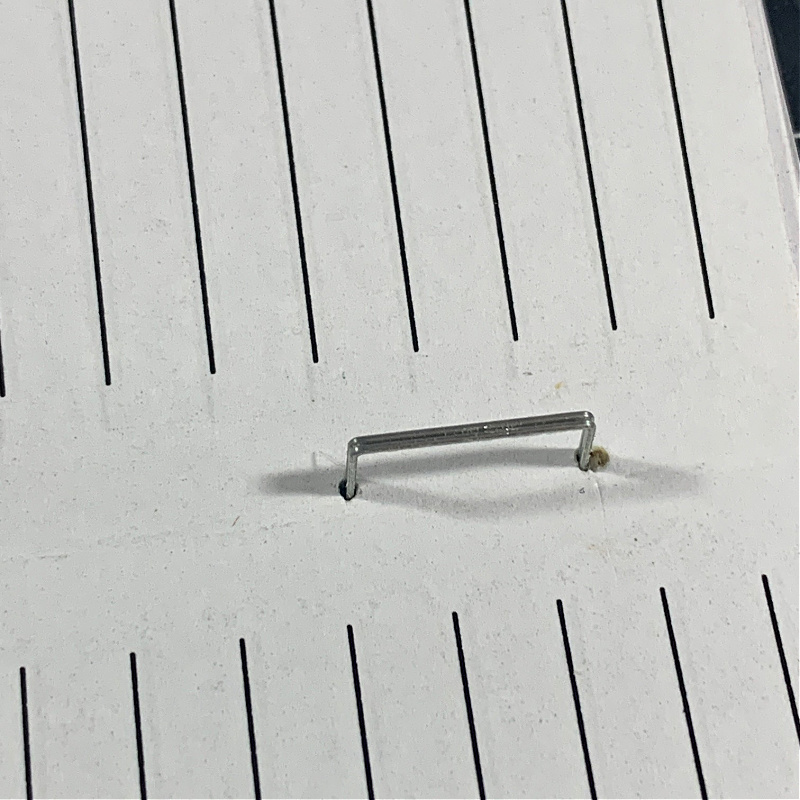
Try to peel two staples from your staple stack so they stay adhered together. (By using two staples this will add extra strength.) Push the ends through the holes you created on the stacked notebook paper so they go completely through to the other side and do this for all three of the staple holes you’ve punched.
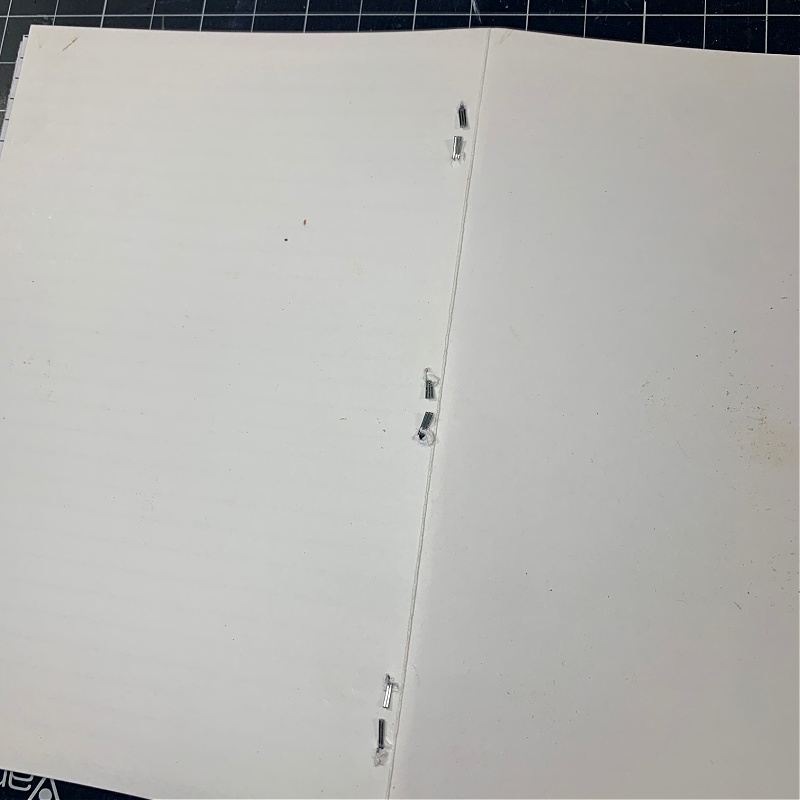
Bend the ends of the staples toward each other and don’t worry if they are straight or not, they will be covered so you won’t see them when the notebook is finished.

Before adhering the front and back covers to the notebook, ink the edges with Vintage Photo Distress Ink. Allow to completely dry before adhering them to the notebook.
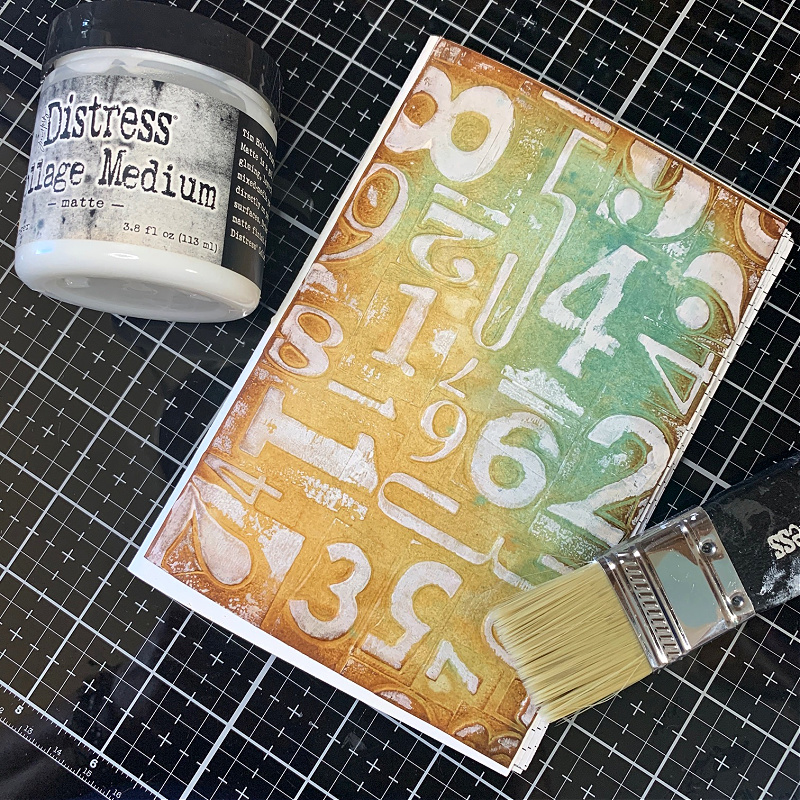
Now it’s time to adhere the embossed front and back covers to the notebook. Brush the blank side of the embossed front cover piece with Distress Collage Medium and place that piece lined up to the cut edge of the front of the notebook. Do not adhere it to the folded edge. Complete this process for the back cover piece as well. Place your notebook under something heavy for about 5 minutes until the collage medium is dry and the cover is set in place. This will ensure the corners and edges will not curl up while the glue is drying.
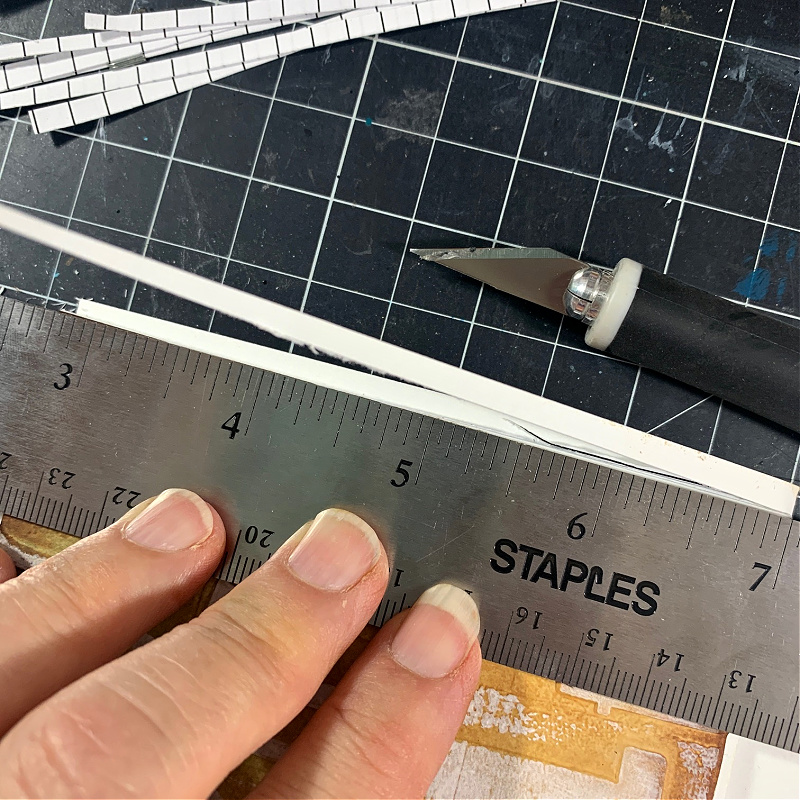
Place a metal ruler along the edge of the notebook cover and slowly run an exacto knife along the edge with light pressure cutting away one or two pieces at a time. Continue doing this lightly until all of the pieces of the lined paper are cut away. Trust me when I say do this step slowly and carefully. Rushing this process or applying to much pressure to the ruler will result in uneven pieces and even possibly moving the ruler allowing the cover to get spliced.
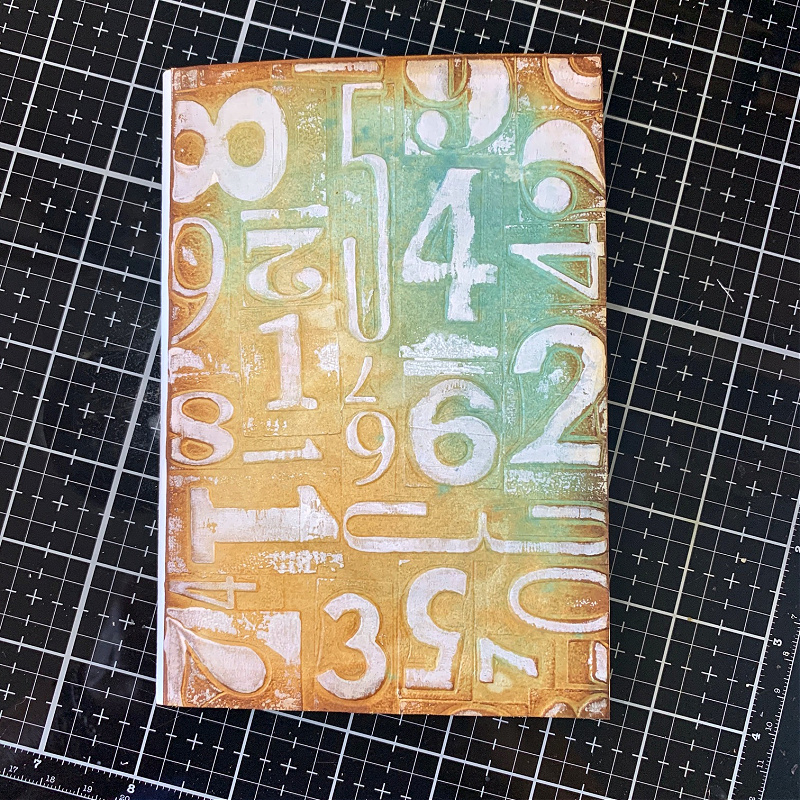
This is what your notebook should look like after cutting all the lined paper evenly from the side edge of the notebook. The exposed white line along the folded part of the notebook is what we will cover next.
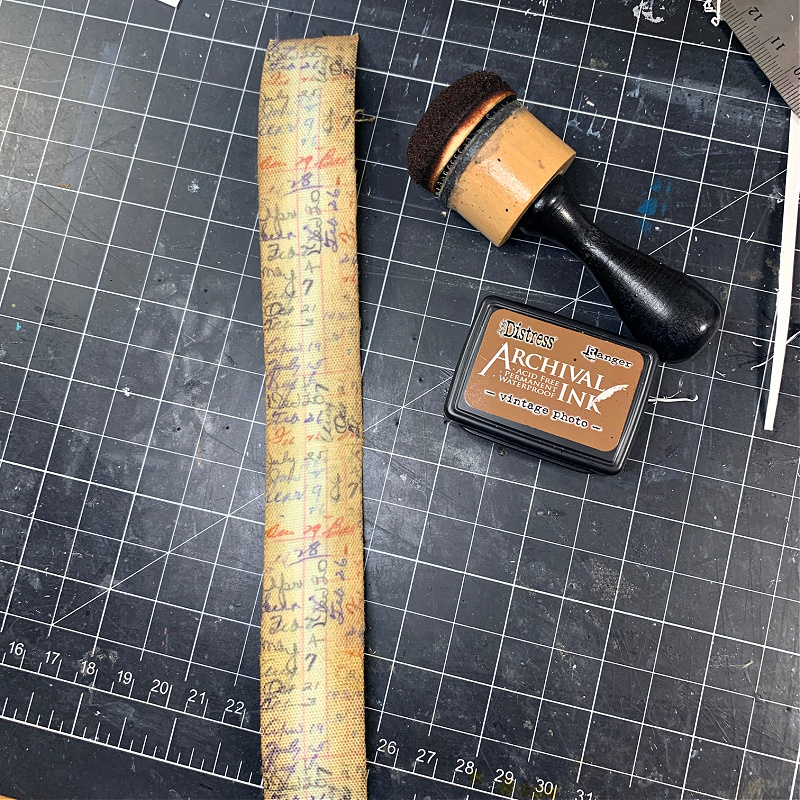
Measure the long side of your notebook and cut a piece of Tim Holtz Idea-ology linen tape two inches longer than that measurement. Ink the edges with Vintage Photo Archival Ink.

Using a scoreboard and bone folder mark or crease all the way down the center of the linen tape on the back side of the tape.

Remove the backing from the tape and lay it down on your surface. Carefully align the notebook folded edge to the center crease you created on the linen tape and press down.
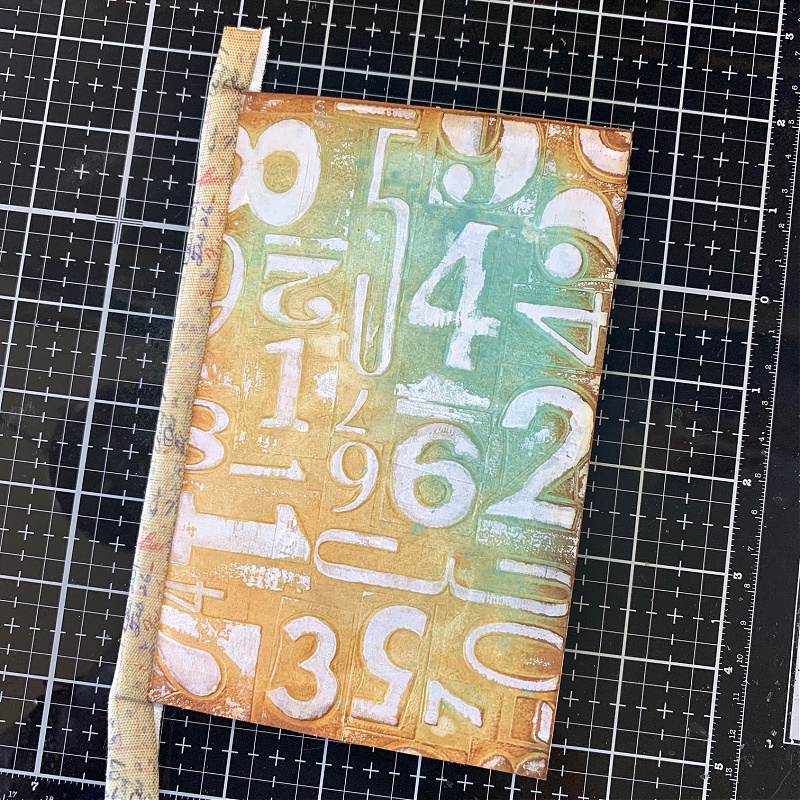
Now fold the top half of the linen tape over the top side of the notebook and press all along the edge to adhere it to the notebook. (After a few minutes the tape began to curl up and did not adhere strongly to the notebook so I carefully lifted the tape and added collage medium under the tape for a more secure bonding. I did this to the back linen piece of the notebook as well. I then placed some clamps along the linen tape until the collage medium completely dried to make sure the bonding was set and strong.)

For the last step, open the notebook up and cut the excess linen tape from the top and bottom edges and your notebook is done! Now it’s time to decorate the cover however you wish.
If you’re interested in seeing some other notebooks I’ve made in the past you can find them here:
Happy, Cheerful Notebooks – Tammy Tutterow Designs
Handmade Notebook – Quick and Easy
I hope you enjoyed seeing how I created this notebook and that you’ll give it a try. Thank you so much for spending your time here with me and sticking with me to the end.
Have a awesome weekend!!

Tim Holtz Sizzix Alphanumeric Theory Thinlits Dies
Tim Holtz Sizzix Collector Thinlits Dies
Tim Holtz Sizzix Specimen Thinlits Dies
Tim Holtz Sizzix Numbered 3D Texture Fades Embossing Folder
Tim Holtz Stampers Anonymous Field Notes Stamp Set
Canson Mixed Media 98lb. Cardstock
Neenah Solar Smooth White 110lb. Cardstock
Tim Holtz Ranger 8.5″ x 11″ Distress Cracked Leather Cardstock
Tim Holtz Ranger 8.5″ x 11″ Kraft Heavystock
Tim Holtz Ranger Antique Linen Distress Spray Stain
Tim Holtz Ranger Speckled Egg Distress Spray Stain
Tim Holtz Ranger Ground Espresso Archival Ink
Tim Holtz Ranger Vintage Photo Distress Ink
Tim Holtz Ranger Picket Fence Distress Paint
Tim Holtz Ranger Medium Distress Brayer
Tim Holtz Ranger 8.5″ x 11″ Mixed Media Heavystock
Tim Holtz Idea-ology Floral Linen Tape
Tim Holtz Ranger Distress Collage Medium Matte
Tim Holtz Ranger Distress Collage Brushes
Tim Holtz Ranger Distress Sprayer
Tim Holtz Sizzix Big Shot Die Cut Machine
Tim Holtz Sizzix Sidekick Die Cut Machine
Tim Holtz Idea-ology Design Ruler
Tim Holtz Tonic Retractable Craft Pick
Dahle Self-Healing 18′ x 12″ Cutting Mat
Tim Holtz Tonic Titanium Snip Scissors


Fun stuff…can make it with whatever paper you want to use inside.