
Hello Friends! Do you ever wonder what to do with all the leftover Tim Holtz layers, baseboard, snippets, ephemera or Idea-ology pieces? My collection is getting so big and I’m trying to think of ways to use it up so today I’m sharing a tutorial I created for my Beauty of Autumn framed picture that does just that. I’ve used Tim’s ephemera, layers etc. to create backgrounds before and love the results but I continually forget to pull them out and use them. They’re tucked away neatly in bins on my shelf and I have to admit I don’t pull them out as often as I should. I was inspired by Cheiron Brandon and her beautiful creations from the new Christmas Idea-ology collection to get them out and start creating. Just in case you don’t follow her, here is a link to her blog. She’s amazing and I love everything she creates because she has a gift of knowing where to put color in unexpected places and it makes me smile every single time. Okay, now on to the tutorial. Enjoy!
Begin by creating an inky background. (I used Tea Dye, Vintage Photo, Bundled Sage and Shabby Shutters Distress Inks and Vintage Photo and Tea Dye Distress Oxides.) Layer the inks on one by one making sure to dry each layer before moving on to the next. When the panel is completely dry, stamp on the script image from the Stampers Anonymous Ledger Script stamp set (CMS241) in Ground Espresso Archvial ink. Lastly, ink the edges with Gathered Twigs Distress Ink.
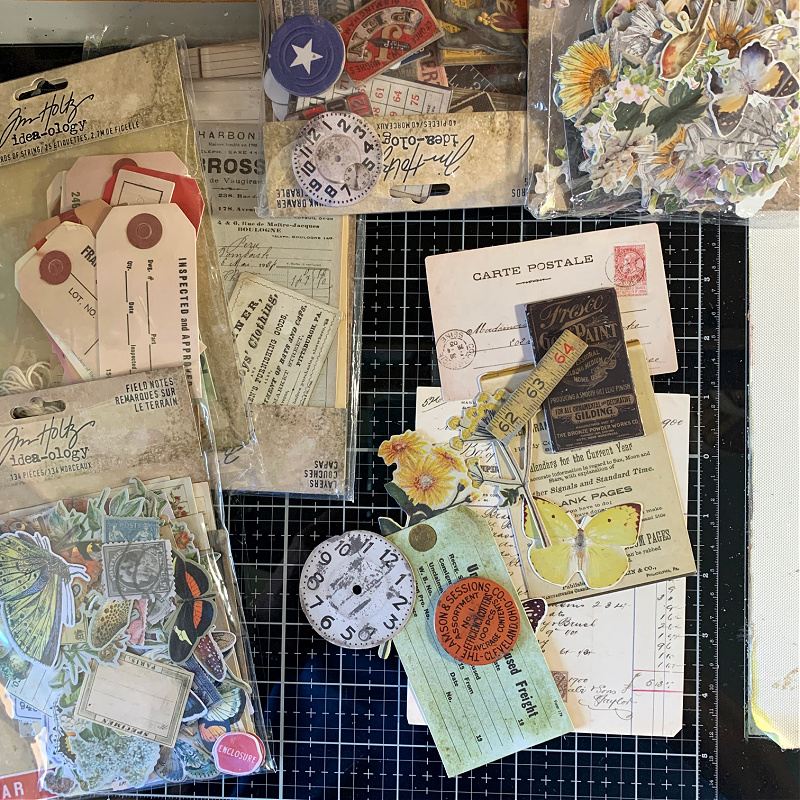
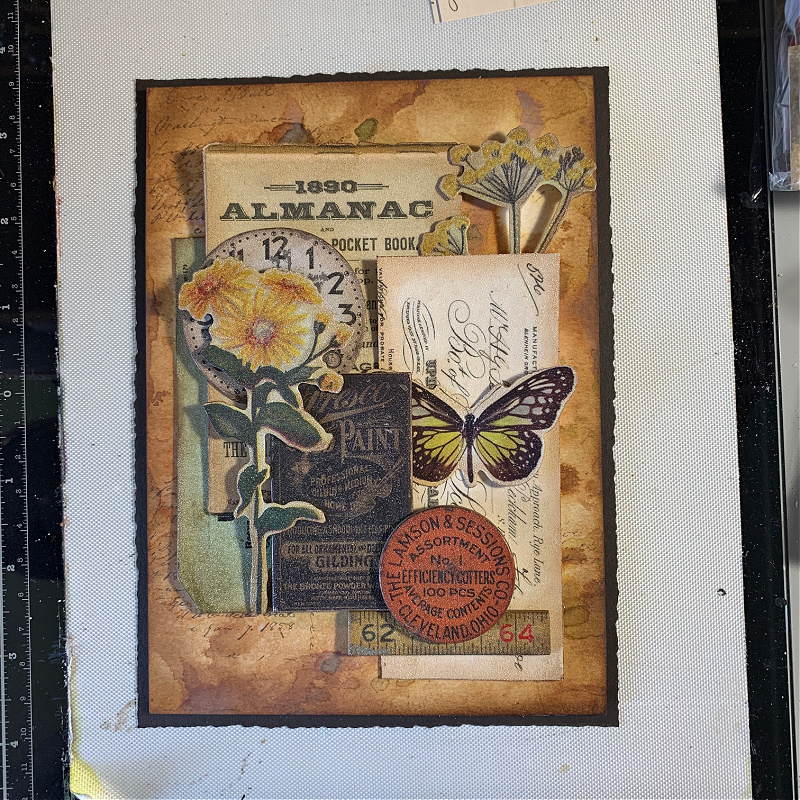
Now that the main panel is set aside drying, get out a good variety of Tim Holtz layers, ephemera, baseboards, tags, snippets and whatever else you have and pull out images that go well together for your theme. (My theme is Autumn, so I gather images in greens, yellows, oranges and browns.)
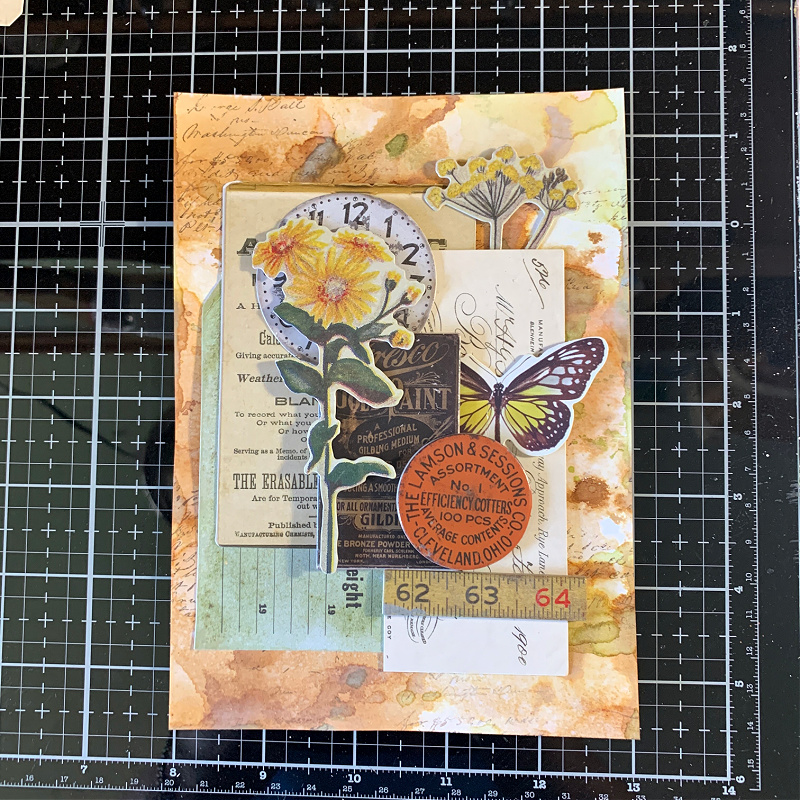
Take all the images you gathered and lay them on the main panel to see how they work together. When you like what you see, take a photo of it so you remember where everything is placed.

Dab one image at a time with the Distress Embossing Dabber and cover it with Distress Frosted Crystals. By doing this you will be able to ink the edges with Distress inks or archival inks to give them depth. If this step is not done, your inks will not be permanent and will smudge when you touch them. Of course, if you don’t want inked edges, just skip this step.
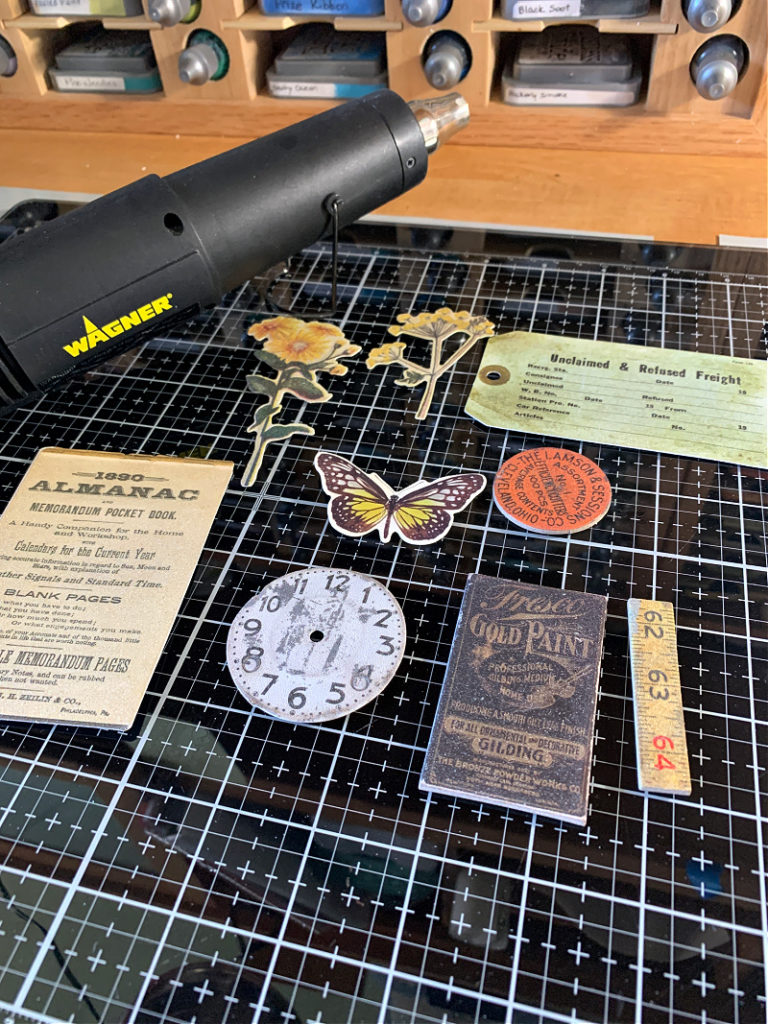
Using a heat tool, melt the frosted crystal to seal the images. Allow them to completely cool before inking the edges.

Ink the edges with whatever ink you choose. This gives them a more vintage, aged look. I used Vintage Photo Distress Ink.
To create the top frame piece, paint it with white gesso and allow it to completely dry. Dab the edges and design of the frame with Old Paper Distress Paint using your fingertips. Allow to completely dry. Using sandpaper, sand away some of the paint in random areas and remove the dust. This exposes the raw wood below which gives it a nice aged look. Add a bit of Vintage Photo Distress Crayon pigment to the frame by rubbing it on your fingertip directly from the crayon and applying it to the edges and design of the frame. This adds nice depth and aging for a vintage look. Set aside.
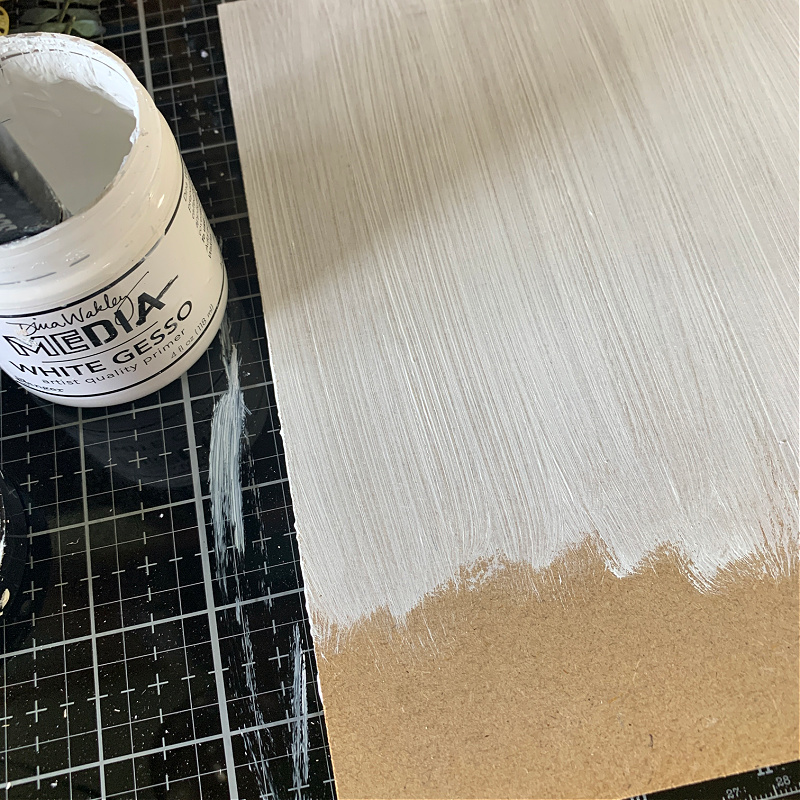
Cover the base of the frame with white gesso and allow to completely dry.
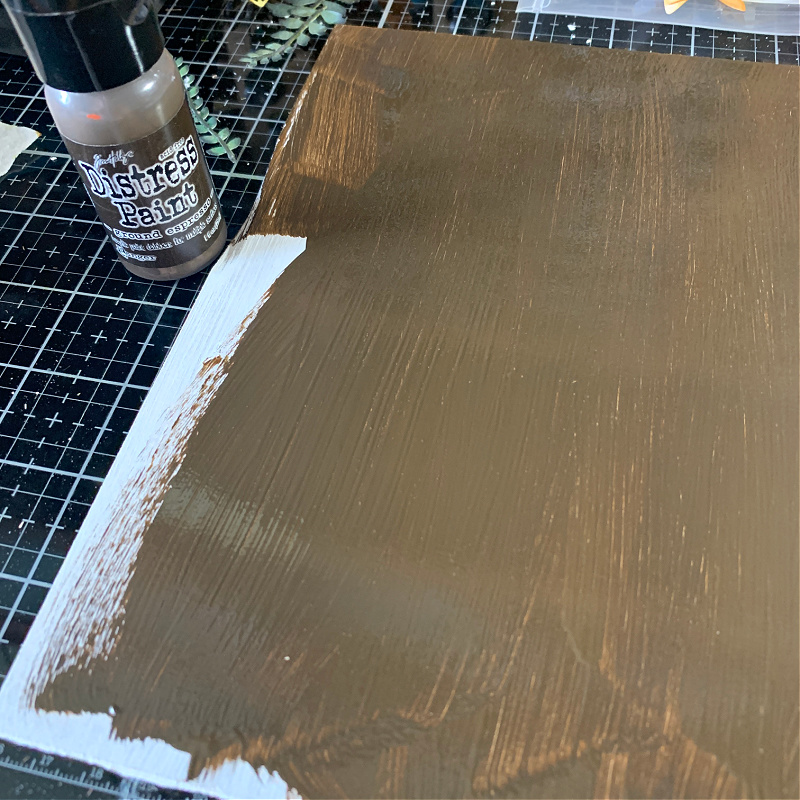
When the white gesso is completely dry, paint the entire panel with Ground Espresso Distress Paint. Set aside to completely dry.
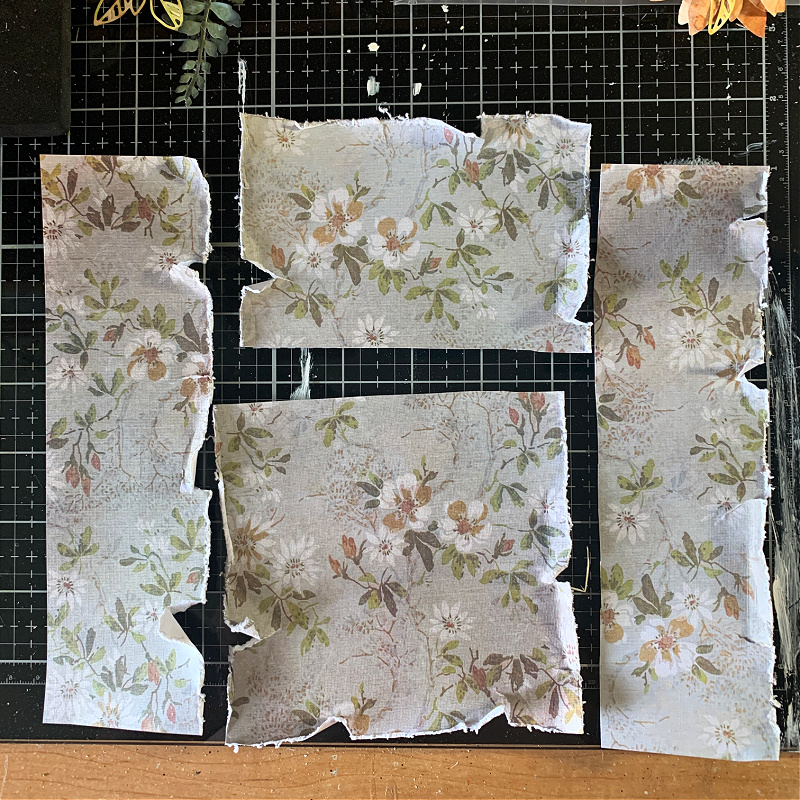
Choose an image of worn wallpaper from any of the ones you have on hand. I used one of the Halloween worn wallpaper images from last year. There are two images to each pack. Cut each piece of wallpaper as shown above and distress and tear the edges. I decided not to ink the edges because I wanted the white of the edges to stay white but you could ink them if it’s just too white for your project.

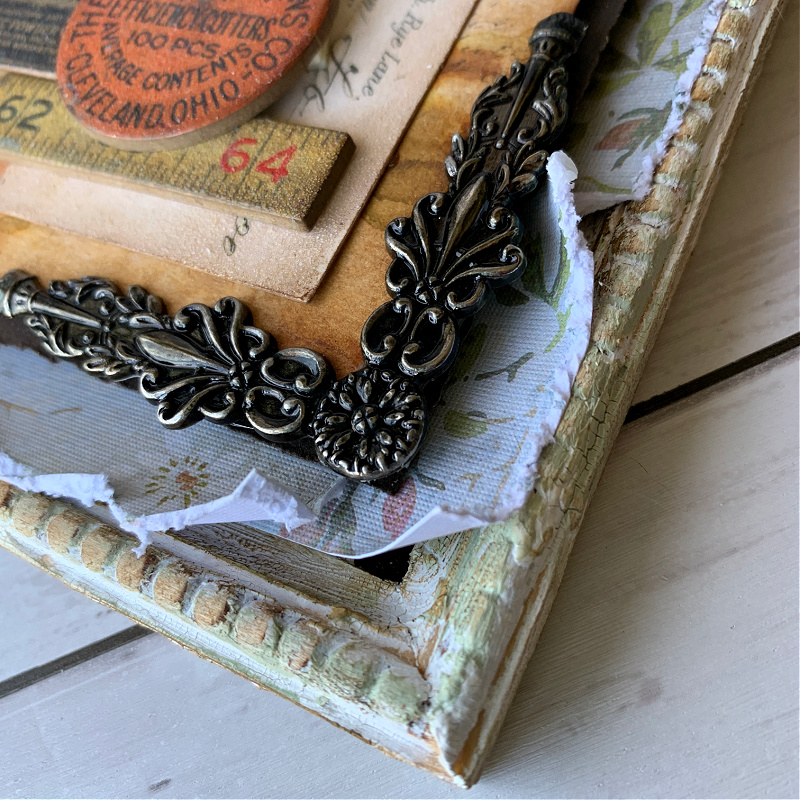
Adhere the top decorative frame piece to the base of the frame. (Usually the top decorative frame piece is adhered to the base after applying a background, but for this project you need to add the decorative frame before adhering the background.)
Next, adhere the four pieces of worn wallpaper to the base of the frame as shown above. Notice how I have the wallpaper overlapping the decorative frame a bit. This is intentional. If you want the entire decorative frame to show, adhere it to the inside without overlapping the decorative frame. In the center of the background, adhere a foam piece to elevate the main background above the worn wallpaper. (I purchase 9×12, 6mm sized sheets of black foam to add dimension to my projects wherever I need it. It’s great to use behind a false wall in vignette boxes for certain projects, as well, so you can create a space for tiny lights if needed. I cut the foam to the size I need for the project.)
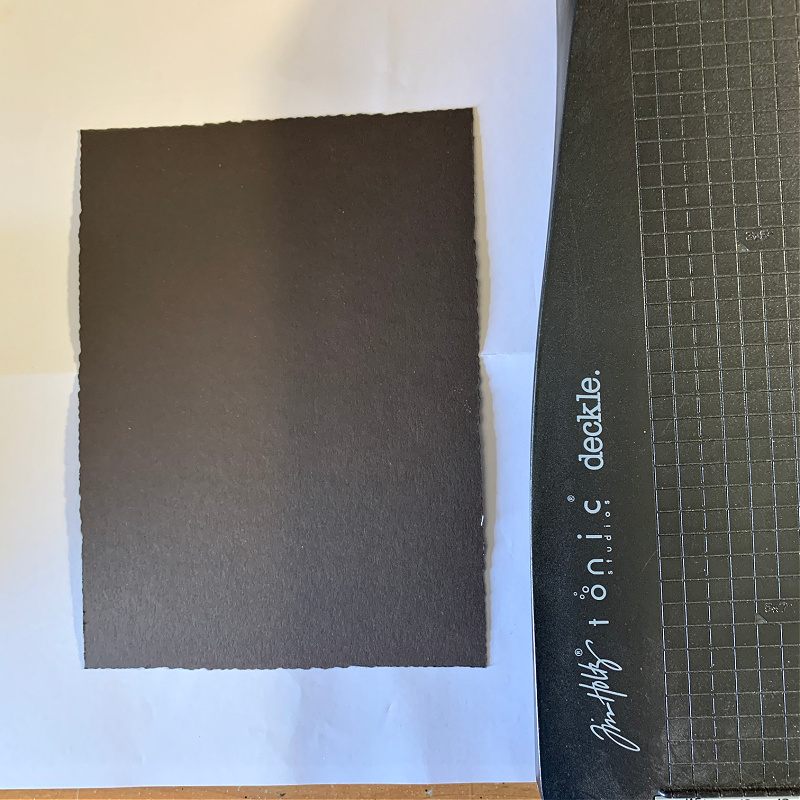
Cut a piece of coordinating colored cardstock to place behind your main panel. (I used Simon Says Stamp Dark Chocolate cardstock) Cut the edges with the Tim Holtz Deckle Edge cutter.
Adhere the cardstock piece behind the main panel as shown above.
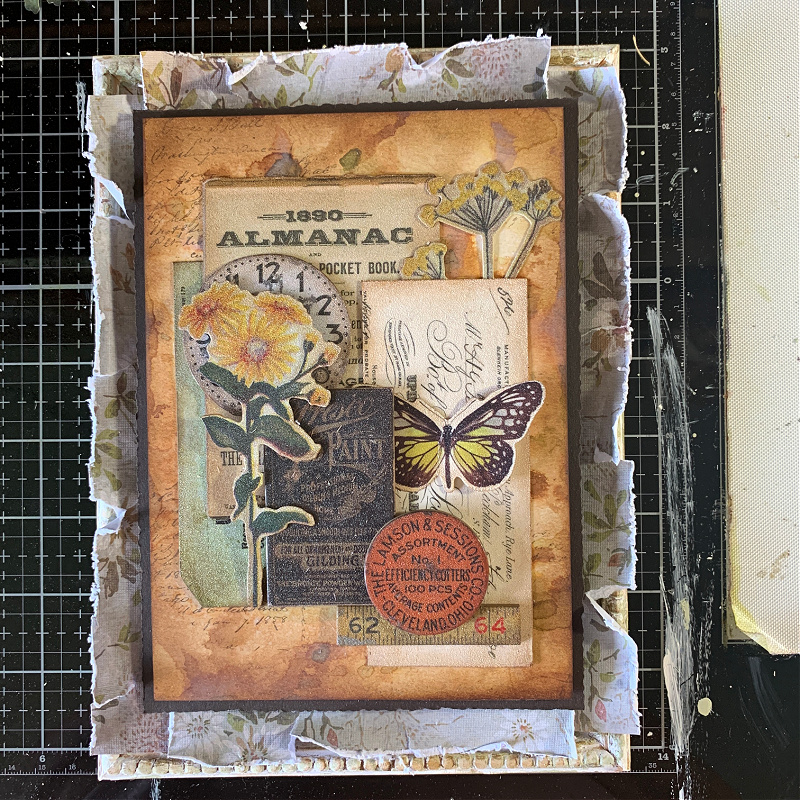
Adhere the main panel in the center of the frame over the black foam piece. Now you’re ready to add whatever you want to the piece.
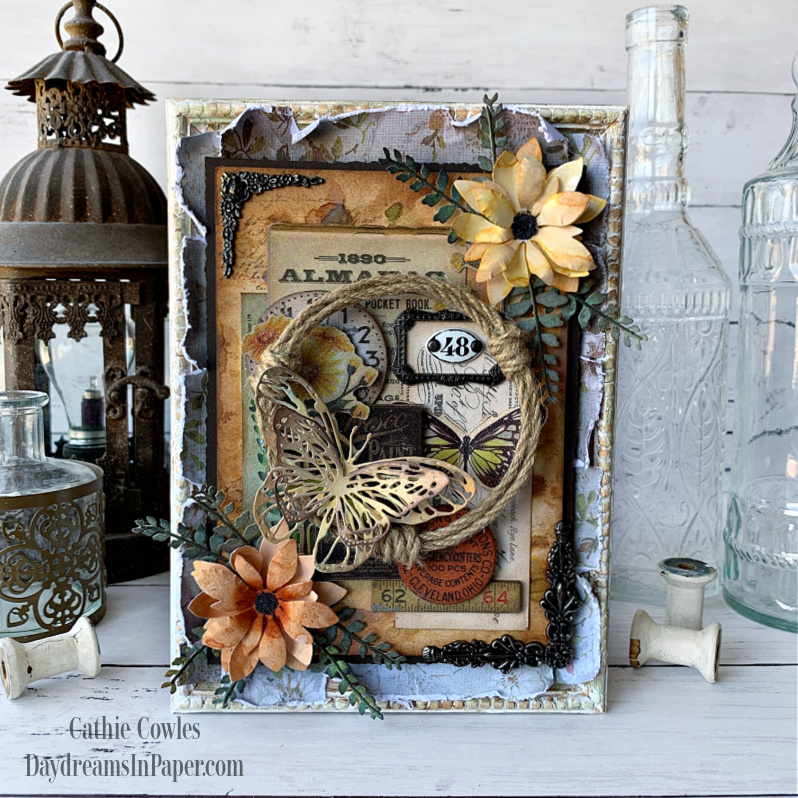
To finish my project, I created some flowers from the Tim Holtz Seasonal Sketch die set (665579). I also added some foliage from the Funky Nature die set and a butterfly from the Scribbly Butterfly die set. A handmade twine circle and a few pieces of Idea-ology colored with Mushroom alcohol ink.
I hope you enjoyed seeing how I put together my Beauty of Autumn framed panel and that you found some of these steps useful for your next project. Thanks so much for stopping by and sticking with me to the end. I so appreciate the time you take to spend it here with me.

Tim Holtz Seasonal Sketch Die Set
Tim Holtz Sizzix Funky Nature Die Set
Tim Holtz Scribbly Butterflies Die Set
Tim Holtz Idea-ology Botanical Layers
Tim Holtz Junk Drawer Baseboards
Tim Holtz Field Notes Ephemera Pack
Tim Holtz Halloween Worn Wallpaper
Distress Paints
Distress Inks
Distress Oxides
Distress Spray Stains for Flowers
Tools and Adhesives, Etc
Ranger Frosted Crystals Embossing Powder
Tim Holtz Deckle Torn Edge Trimmer


