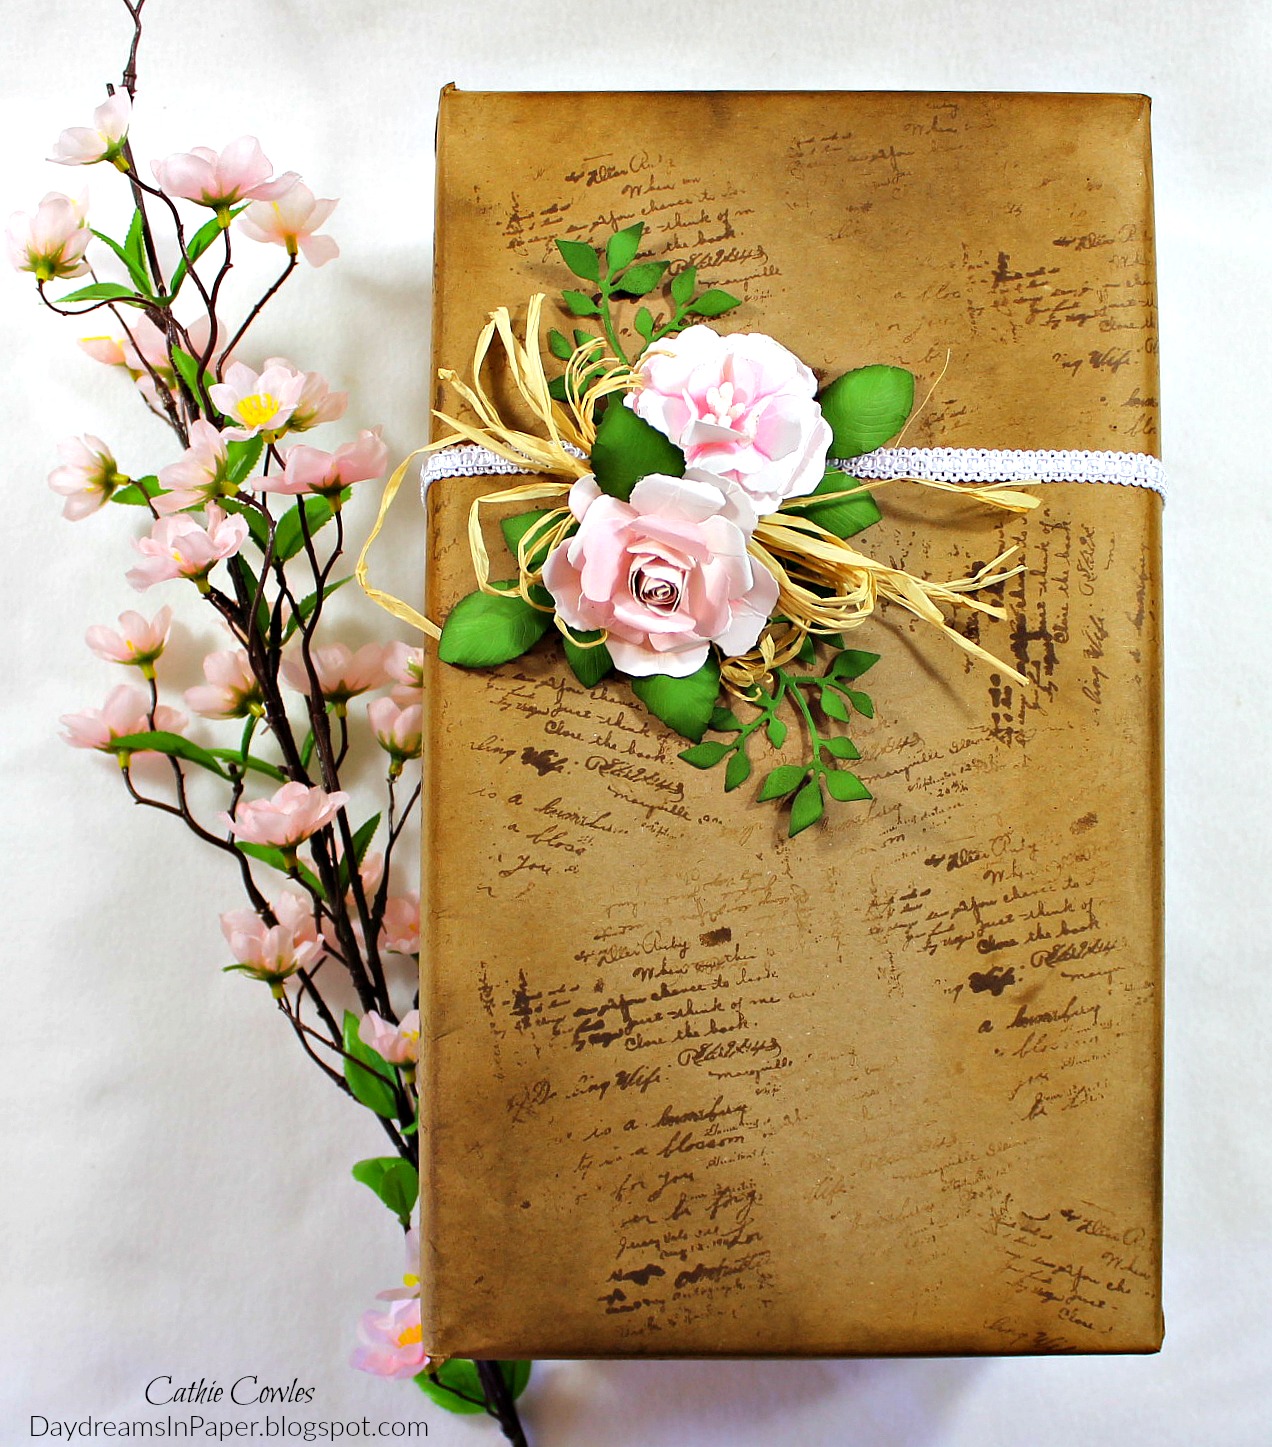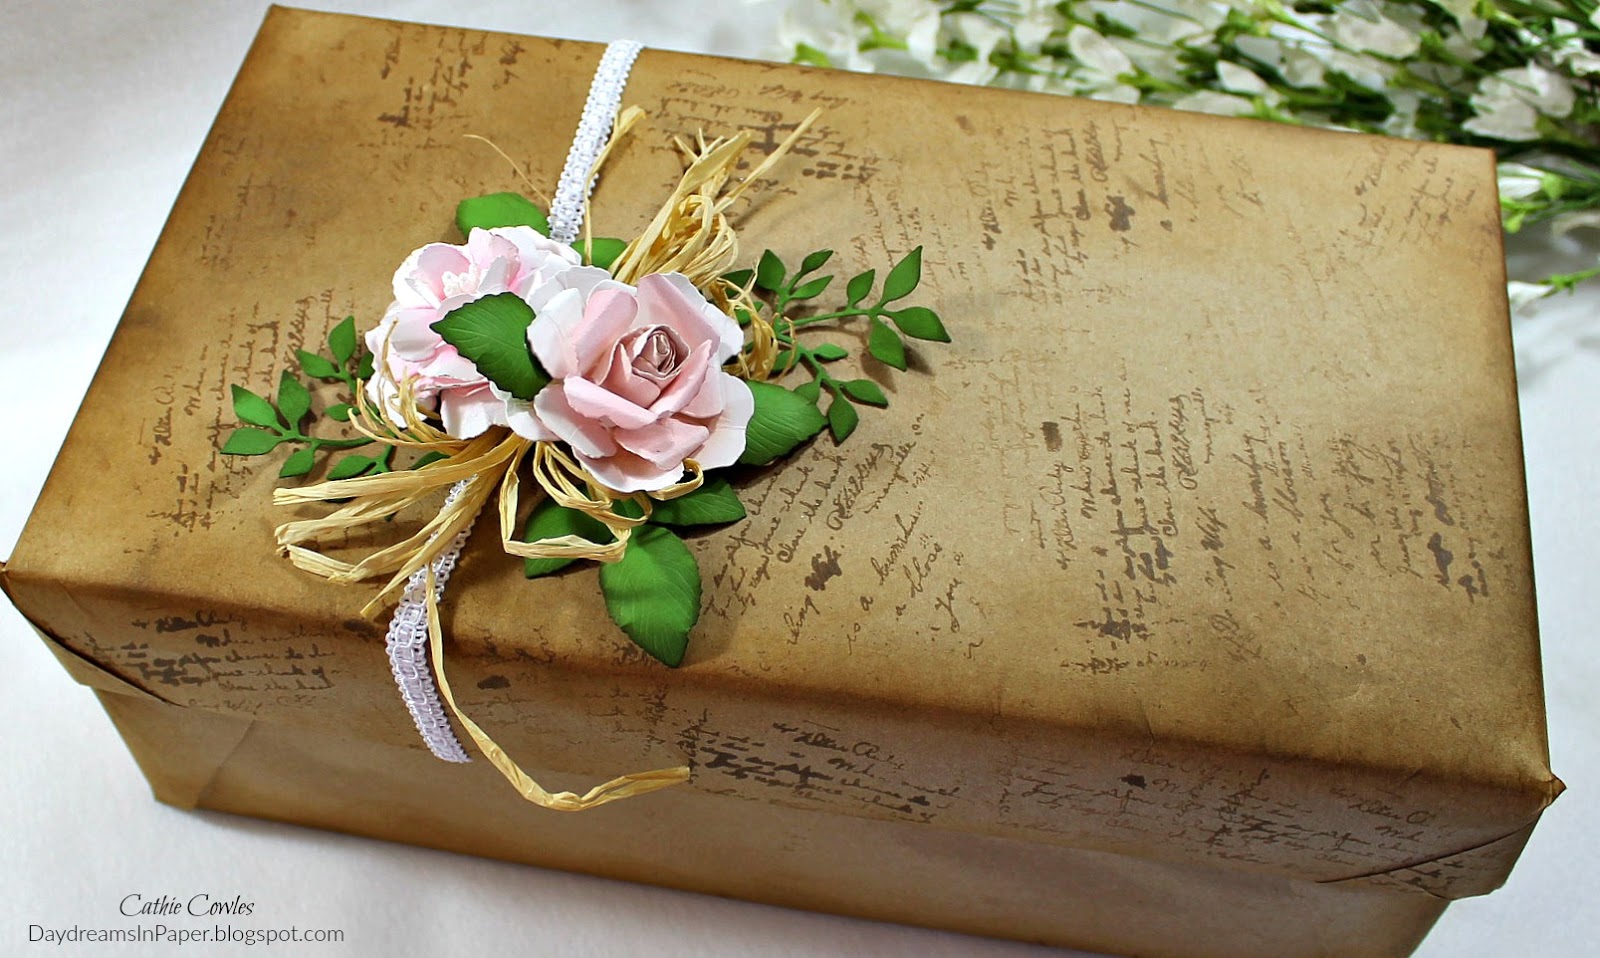
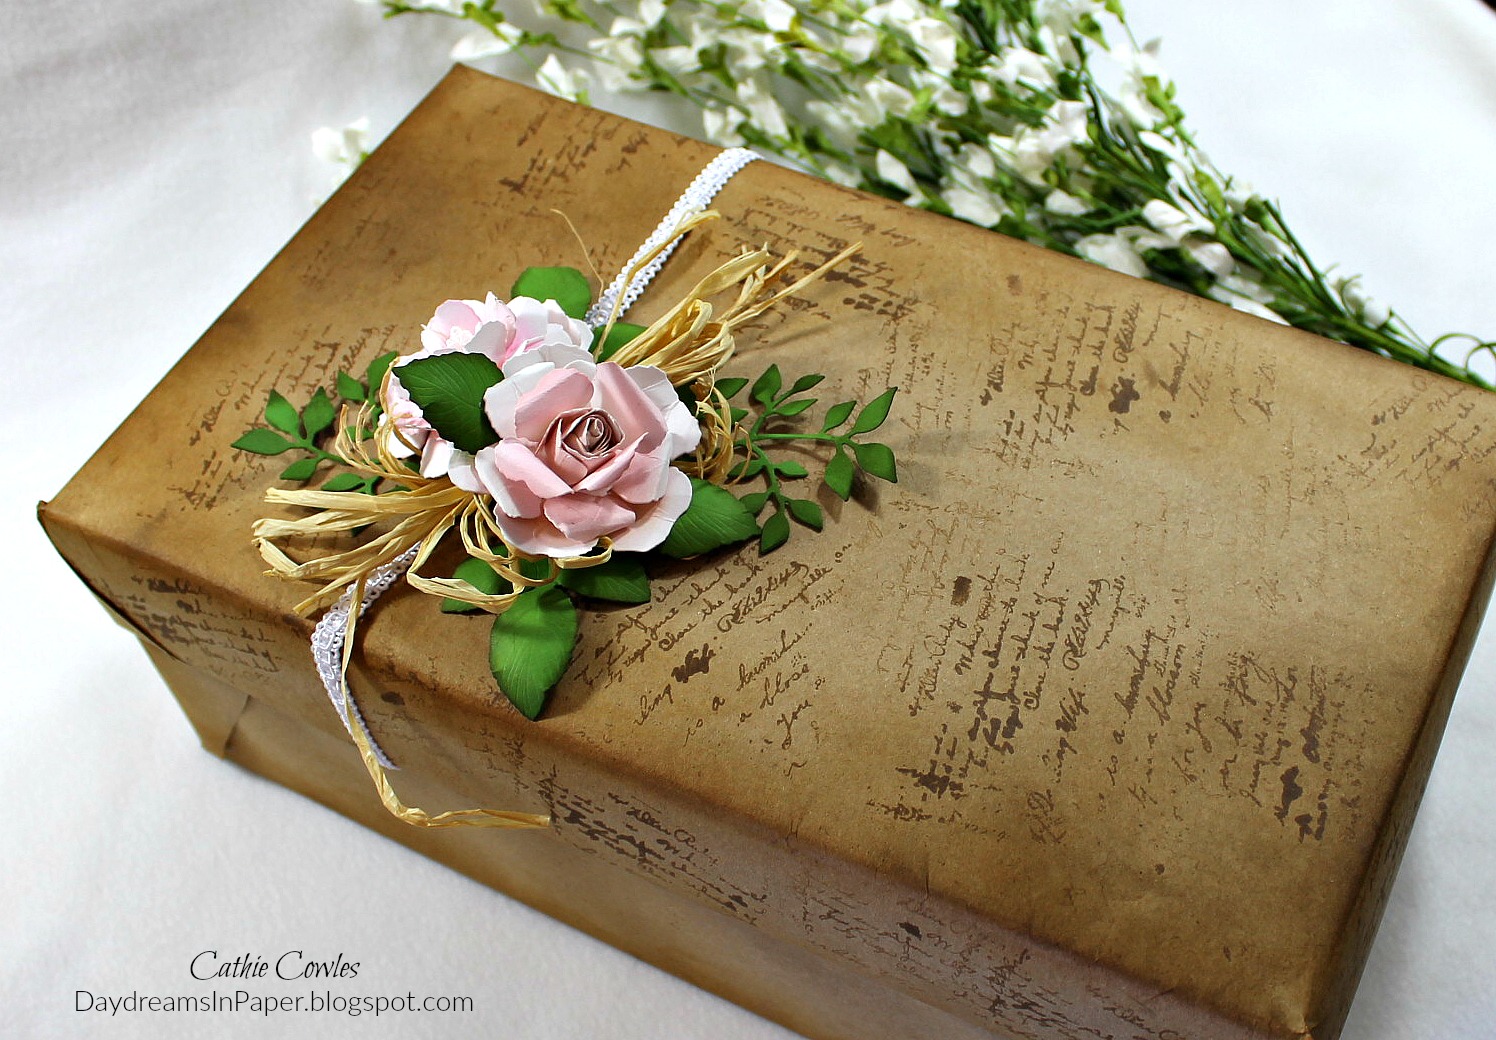
Hi Everyone! I’m so happy you stopped over to check out my project. I’m so appreciative you’re here and hope you find some useful ideas for your next craft project. I decided to honor Earth Day by recycling an old shoe box. With birthdays, graduations and even Mother’s Day coming up, it’s a perfect way to create a beautiful package for your gift. I hope you enjoy the tutorial I put together below. Happy Crafting!
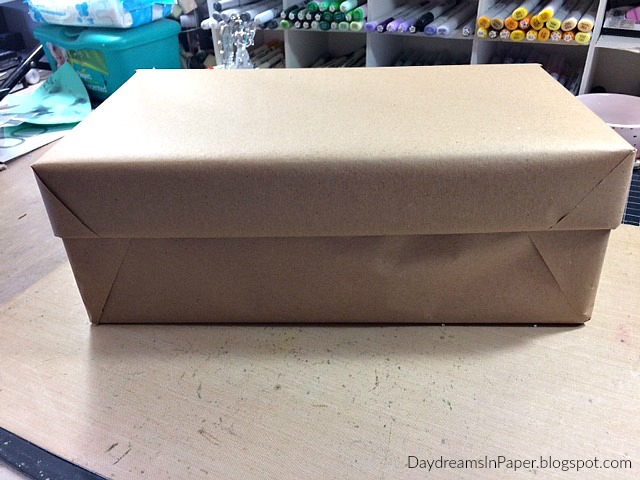
I chose a large, sturdy shoe box and covered it with craft butcher paper. You can find small rolls of this online for a reasonable price and it comes in white too.
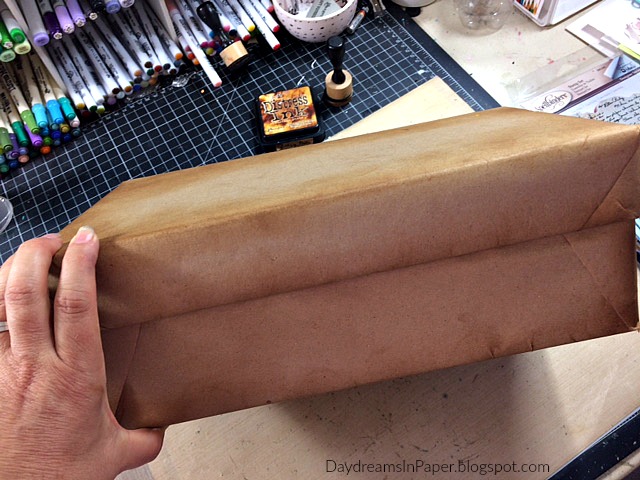
I ink all the edges of the box, top and bottom, with Vintage Photo Distress Ink using a mini ink blending tool.
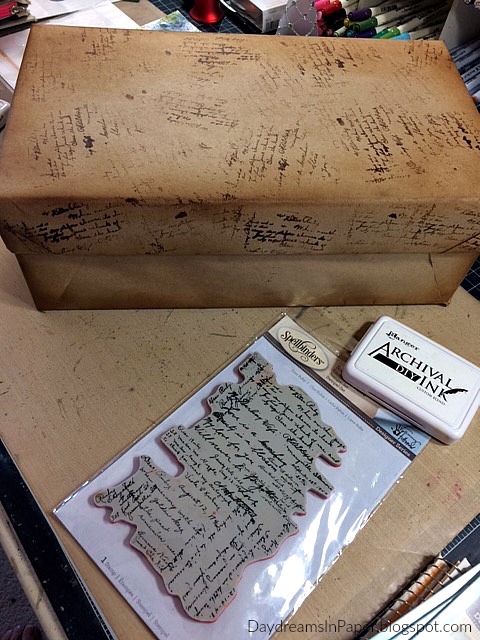
Next, I stamp on the Dear Ruby background stamp in random areas of the lid with Vintage Photo Archival Ink. I did not mount the stamp onto a stamping block, I ink small portions of the stamp and apply the image while holding it in my hand.
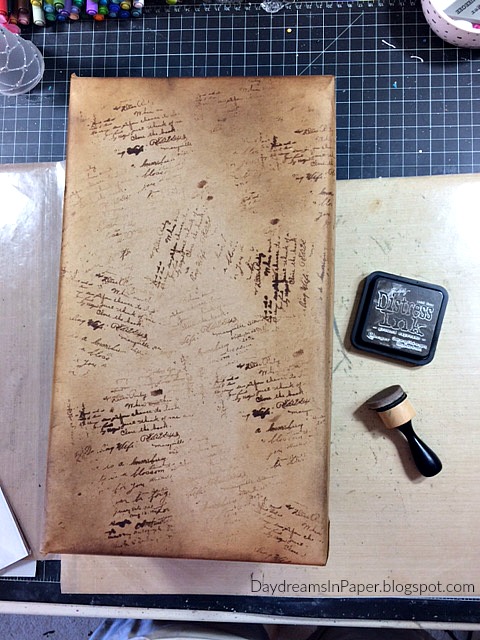
To define the edges and make them stand out, I ink the edges and small portions of the top with Ground Espresso Distress Ink.
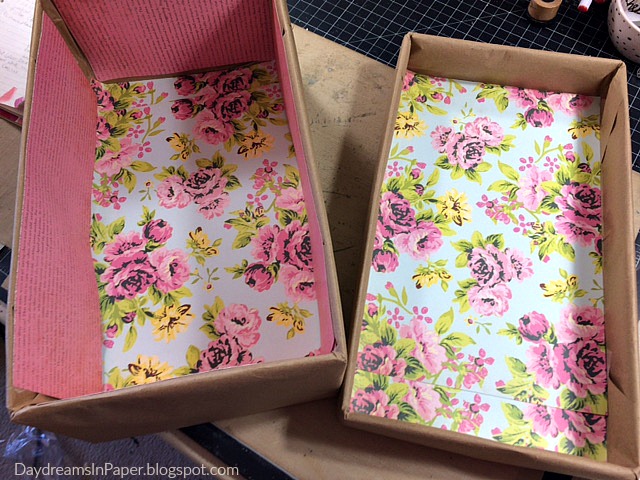
I decorate the inside of the box with some old card stock I had in my stash.
Now onto creating the pretty lid decorations:
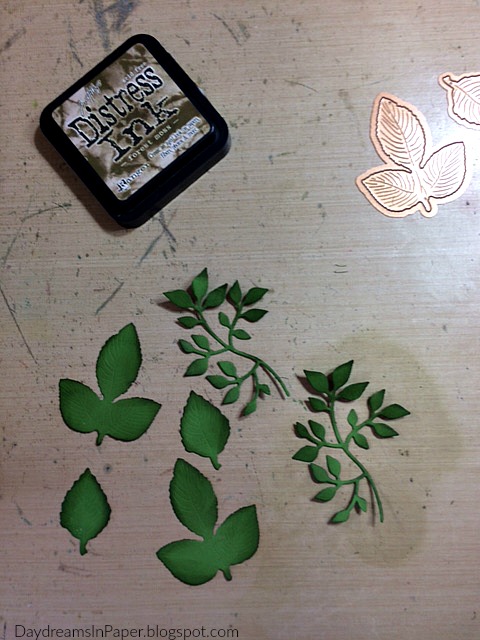
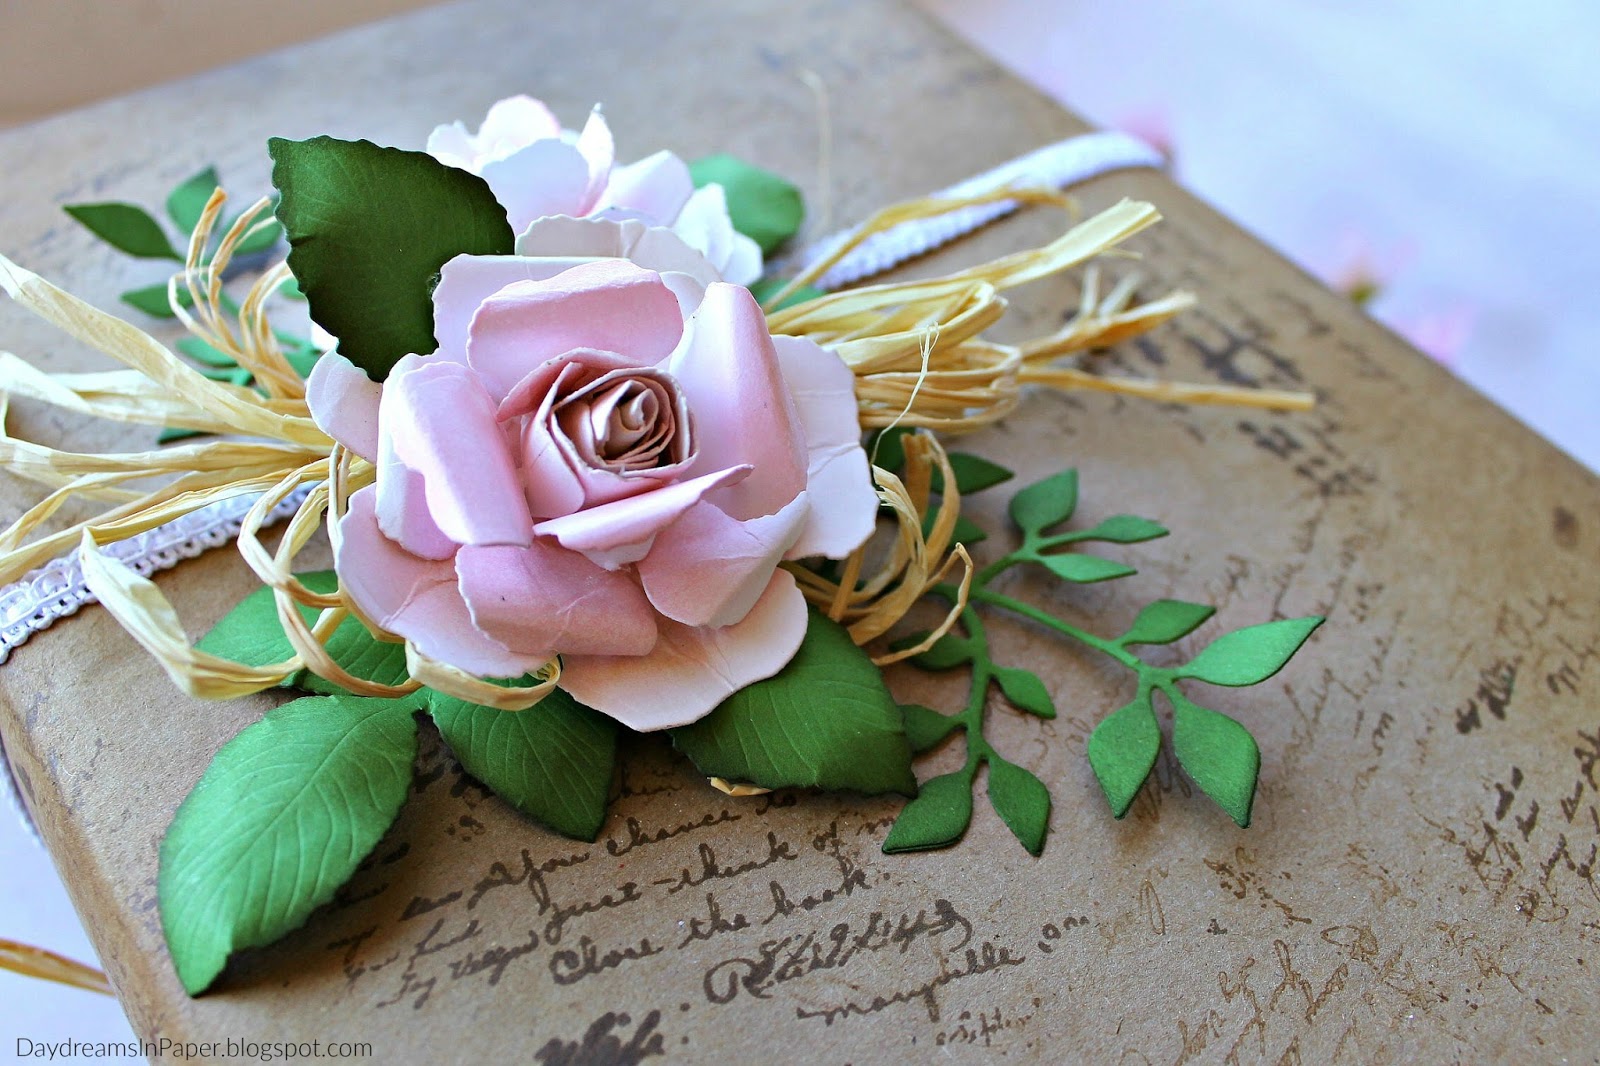
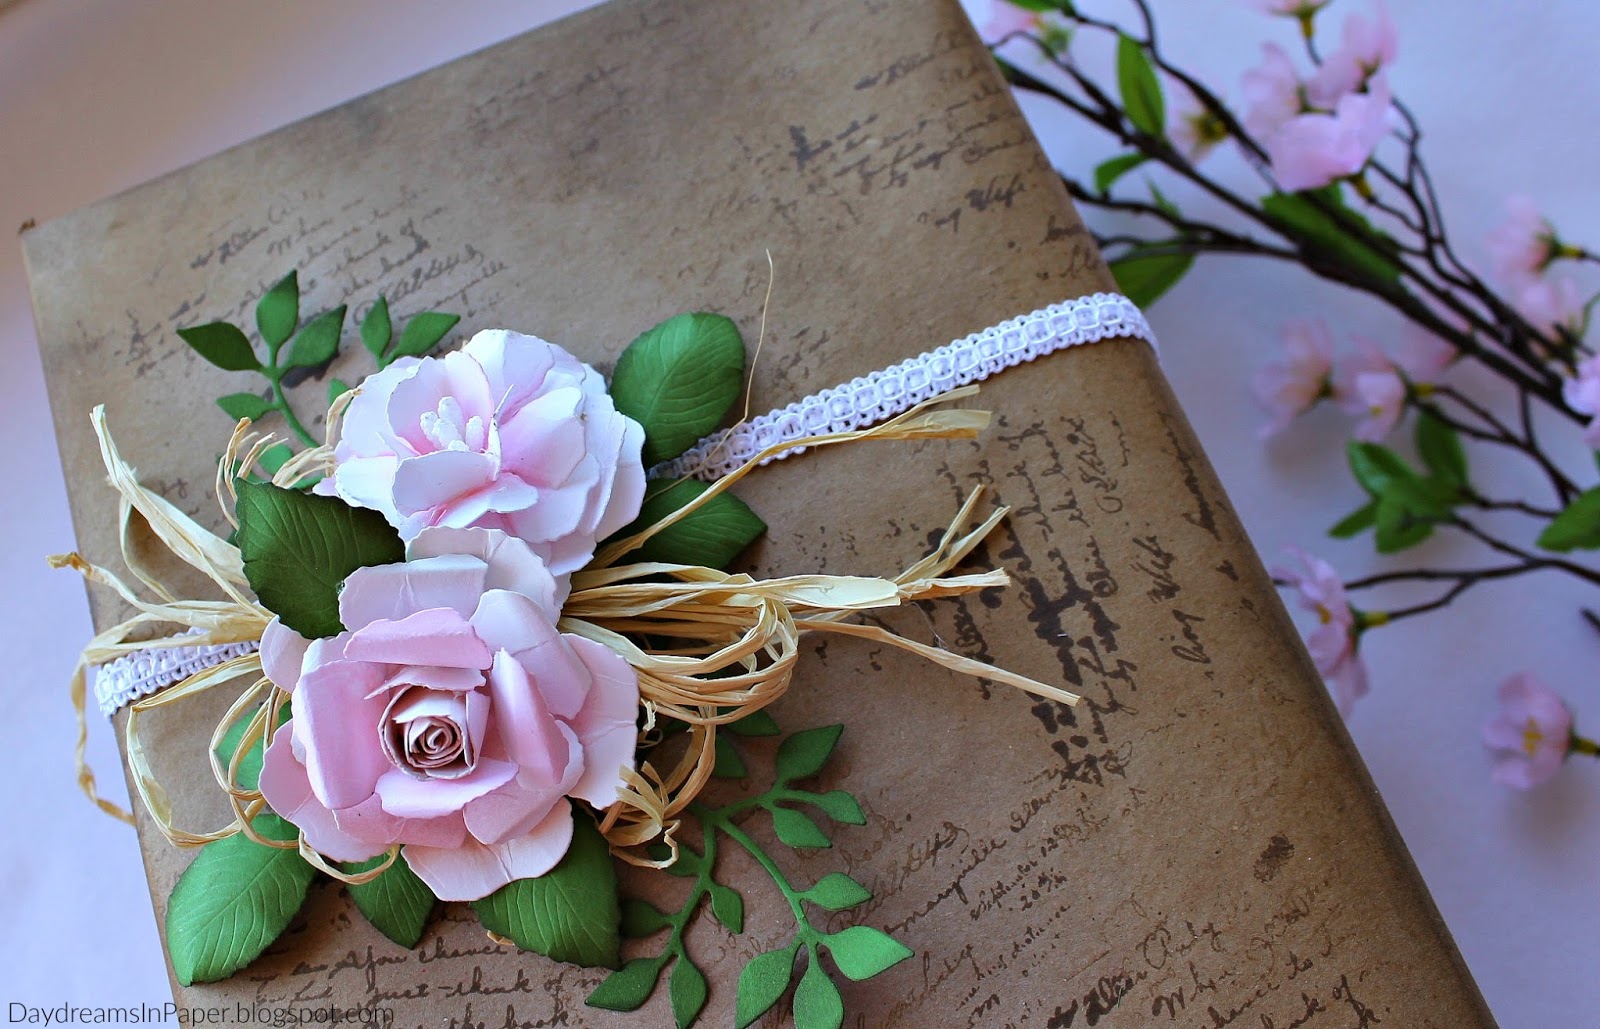
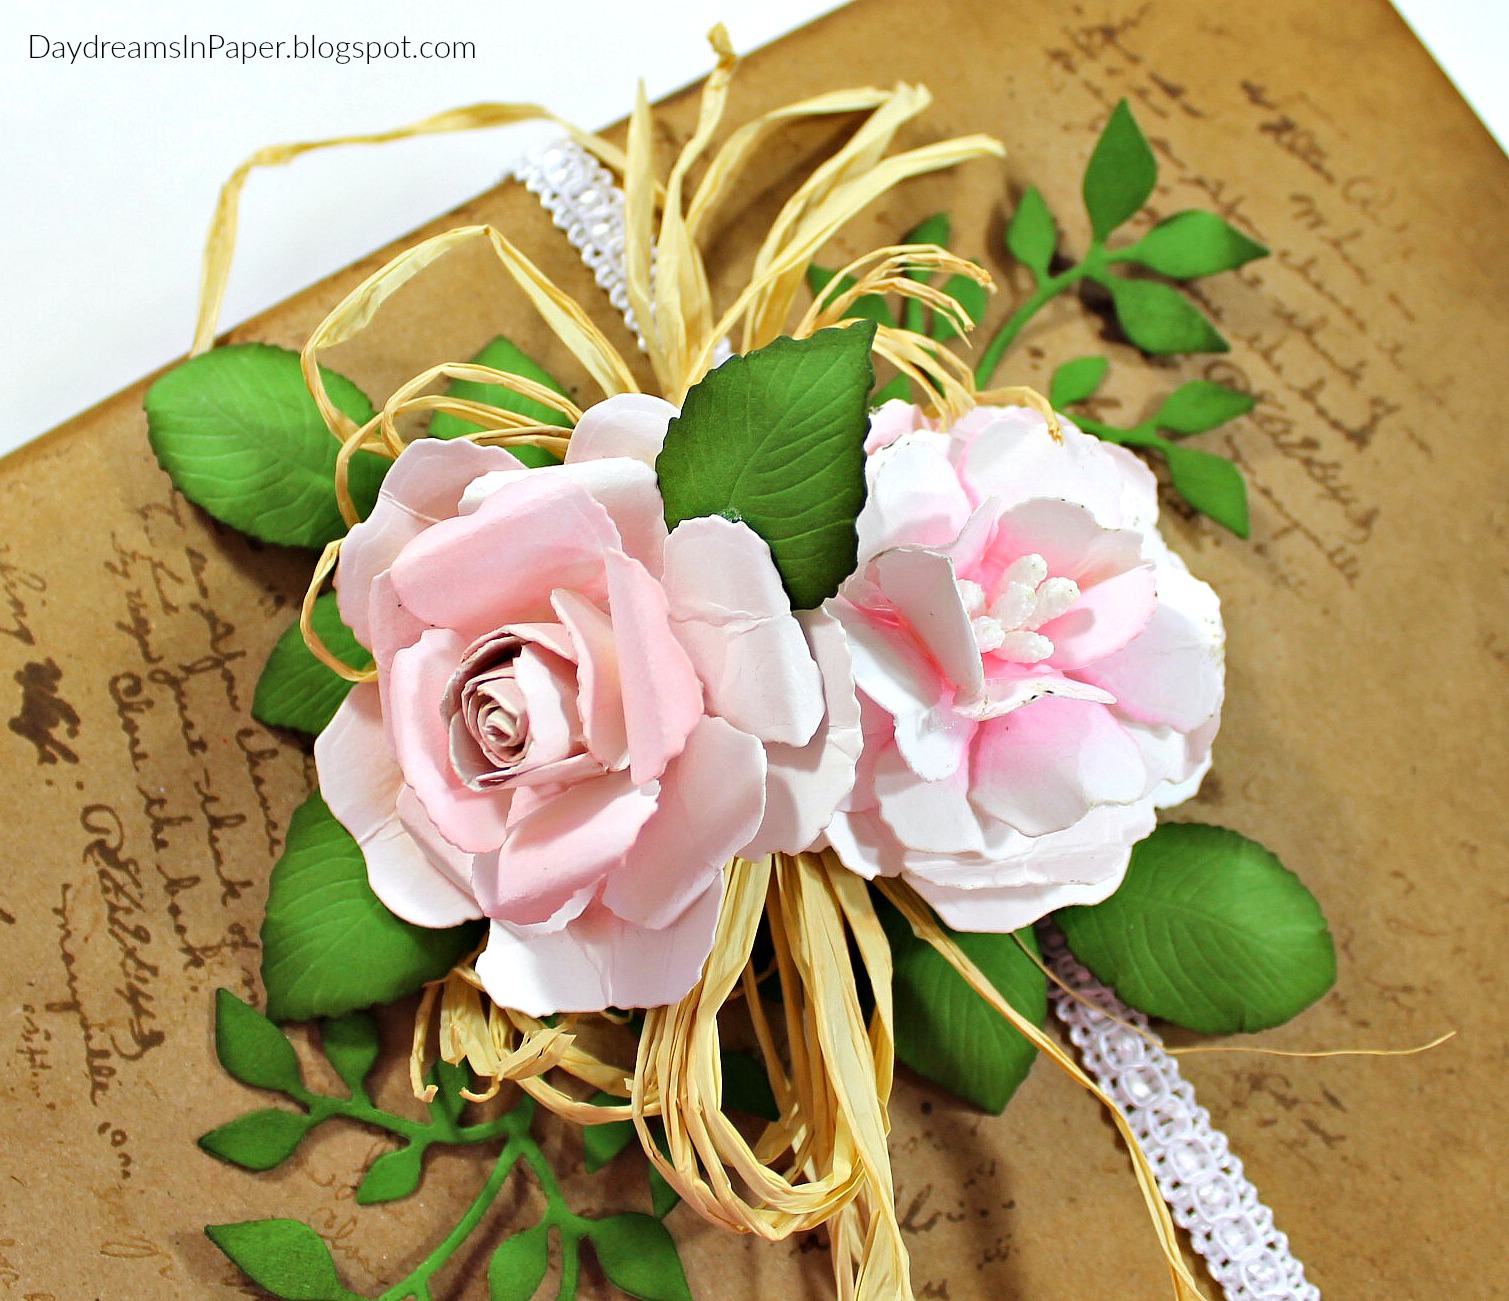
I cut some foliage from the Tammy Tutterow Pom Pom Posies die set and Tim Holtz Garden Greens thinlits dies out of Bazzill Kiwi Crush card stock and ink the edges with Forest Moss Distress Ink.
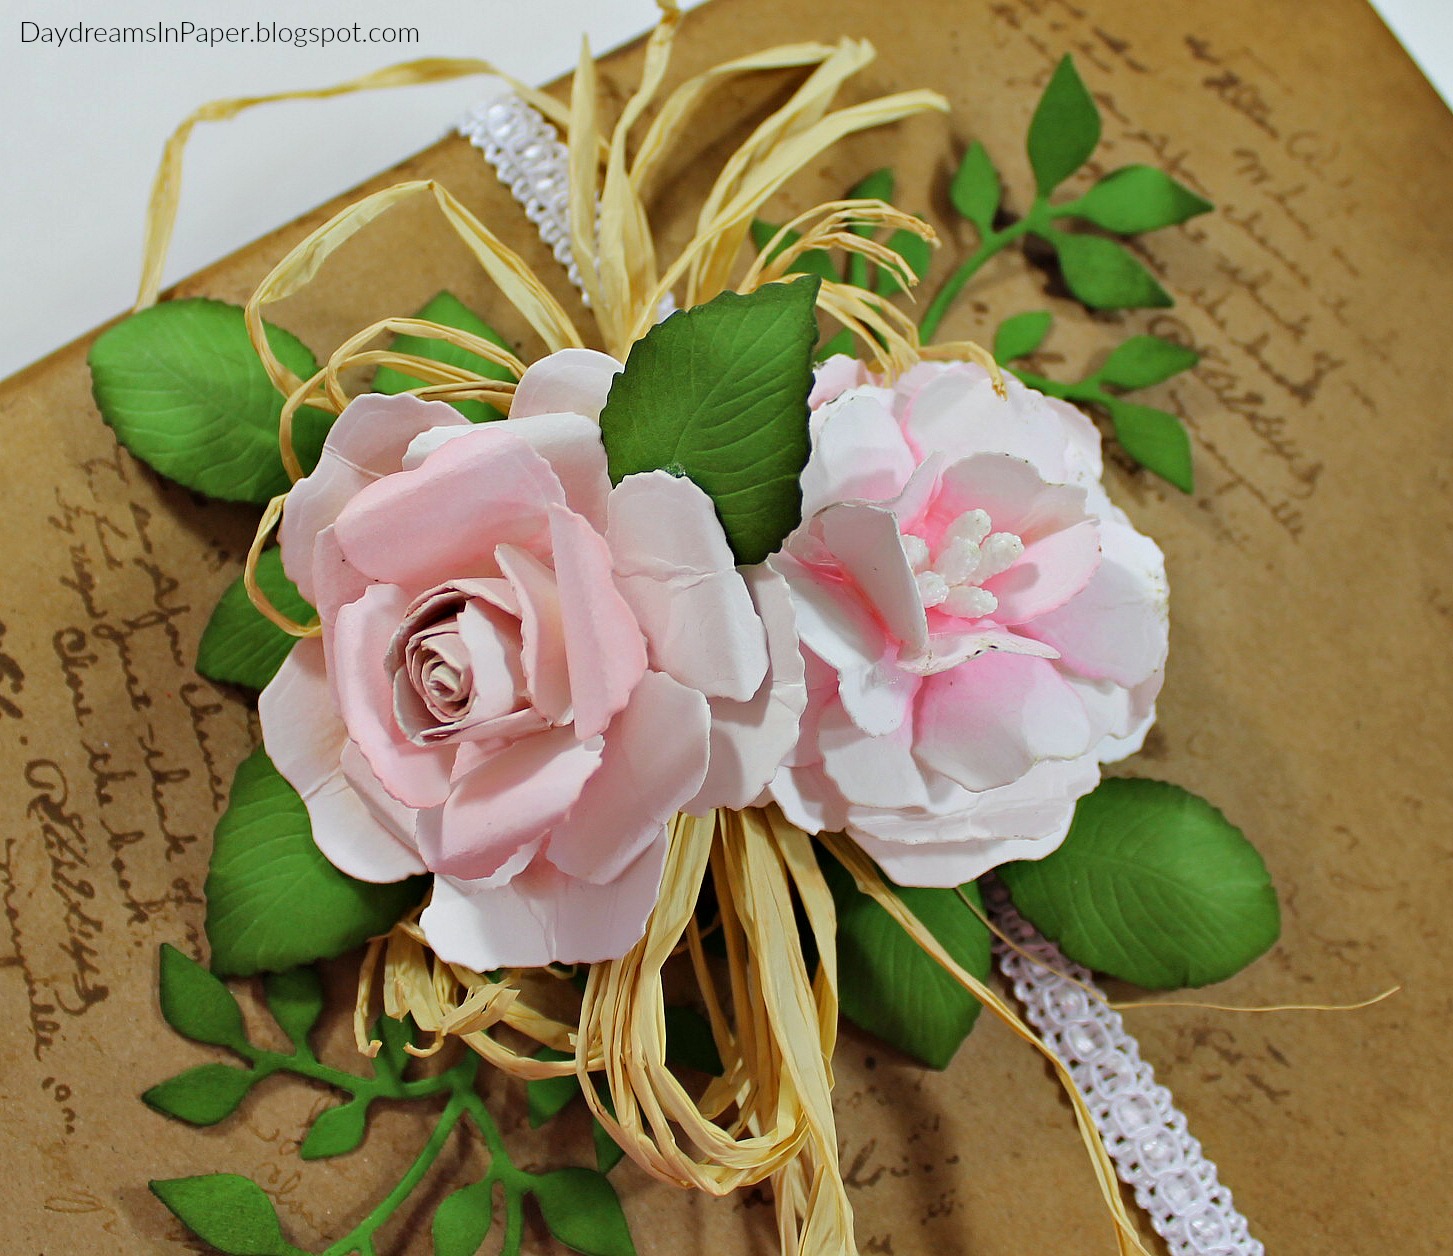
I creat two different flowers from the Shabby Posies die set. This is a must have set for me. I have created several different types of flowers out of it because the shape of the petals can be manipulated in so many ways.
For the rose, I cut out the petals and ink the centers with Spun Sugar Distress Ink. You can find my tutorial for creating these roses here.
For the flower with stamens, I use the same die set. I just cut out the petals, ink the centers with Simon Says Stamp Teeny Bikini ink and punch a hole in the center of each petal to push the stamens through. I offset the petals to form the layers of the flower.
To finish the gift box, I make an arrangement with the flowers, foliage and raffia atop a pretty white crochet ribbon. Below are some close-ups of the gift box.
I hope you enjoyed seeing how I transformed a shoe box into a beautiful gift box and that you use some of these ideas to create a beautiful box of your own. Have a great weekend! ♥