
Hi Friends! It’s been a long, long time since I’ve posted to my blog and now I’m back in full swing after time away babysitting for my grandkids while my daughter-in-law worked on her last set of clinicals to get her Physical Therapy degree. I’m so happy to be back in my craft room and hope to post more tutorials. I was working hard on the new Tim Holtz Sizzix Chapter 3 release and today I’m sharing my Arizona – Take the Scenic Route vignette that you may have seen on Tim’s YouTube Live. This tutorial will focus on the whitewash vignette box and how to create it. So let’s get started. Enjoy!
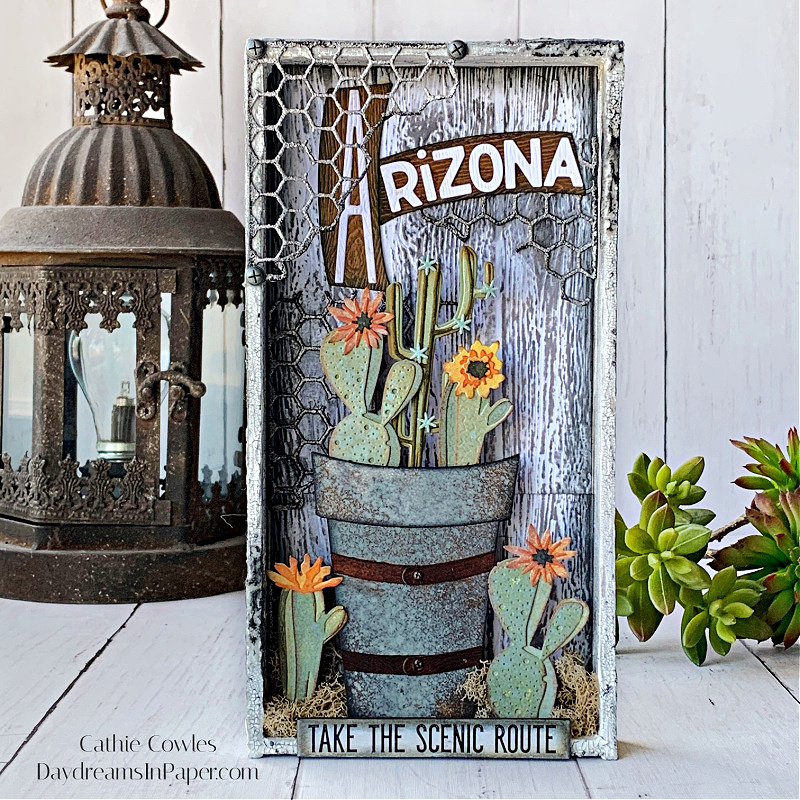
The tutorial below will show you how I created the vignette box that I created for my project as you can see in the above photo. I’m a huge fan of whitewashed wood and I thought it would showcase the cactus and pot beautifully with the colors I chose to use.
_________________________
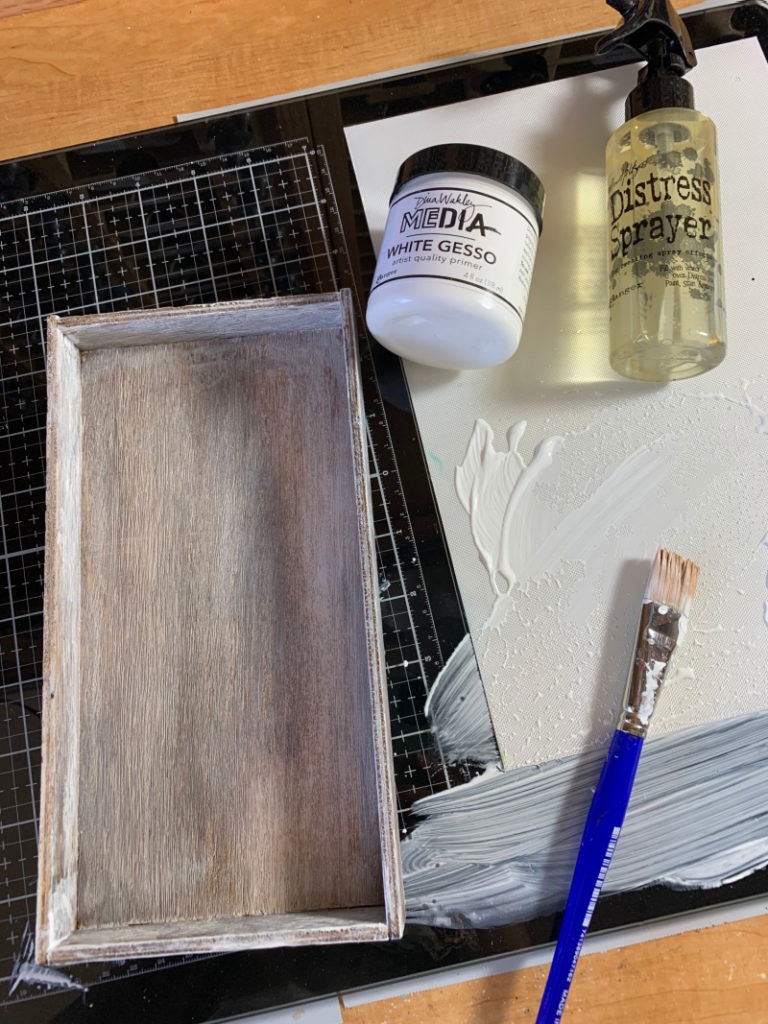
Begin by creating a mixture of gesso and a bit of water and brush all over the vignette box with a paintbrush. Allow this to completely dry. You can speed up the process by using a heat tool, if you wish.
_________________________
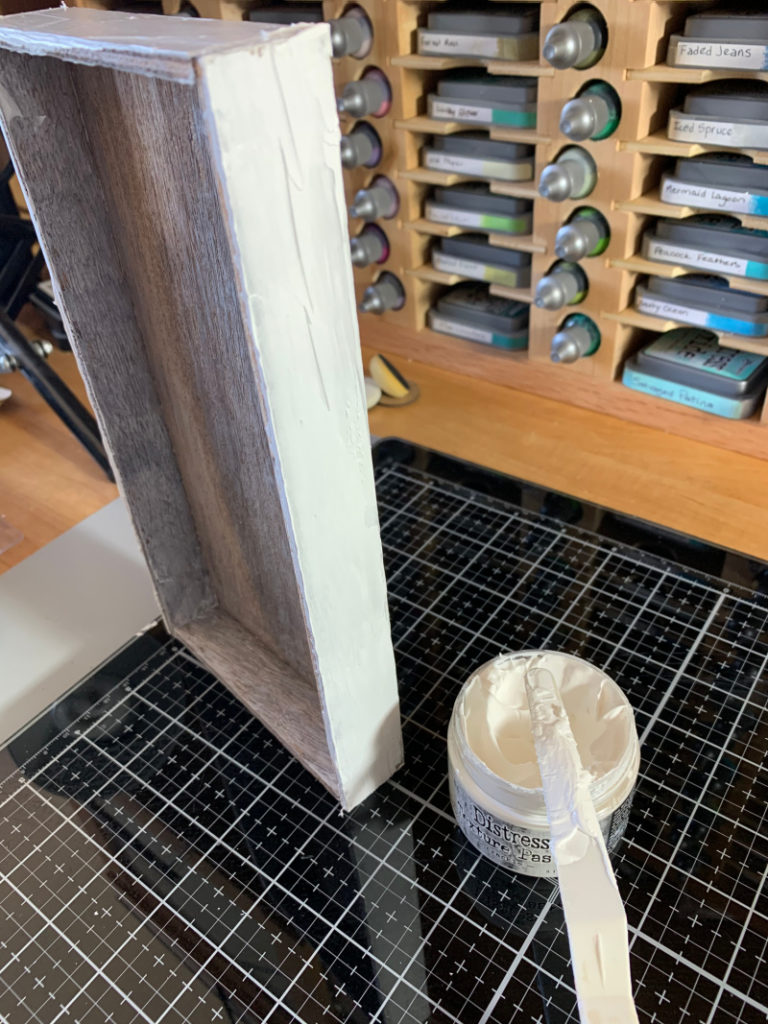
When the vignette box is completely dry, begin applying Distress Crackle Texture Paste to random areas of the inside and outside side panels of the box using a palette knife. Do not apply any paste to the inside main panel of the box because we will be covering that with something else. Allow to completely dry.
_________________________
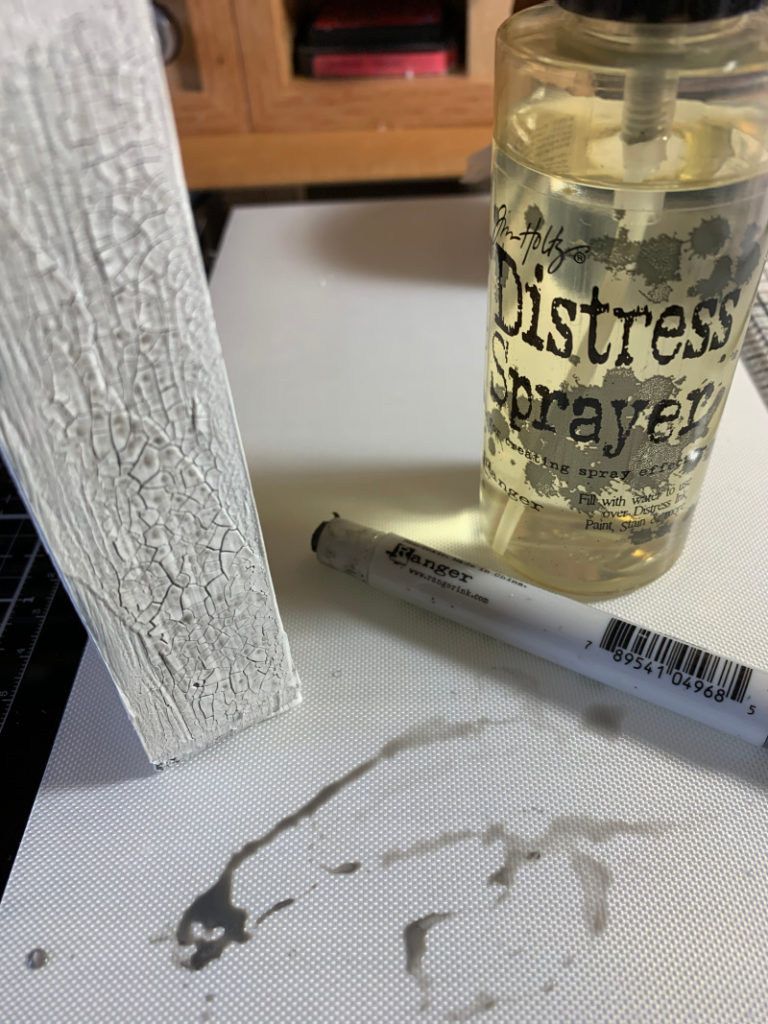
Now that the texture crackle paste is completely dry, rub a bit of Distress Hickory Smoke Crayon onto your work surface and spritz with water. Using the tip of your finger mix the crayon and water together and apply it over the cracked areas.
_________________________
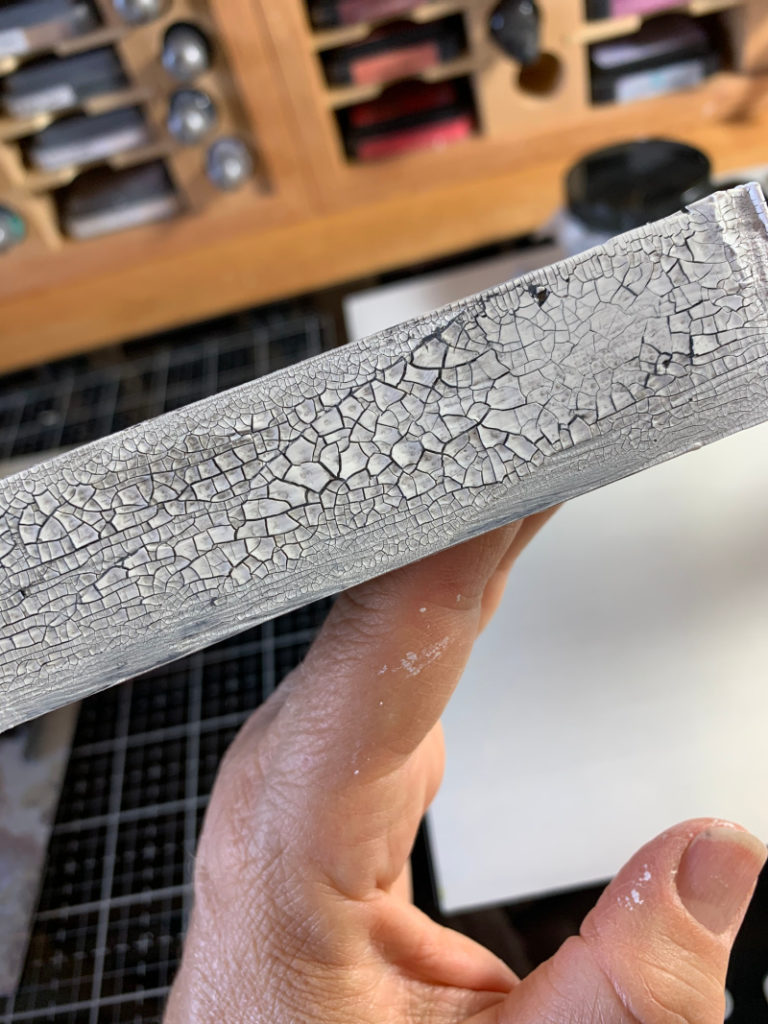
Here is a close-up of the colored crackle areas. You can see how the mixture of crayon and water seeps into the cracked areas giving depth to the crackles and really accentuates them. Set the vignette box aside to completely dry.
_________________________
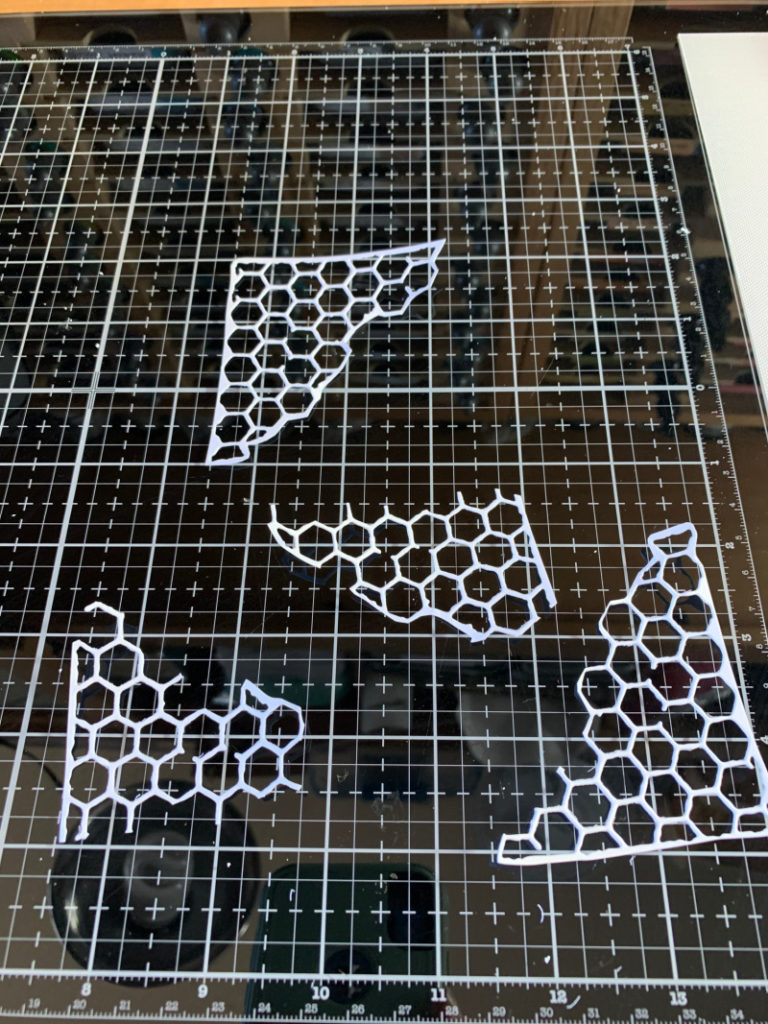
While the vignette box is drying, use the Tim Holtz Mixed Media die set (660220) and make a few of the design that looks like chicken wire or honeycomb. Cut them with a scissor to make smaller pieces.
_________________________

Using your fingertips, apply a bit of Distress Grit-Paste over the die cut pieces of chicken wire and allow to completely dry.
_________________________
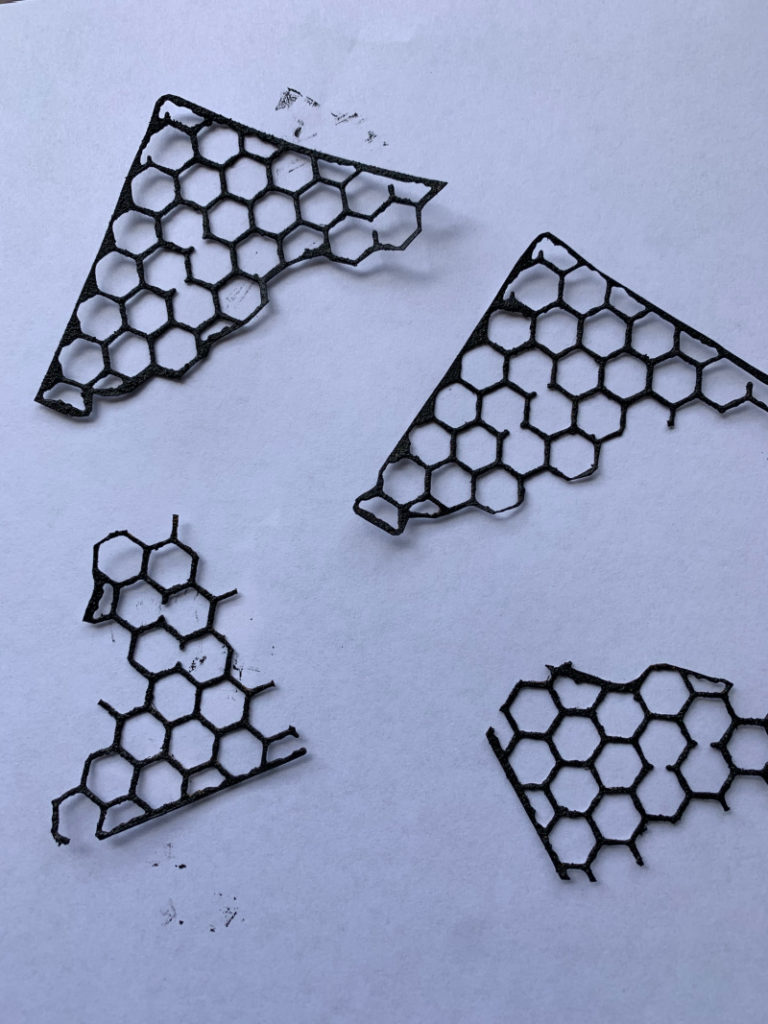
Paint each piece of chicken wire with Distress Black Soot Paint. When completely dry, gently rub Prima Old Silver Metallique Wax over the tops of the pieces. This is the magic that makes them look like pieces of old metal. Set them aside to completely dry.
_________________________

I didn’t have any sheets of 8-1/2″ x 11″ woodgrain cardstock so I used the Tim Holtz Lumber 3D embossing folder to create the wood panels for the back of the vignette box. This is the easiest whitewashed wood you’ll ever create. Just emboss a piece of white mixed media cardstock with the Lumber embossing folder and gently rub Distress Hickory Smoke Ink over the raised embossed areas with an ink blending tool. That’s all there is to it.
_________________________

Adhere the embossed cardstock pieces to the back of the vignette box. Adhere a few of the pieces of chicken wire you created to the inside of the box and don’t forget to use that chicken wire to cover the line where the two pieces of embossed cardstock meet. If you look at my final photo for the project, you will see I forgot to do that. Ugh!!
_________________________
I hope you enjoyed this tutorial and that you’ll give these techniques a try. I had so much fun creating for Tim and Sizzix and hope you have an awesome rest of your day! Thanks so much for stopping by and sticking with me to the end. I appreciate so much that you took time out of your day to spend it here with me.

Below is a shopping list for all the supplies I used to create my Arizona – Take The Scenic Route Vignette
Tim Holtz Sizzix Dies
Tim Holtz Lumber 3D Embossing Folder
Tim Holtz Mixed Media Thinlits
Tim Holtz Stretch Upper Alpanumeric
Inks and Paints
Prima Old Silver Metallique Wax
Mediums
Distress Texture Paste Crackle
Tools
Papers
Cardstock for the Cactus and Pot were from my stash. These pieces were created while I sat one afternoon and played with sprays, oxides and inks and created a bunch of backgrounds. This makes it easy for me to go to my stash and pick out backgrounds that would be great to use with dies.
Ranger Distress Collage Medium Crackle


Your viniette is gorgeous. Thanks so much for sharing your tips. All very useful
You sure made an amazing project!!! Now I would like to try out some of your techniques, too! Awesome tutorial! So glad you shared this!!!