
Hi friends! Today I’m sharing a card I created using the new Tim Holtz Sizzix dies, Papercut Chicks and Gladys. These two beloved die sets just had to be combined and I imagined this the minute I saw them both. I wanted to get this done before Valentine’s Day but circumstances (life) prevented me from doing so. Below is an explanation on how I put this card together. Enjoy!
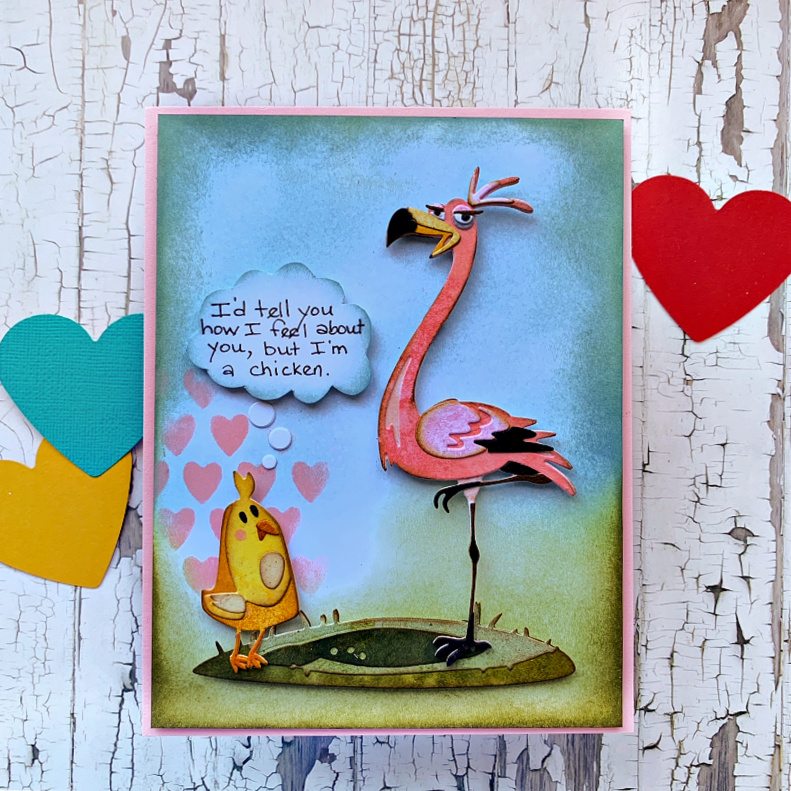
To begin, I cut a 5″ x 6.5″ piece of mixed media heavy stock and inked the top portion with Speckled Egg Distress Ink and the bottom portion of the panel with Peeled Paint Distress Ink using the Simon Says Stamp Blending Brushes.
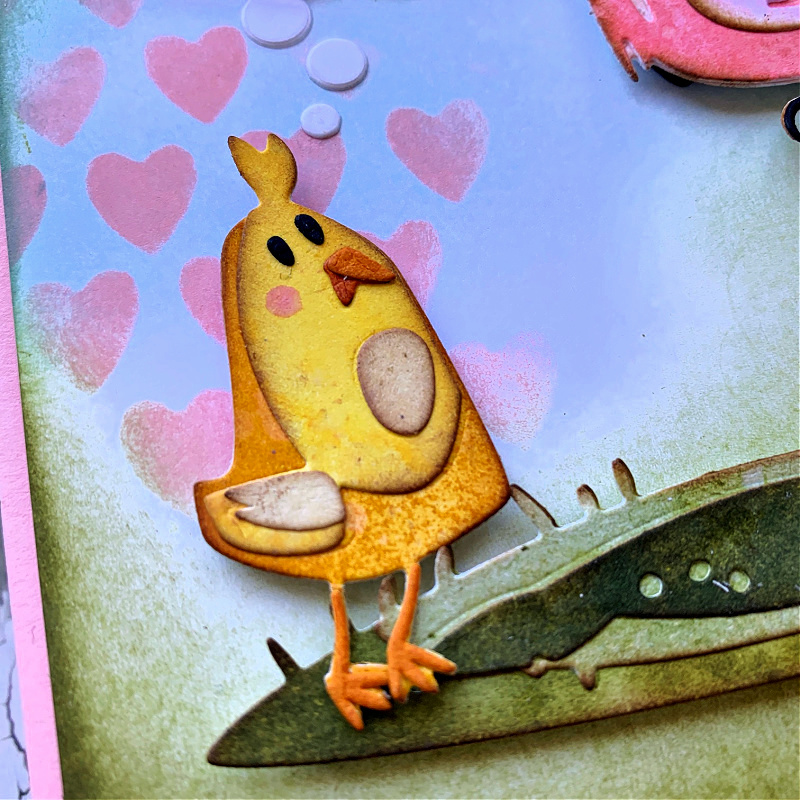
In the area behind the chick, I added the Tim Holtz Heart stencil with Saltwater Taffy Distress Oxide. I cut the chick out of inked cardstock from my stash and assembled him. I also created the grassy area from the die set out of inked cardstock from my stash. (I have an array of inked cardstock that I create in an afternoon so I can easily pull out what I need when I putting together dies. I try to create different hues of colors which is great to have on hand when creating any of the Tim Holtz Sizzix Colorize sets.)
Also just so you know, Sizzix creates videos for each of their colorize dies and you can find the Papercut Chicks video here: Sizzix Papercut Chicks Assembly Video.
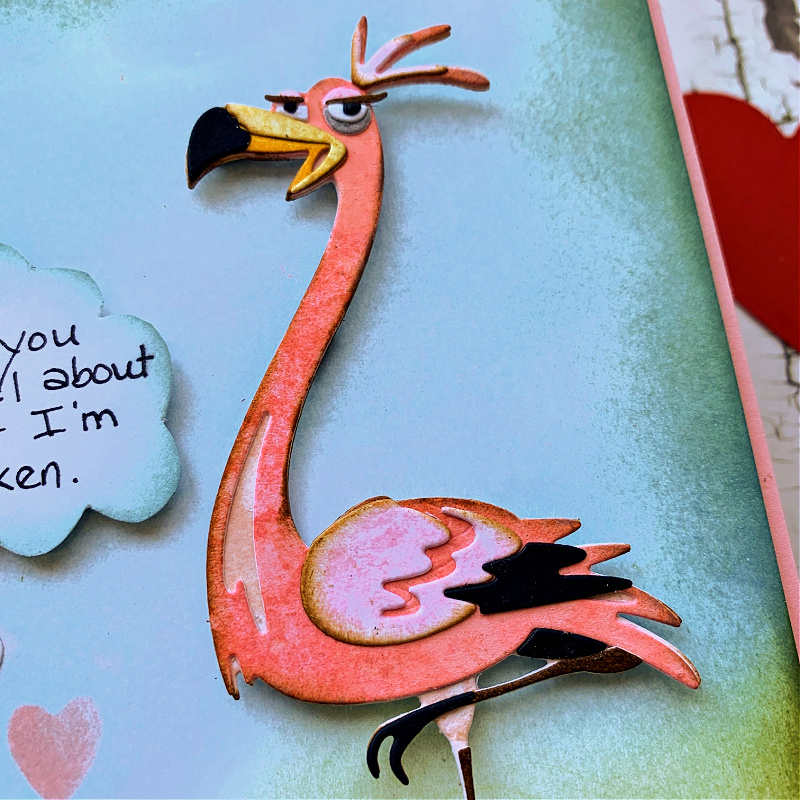
Next, I cut and assemble Gladys. Isn’t she sassy and wonderful!! Again, I used inked cardstock from my stash. You can find the video to assemble her here: Sizzix Gladys Assembly Video.
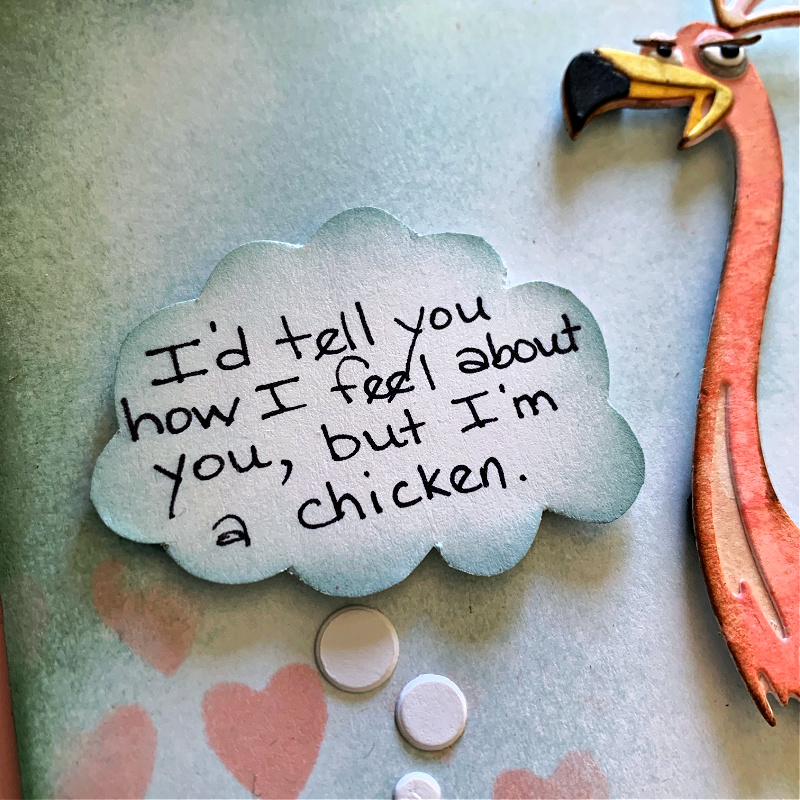
I created a handwritten sentiment for my card. I simply wrote out the sentiment onto a small piece of mixed media heavy stock and cut out the thought bubble shape with scissors. I inked the edges and adhered that to the card. The thought bubble dots are flower centers from the Tim Holtz Sizzix Large Funky Floral die set. You could use a hole punch or circle punch but I didn’t have any the size I wanted and this die set worked perfectly.

Now it’s time to put it all together. Before adhering the chick, grass and Gladys to the card front, I ink the edges of the top portion of the card panel with Stormy Sky Distress Ink and the bottom portion of the panel with Forest Moss. I adhere the chick, Gladys, grass and sentiment with 3D foam tape to create some dimension. Next, I ink a 5.25″ x 6.75″ piece of mixed media heavy stock with Saltwater Taffy Distress Ink and adhere it behind my main card panel and the card is done!
I hope you enjoyed seeing how I put this card together. I’ve had a lot of fun seeing how everyone is using the new Papercut Chick and Gladys die sets. How could you not just fall in love with them, right?
Have a wonderful rest of your day and thank you so much for sticking with me to the end. I really appreciate you spending your time here with me.

Tim Holtz Sizzix Gladys Thinlits Die Set
Tim Holtz Sizzix Papercut Chick Thinlits Die Set
Tim Holtz Sizzix Funky Floral, Large Thinlit Die Set
Tim Holtz Ranger White Heavy Stock
Simon Says Stamp Black Cardstock
Tim Holtz Ranger Speckled Egg Distress Ink
Tim Holtz Ranger Stormy Sky Distress Ink
Tim Holtz Ranger Peeled Paint Distress Ink
Tim Holtz Ranger Forest Moss Distress Ink
Tim Holtz Saltwater Taffy Distress Ink
Tim Holtz Saltwater Taffy Distress Oxide
Tim Holtz Sizzix Big Shot Foldaway Die Cut Machine


I just love your punny sentiment….I laughed so hard when I first read it….LOL. Gladys is sassy and is a favorite for sure….fun stuff!!!