
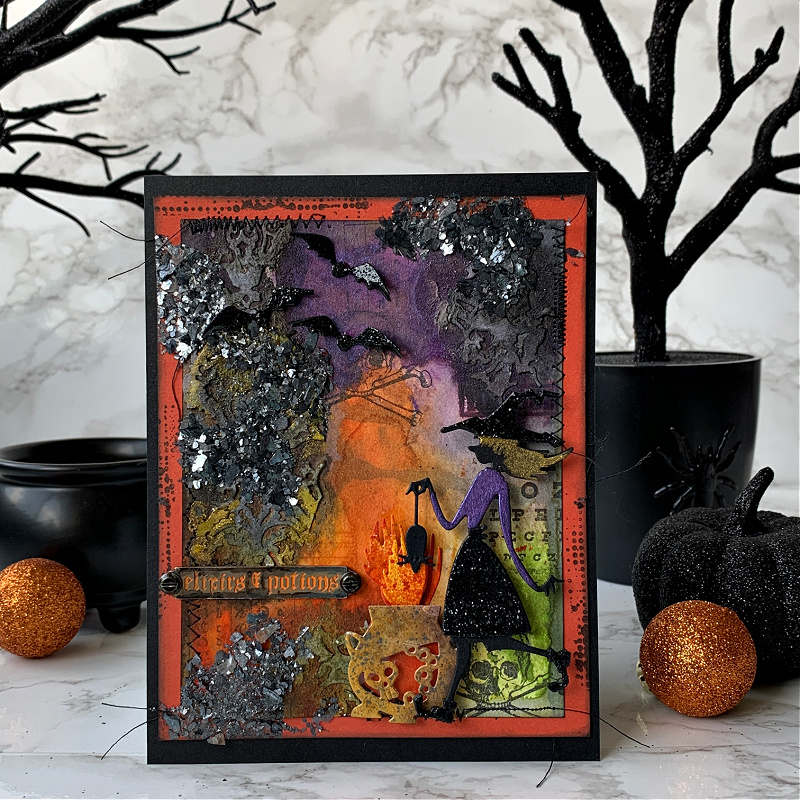
Hi Friends! I hope you all had an amazing weekend. I’m here again today with another card created from the new Tim Holtz Sizzix Toil & Trouble die set. Today’s tutorial will focus on the background I created for this card. It’s fun and easy and can be done in a few easy steps. Enjoy!

To begin, smudge Crackling Campfire, Twisted Citron and Wilted Violet onto a craft mat and spritz with water. Cut a piece of Distress watercolor cardstock and carefully lay the piece of cardstock into the water and ink mixture. Lift and dry. Continue this process until you are happy with the results remembering to completely dry each layer before moving onto the next. Next, lightly spritz a bit of the coordinating colors over the panel to add some depth and shine. Set aside to completely dry.

When the panel is completely dry, stamp on some fun and spooky Halloween images with Distress Black Soot Archival Ink. I used the Tim Holtz Stampers Anonymous Mini Halloween 5 (CMS275).
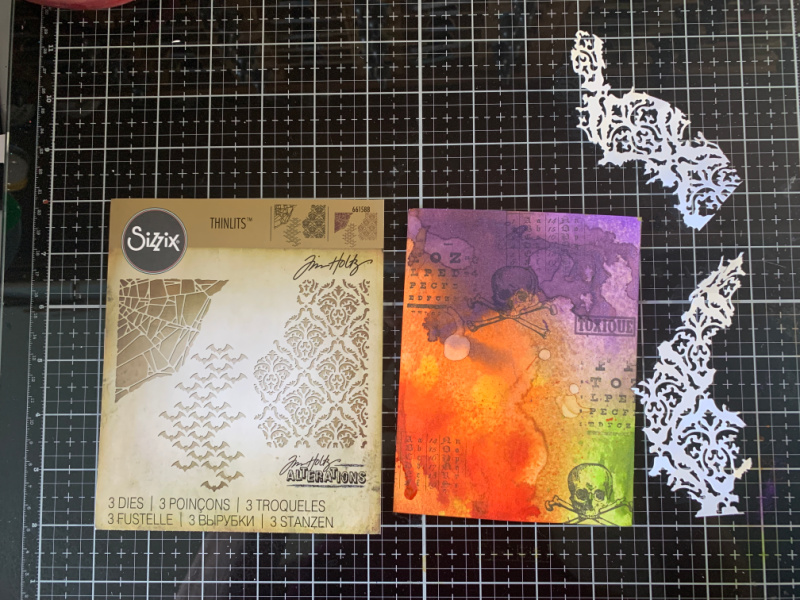
Cut a few pieces of the damask design from the Tim Holtz Sizzix Mixed Media Halloween die set.
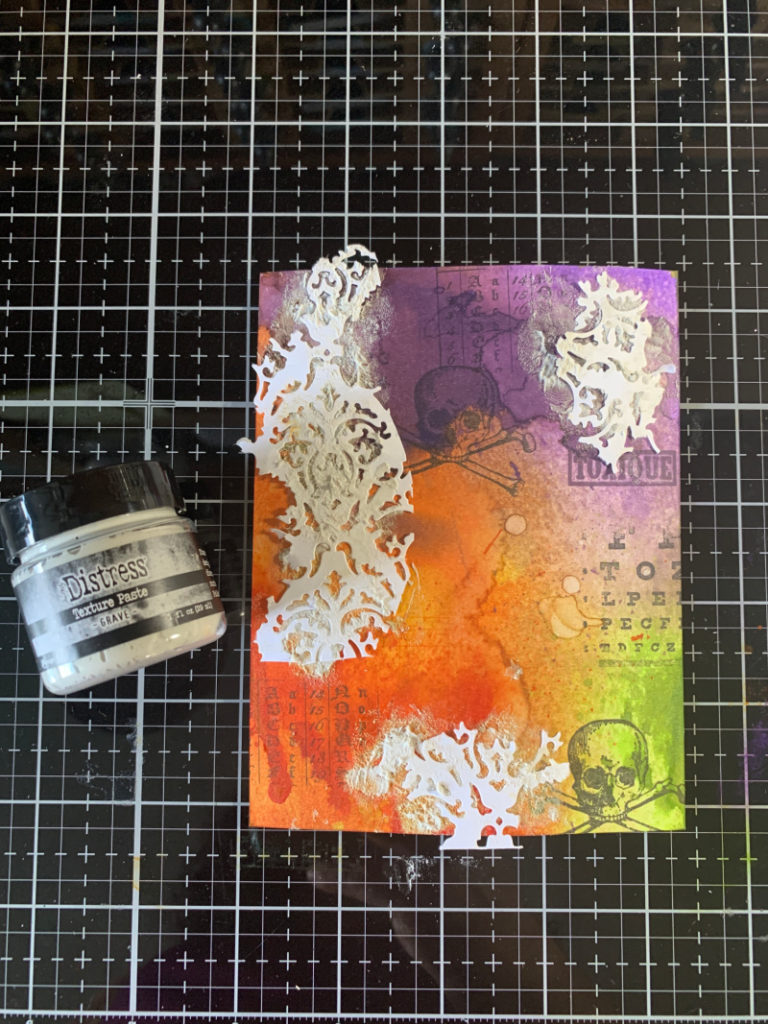
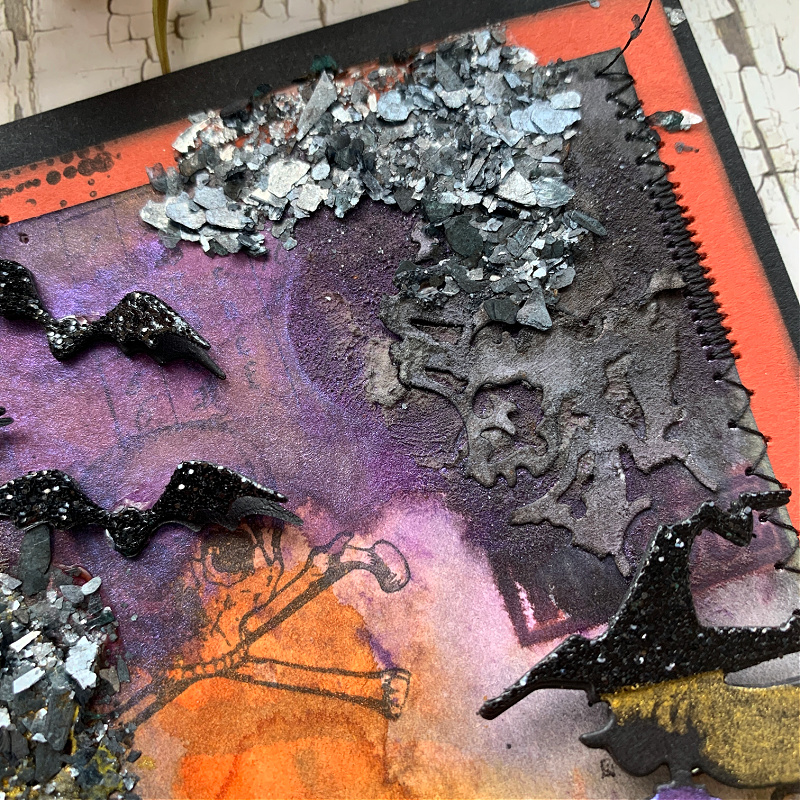
Tear the pieces of damask die cut pieces into smaller pieces and adhere in random areas onto the main card panel with Distress Grave Texture Paste. Allow to completely dry.
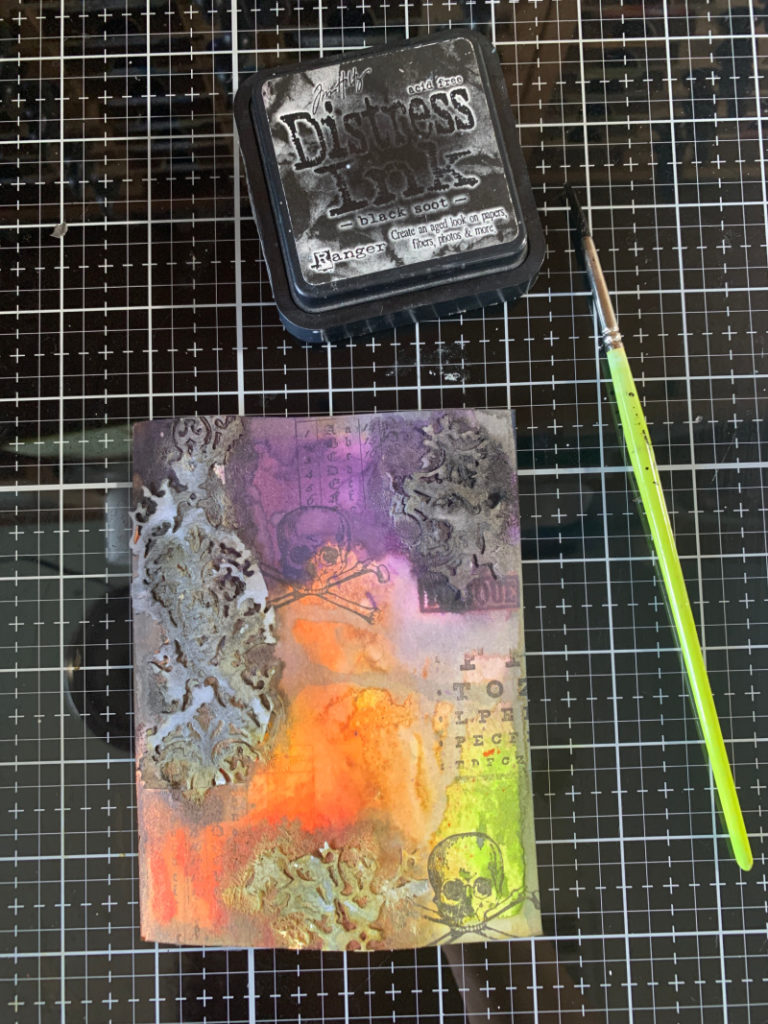
Smudge Black Soot Distress Ink onto a craft mat and spritz with water. Pick up the ink and water mixture with a paintrush and brush over the die cut piece areas and along the edges of the panel. Allow to completely dry.
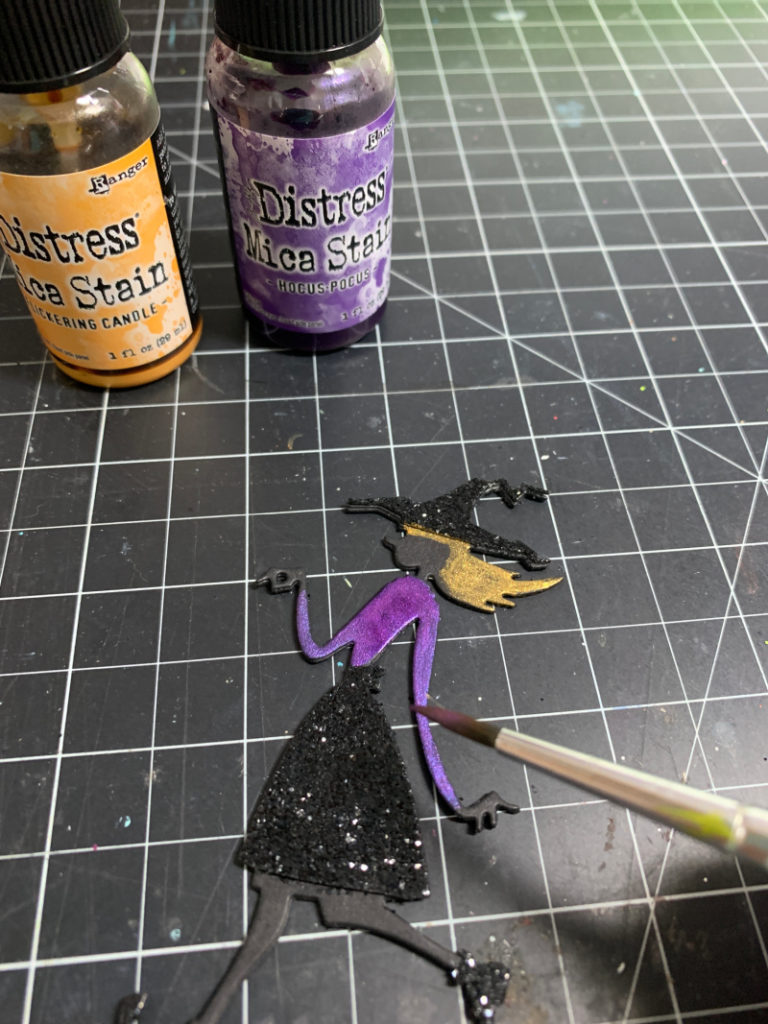
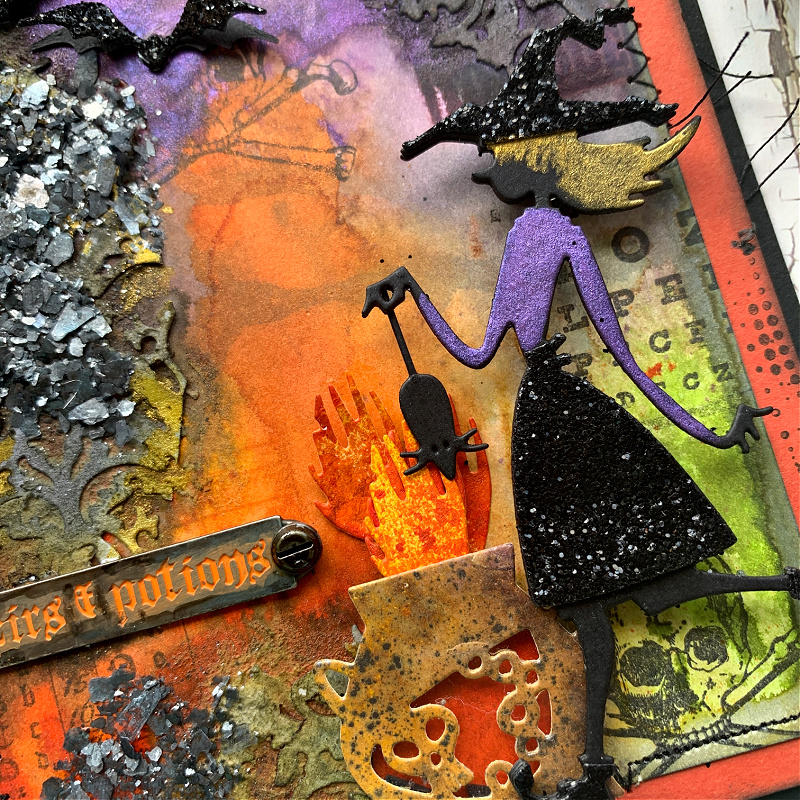
Cut a witch from the Tim Holtz Sizzix Toil & Trouble die set out of black cardstock a few times and layer one on top of the other. I do this so it’s nice and thick for more sturdiness on the card. Cut the same witch another time out of black cardstock that has been prepared with Distress Nightfall glitter. (You can find a tutorial on how to create this glittered cardstock here.) Color the witch with Distress Mica Spray Flickering Candle and Hocus Pocus. (After I adhered her to the card her straight hairline look odd so I painted on wisps of bangs.)
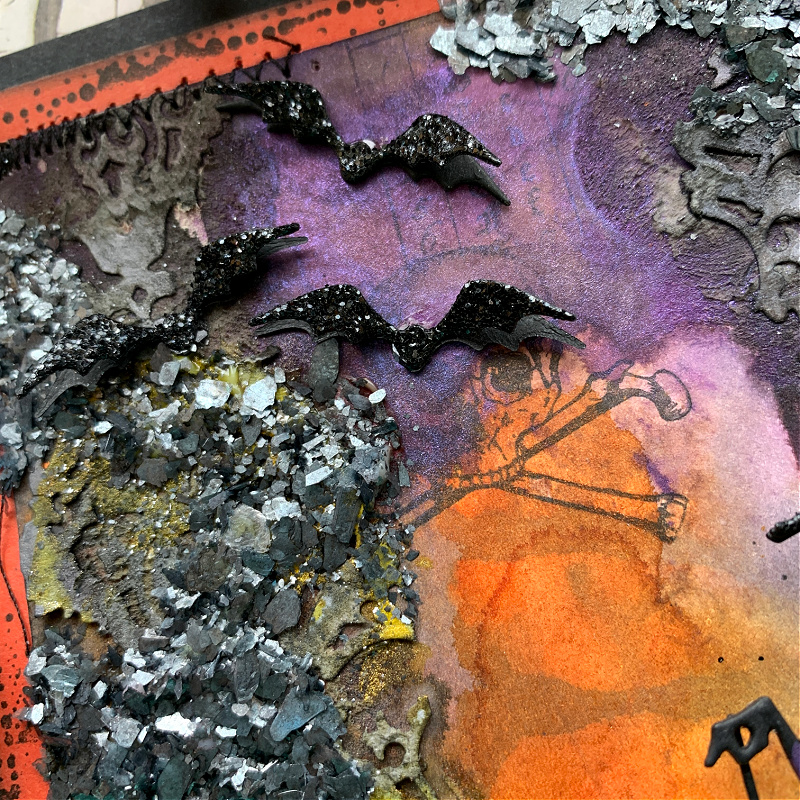
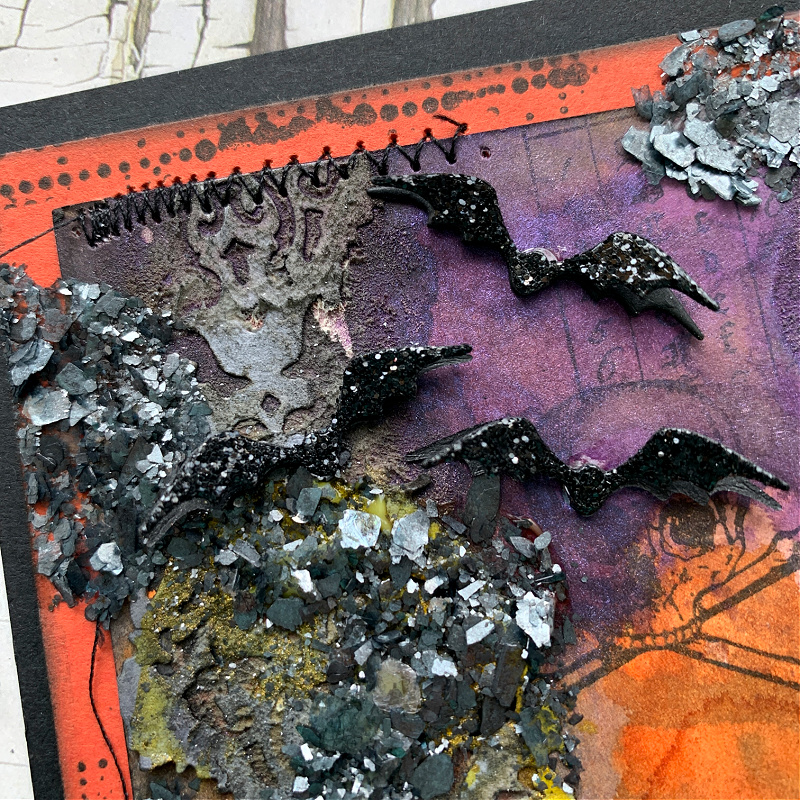
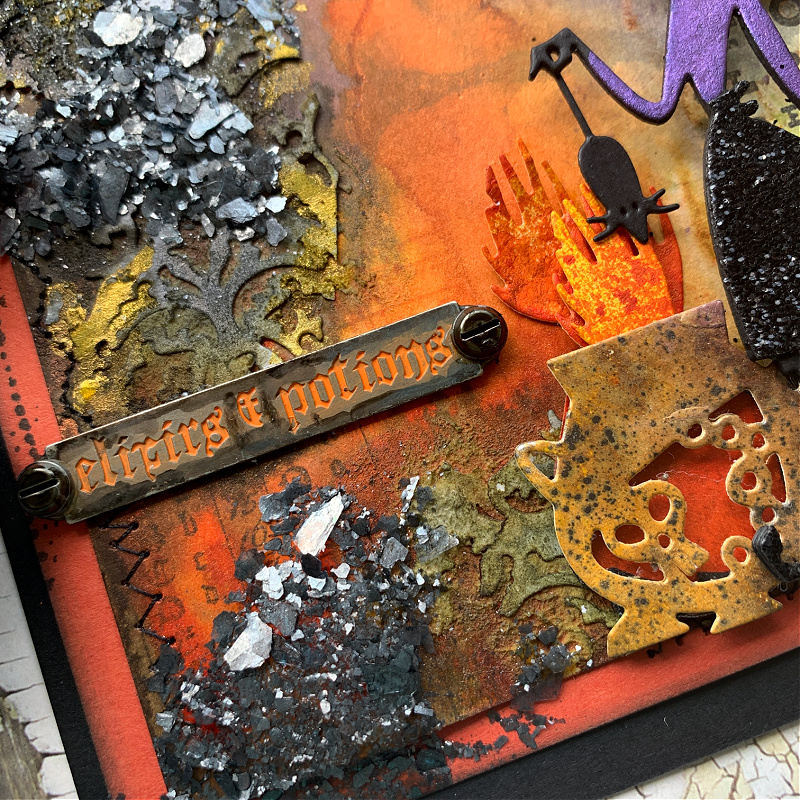
To finish the card, add Distress Midnight Mica Flakes in radom areas, a sentiment, bats, the cauldron and some fire flames that you can create out from the bristles of the broom that comes in the Toil & Trouble die set.
Here are some close up photos of the card:

I hope you enjoyed this tutorial. Thanks so much for sticking with me to the end, I really appreciate the time you take out of your day to spend time with me here. Have an amazing week!
What I used to create this card and where to find:

Tim Holtz Sizzix Toil & Trouble Die Set
Tim Holtz Stampers Anonynmous Mini Halloween #5
Tim Holt Sizzix Mixed Media Halloween Die Set
Simon Says Stamp Black Cardstock
Ranger Distress Watercolor Cardstock
Crackling Campfire Distress Ink
Tim Holtz Distress Mica Spray Set #1
Tim Holtz Distress Mica Spray Set #2


your card is exquisite. thanks as always for sharing, especially all those details.
Thank you for the tutorial. I love seeing and learning about how makers create such layered backgrounds with Tim’s products.