
Hi friends! Today I’m sharing my creation from the new Tim Holtz Sizzix Halloween release. The main character is Edison but I used a few of the other new dies in the release as well. Below is a tutorial on how I put this vignette box all together. I hope you enjoy!
.

.
Lights On
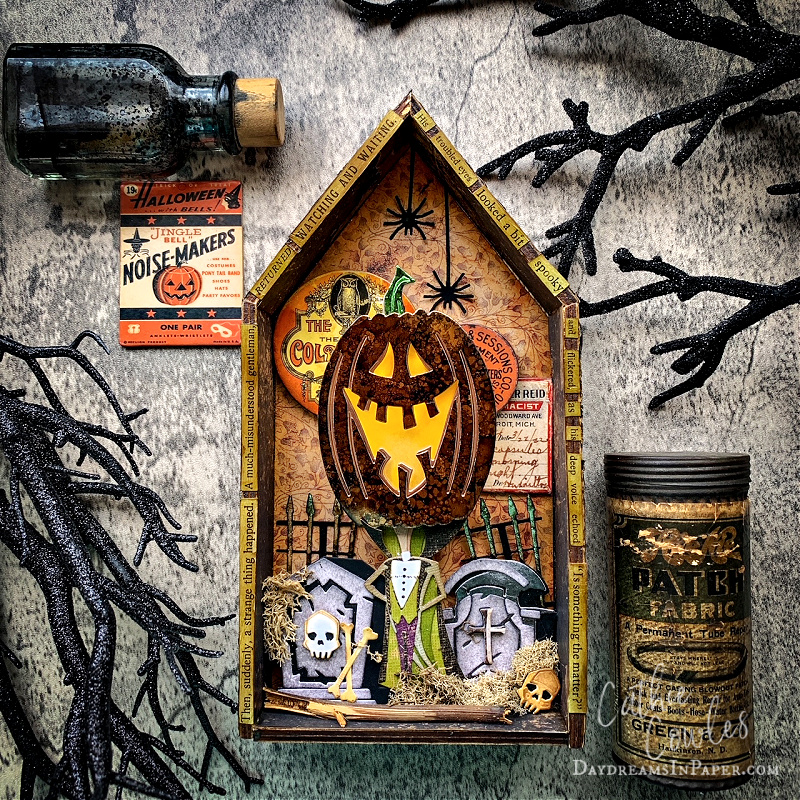
I knew I wanted to create a Halloween scene with Edison and decided to create one using a vignette box. Edison’s mouth and eyes are so expressive and I envisioned them lit up for a fun Halloween display. Let’s begin!
.
Creating the Shrine Vignette
.
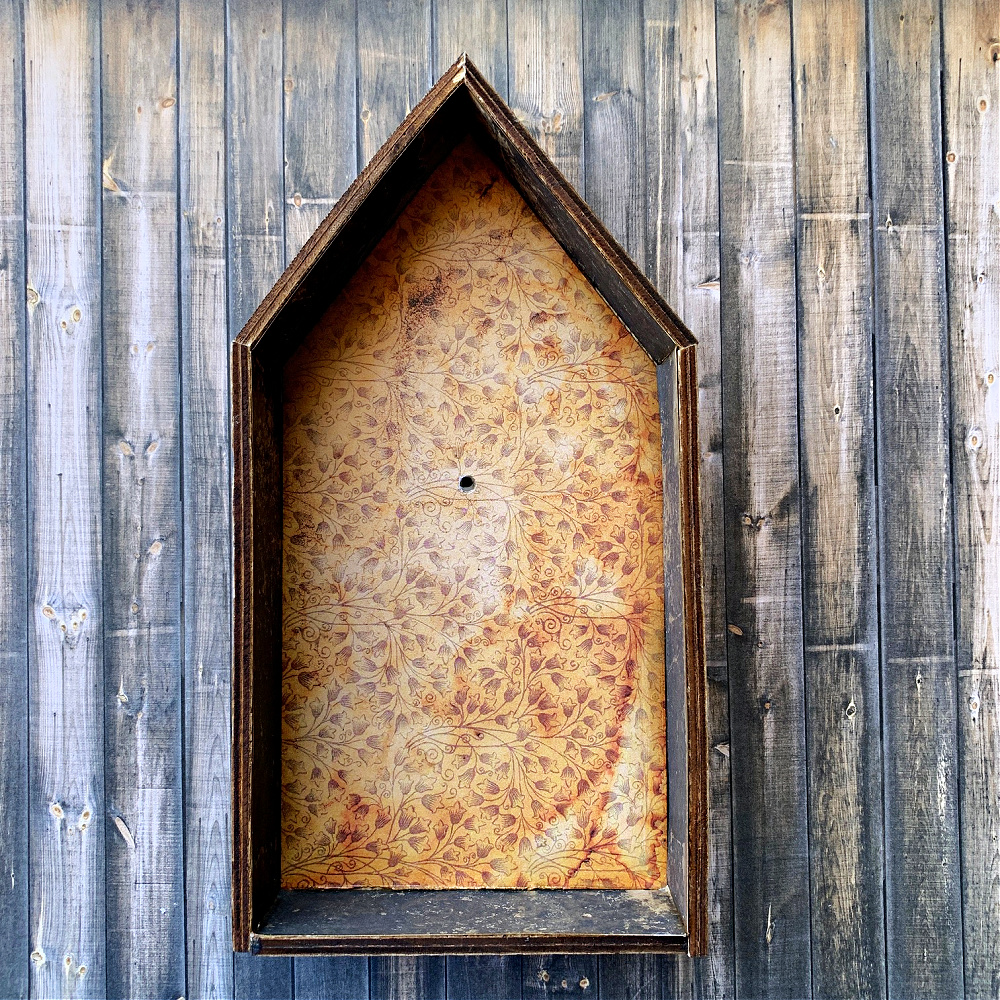
The first thing to do is to create a hole for the lights that will make Edison shine. (I use a Fiskars Hand Drill to make all my holes in vignette boxes. It’s the perfect tool with several different drill bits and creates the holes easily.) Next, cover the inside of the vignette with Halloween backdrop cardstock and the sides on the inside of the vignette as well. Any of the Tim Holtz Halloween backdrop papers work amazing. Make sure after adhering the cardstock to the back of the vignette you also create the hole through the cardstock. Any sharp object will do.
.
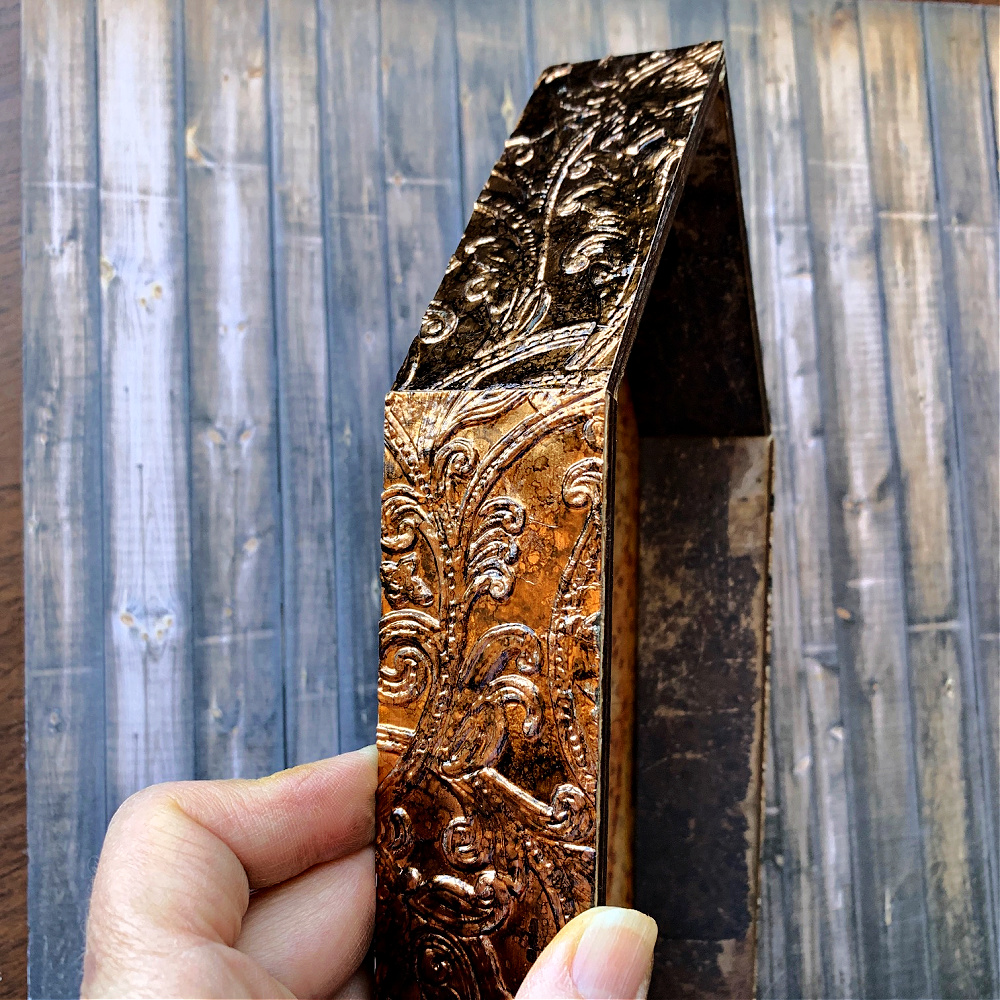
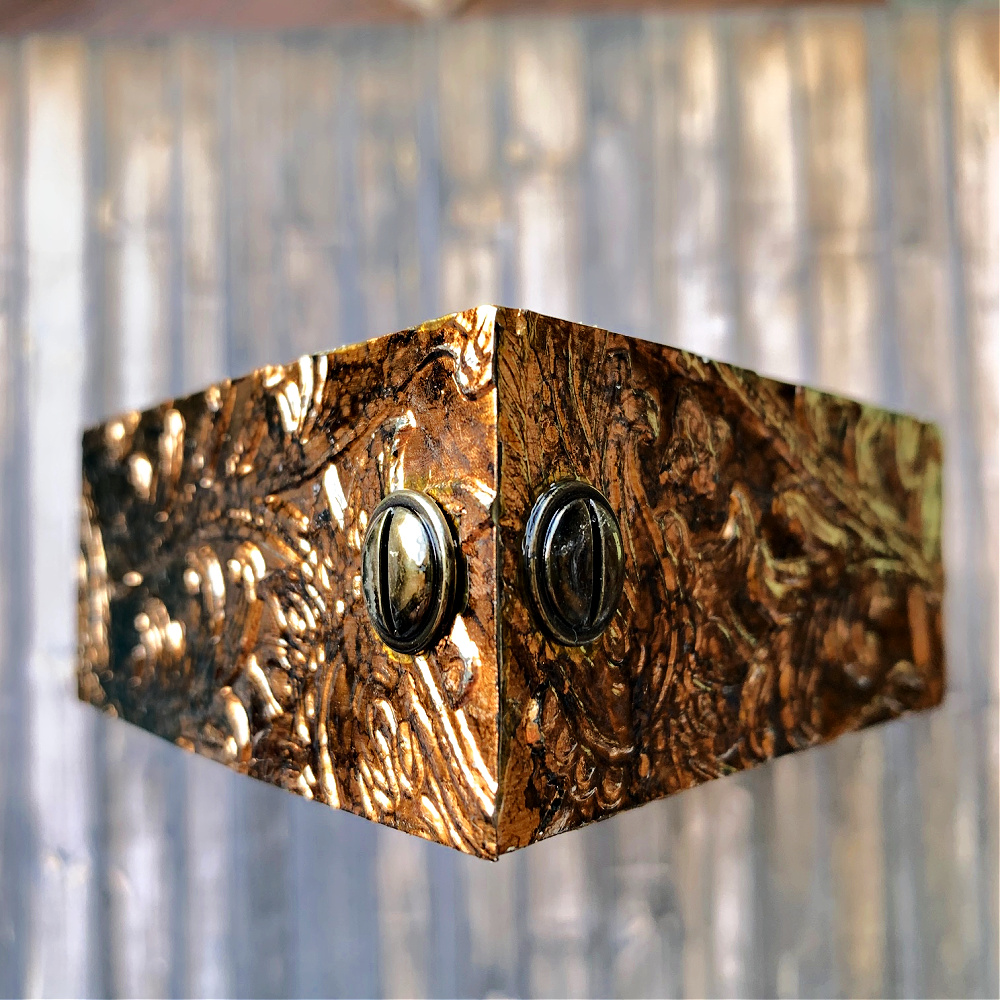
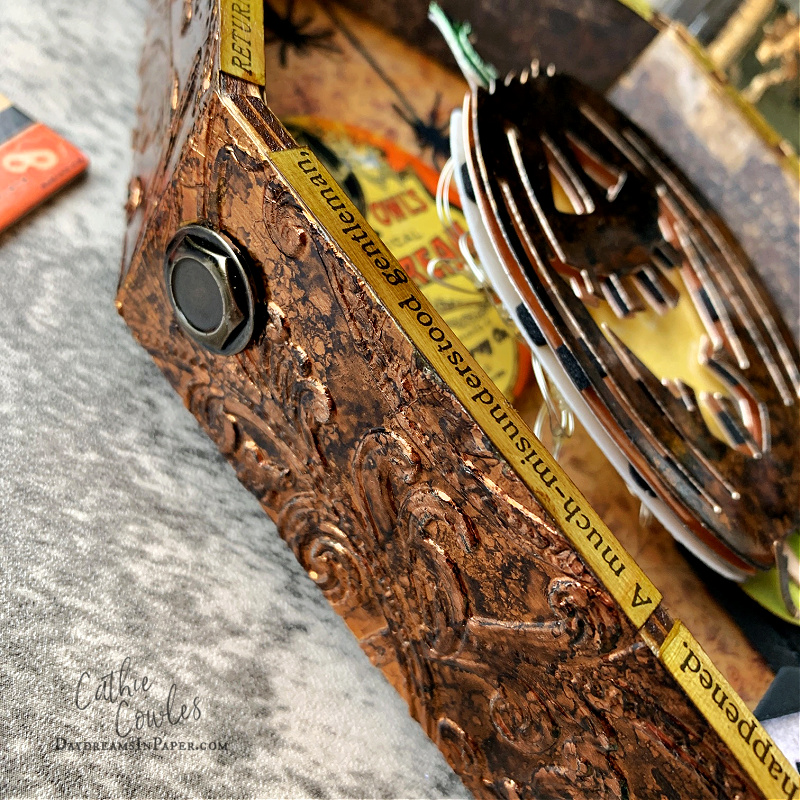
For the outside of the vignette box I embossed two 4.25″ x 6.25″ pieces of copper metallic kraft stock pieces with the Tim Holtz Entangled 3D embossing folder.
.
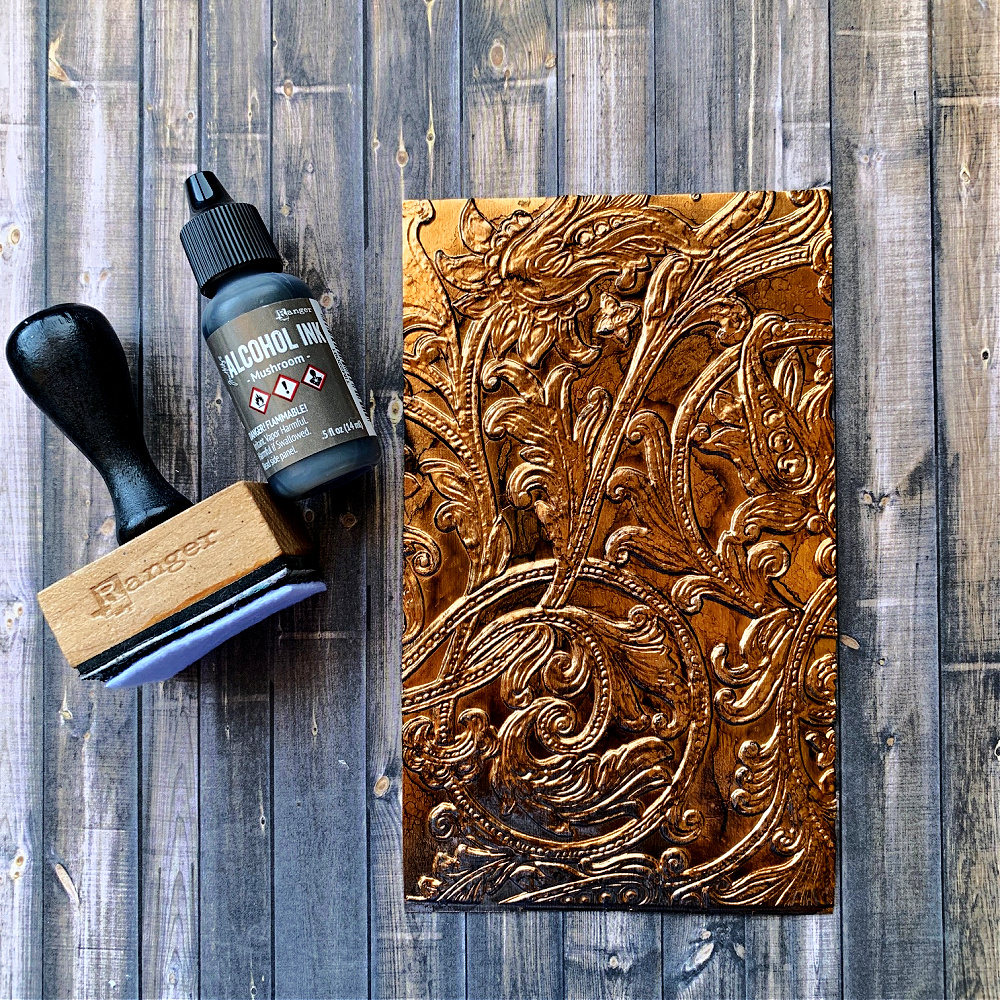
Next, ink over the embossed design with mushroom alcohol ink using a felt blending tool. Make sure it is completely dry before moving on to the next step.
Measure the outside walls of your vignette. If using the shrine vignette, measure the left and right outside walls and the two slanted sides that make up the roof.
.
Adhere the two roof top pieces and outside walls onto the vignette with collage medium. Allow to completely dry.
.
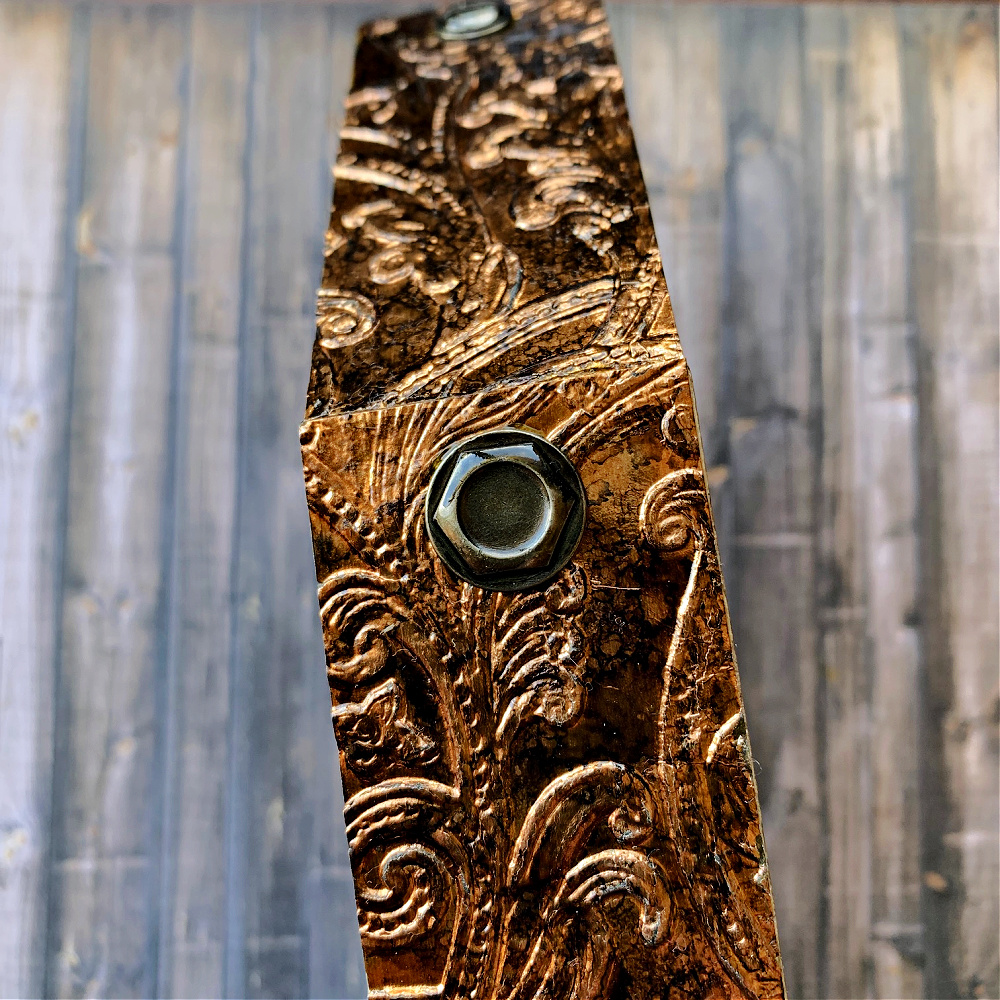
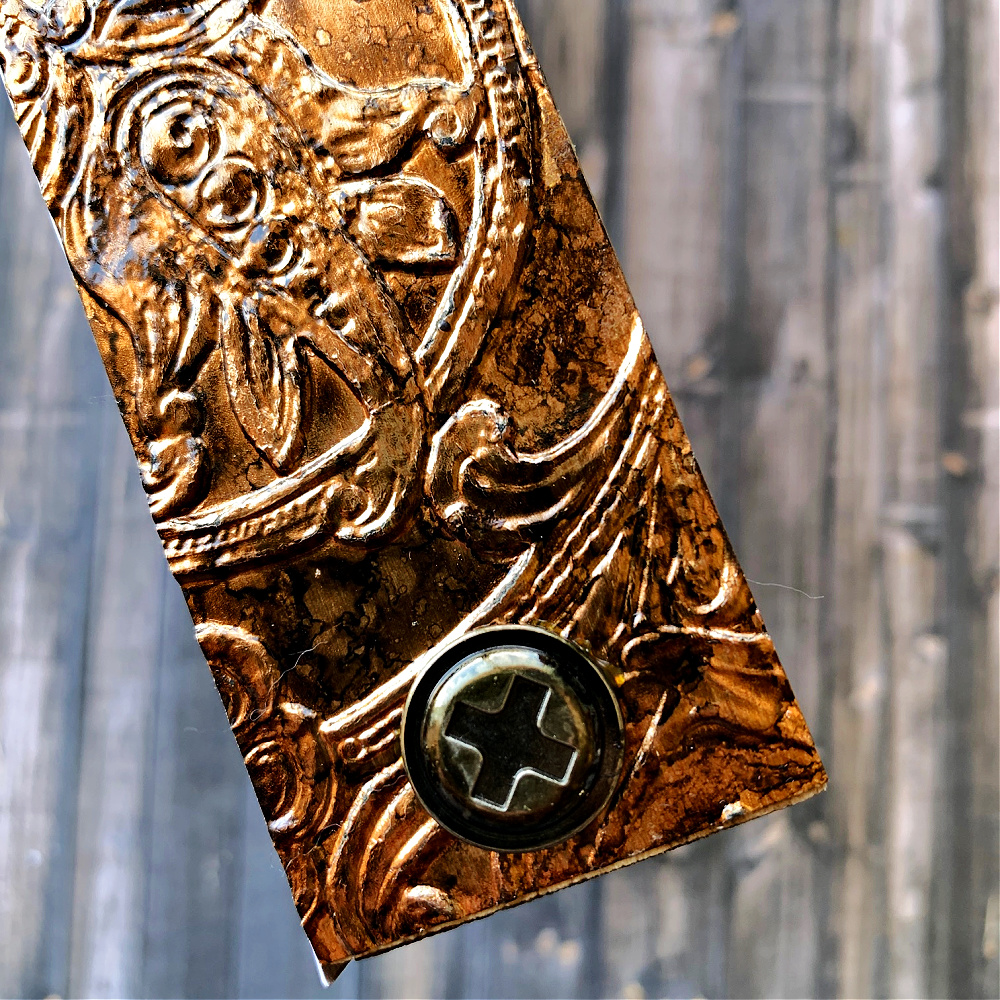
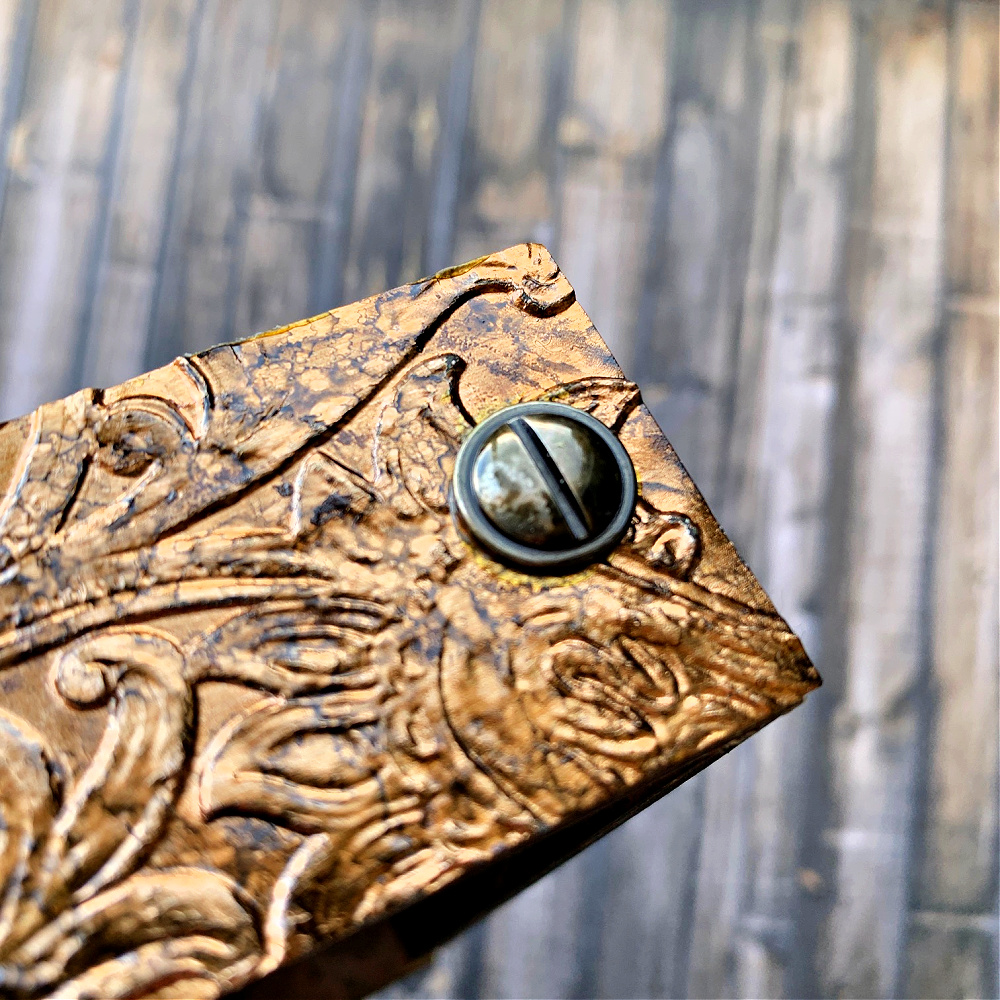
Next, ink 6 Tim Holtz Idea-ology Machinery Heads, 2 small and 4 large, with mushroom alcohol ink. Adhere them to the outside walls of the vignette with collage medium. I adhered the two small machinery heads to the top of the outside rooftop corners of the vignette and the 4 large ones to the long outside walls of the vignette at the top and bottom. When finished you can set this aside.
.
.
.
.
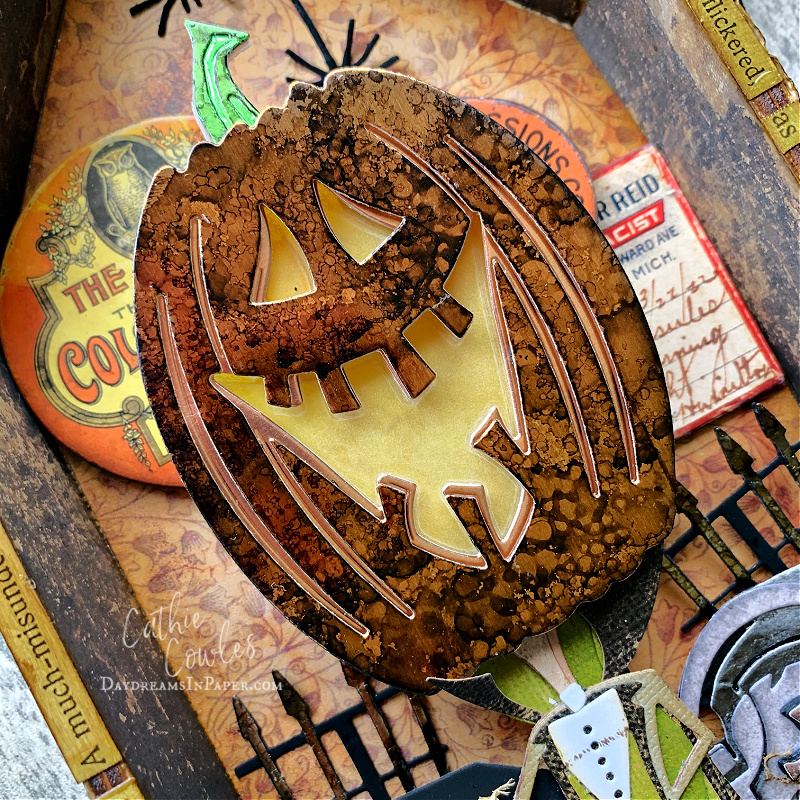
Creating Edison
.
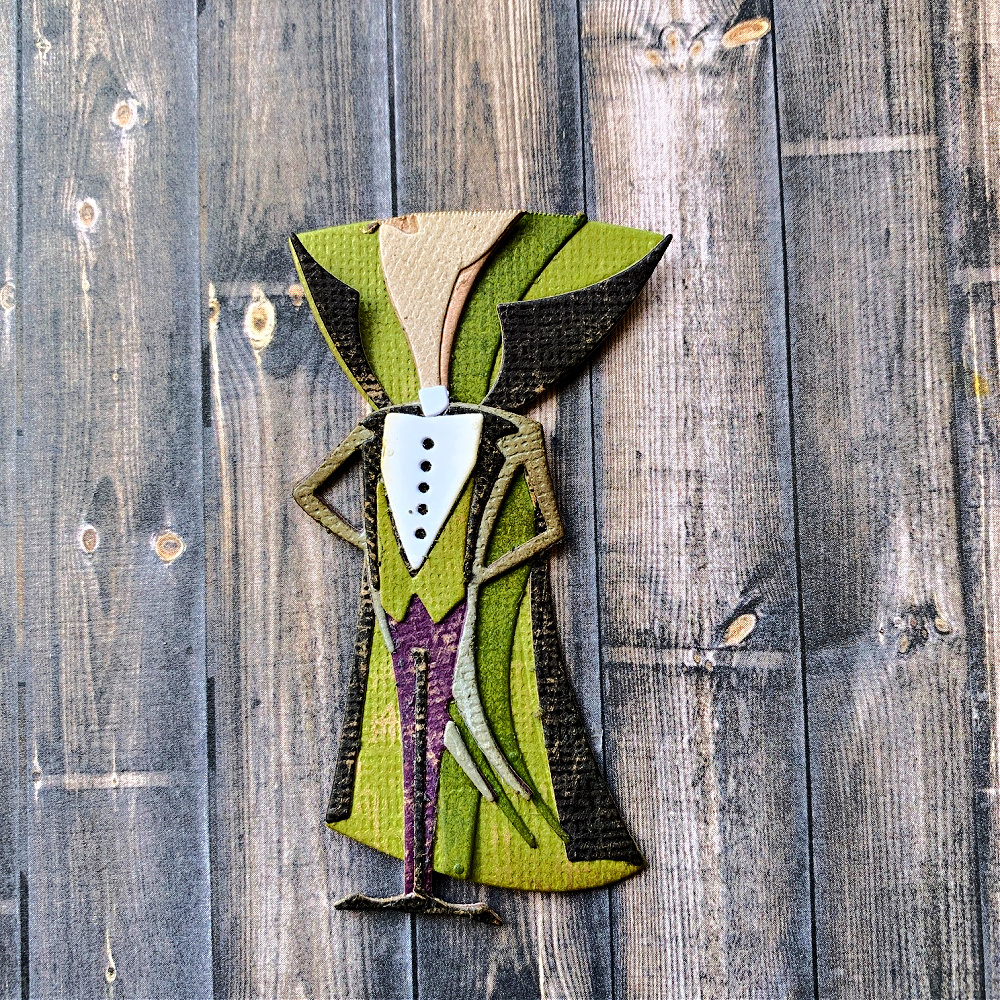
To create Edison, first, create The Count from last year’s Halloween relese and cut off the top part as shown above. Set aside.
.
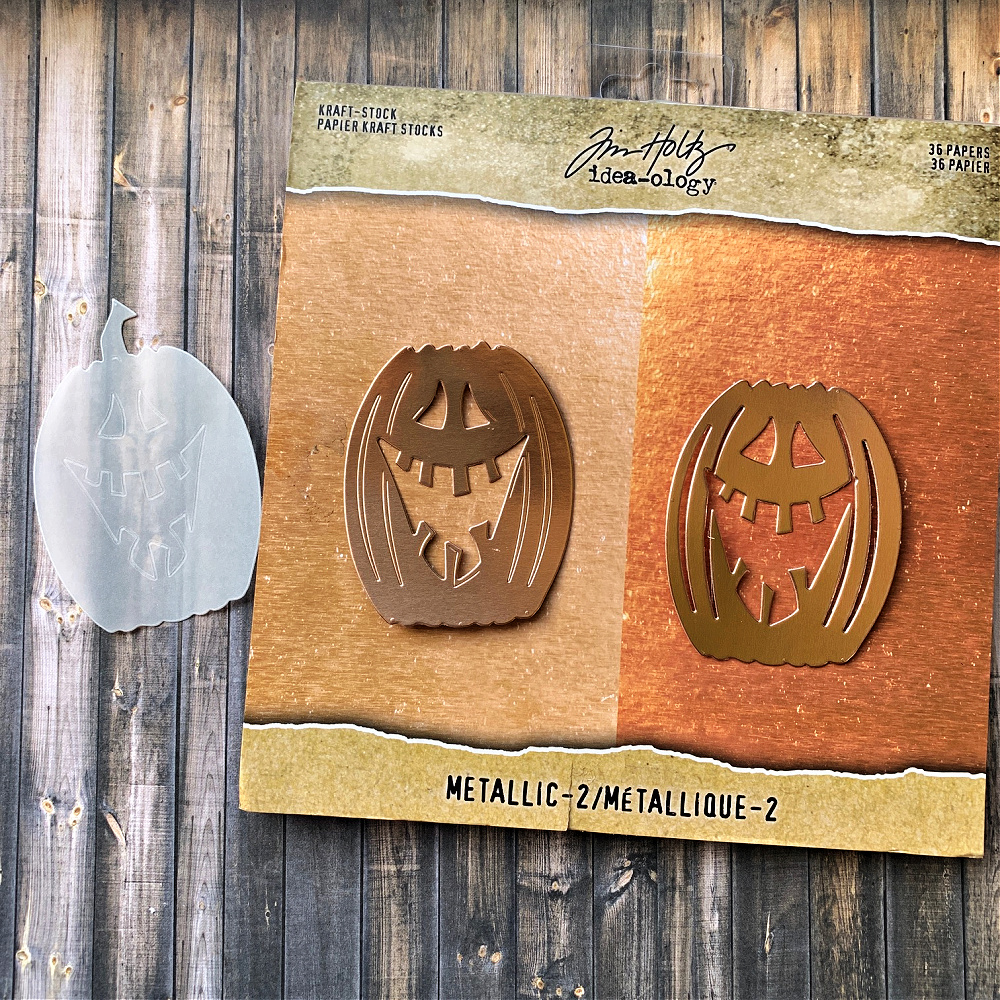
Next, cut out the three Edison shapes. Cut the outside Edison piece from the copper metallic kraft stock. Cut the inside piece that will provide the shading of Edison from the rose gold metallic kraft stock and the solid background Edison piece out of vellum.
.
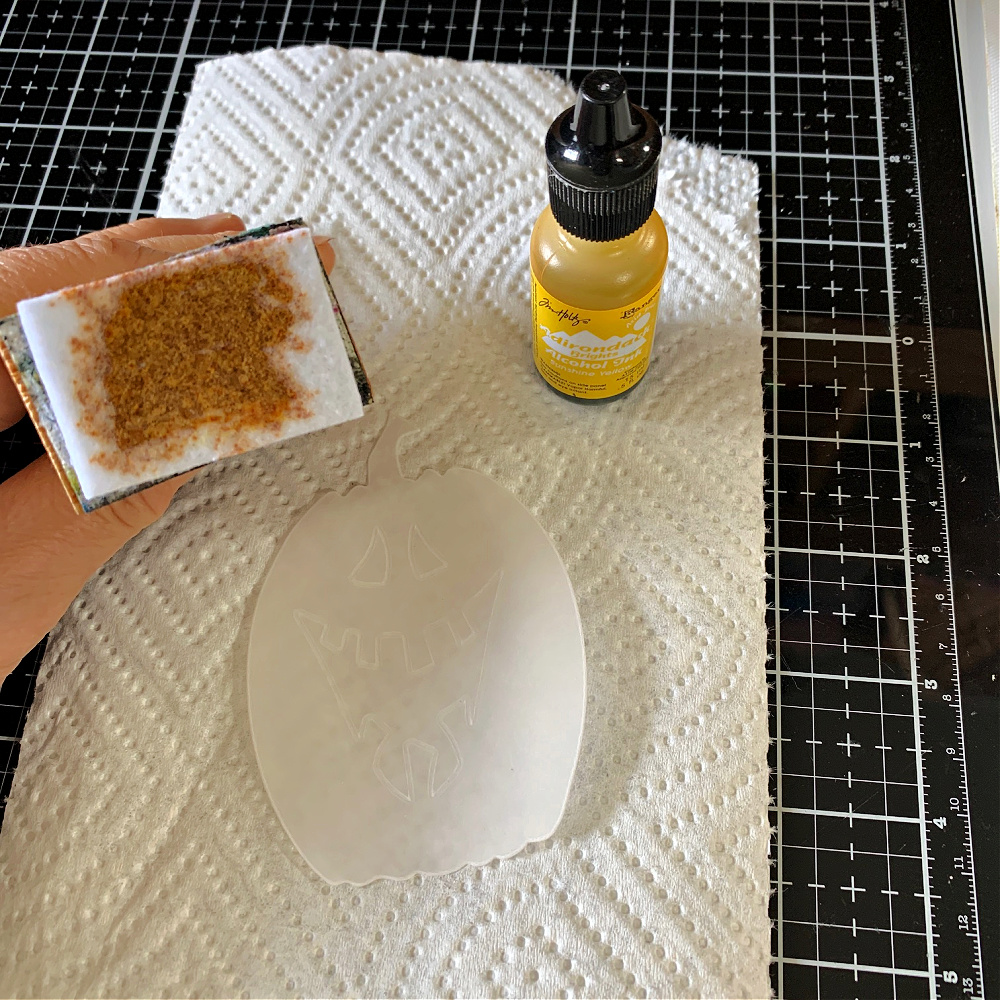
Apply some Sunshine Yellow alcohol ink onto a felt ink blending pad and dab onto the vellum cutout.
.
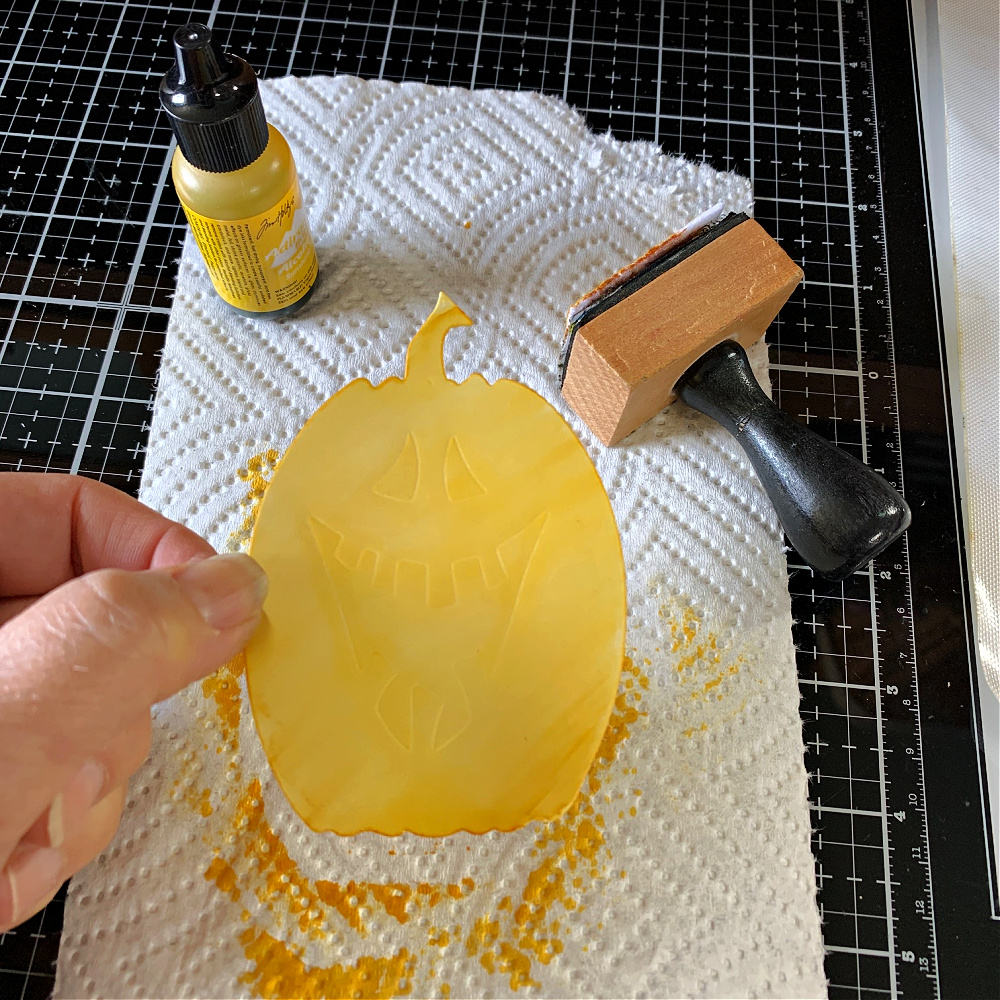
You may have to do this a couple of times to get a deep color and smooth out any alcohol ink that may pool in random areas. Work with it until you are happy with the outcome. Set aside and allow to completely dry.
.
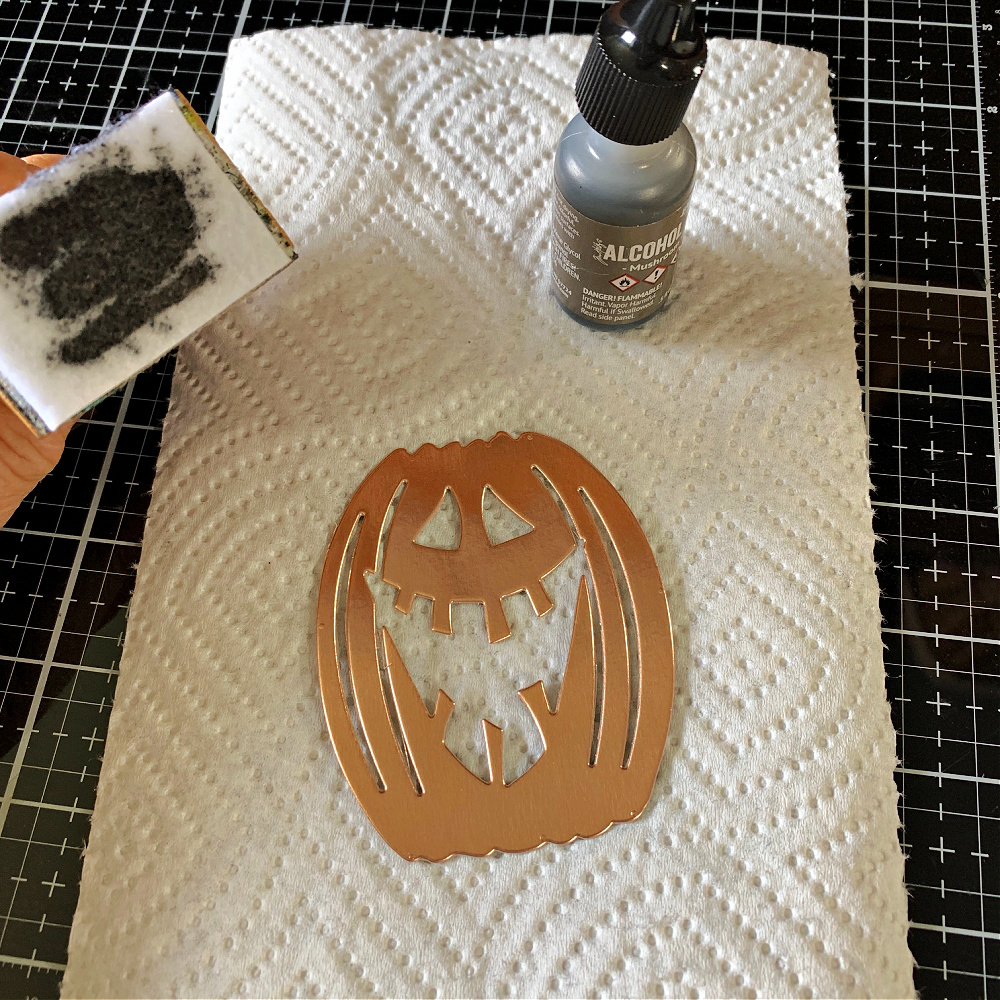
Next, apply a bit of mushroom alcohol ink onto a felt ink pad and dab onto the copper metallic Edison cutout. Continue the process until you are happy with the outcome. Do not complete this process on the rose gold metallic cut out of Edison as that one will be the shadow piece.
.
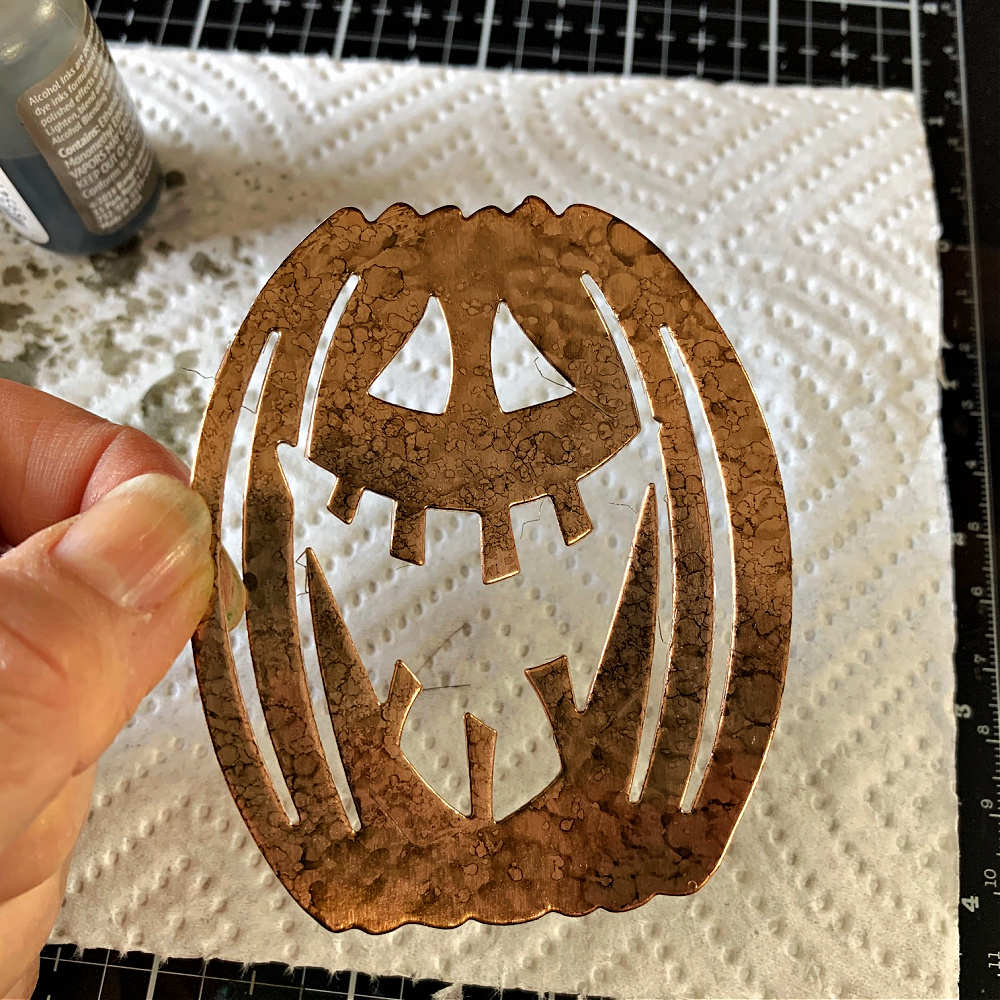
Here is the result of inking with the mushroom alcohol ink over the copper metallic kraft stock.
.
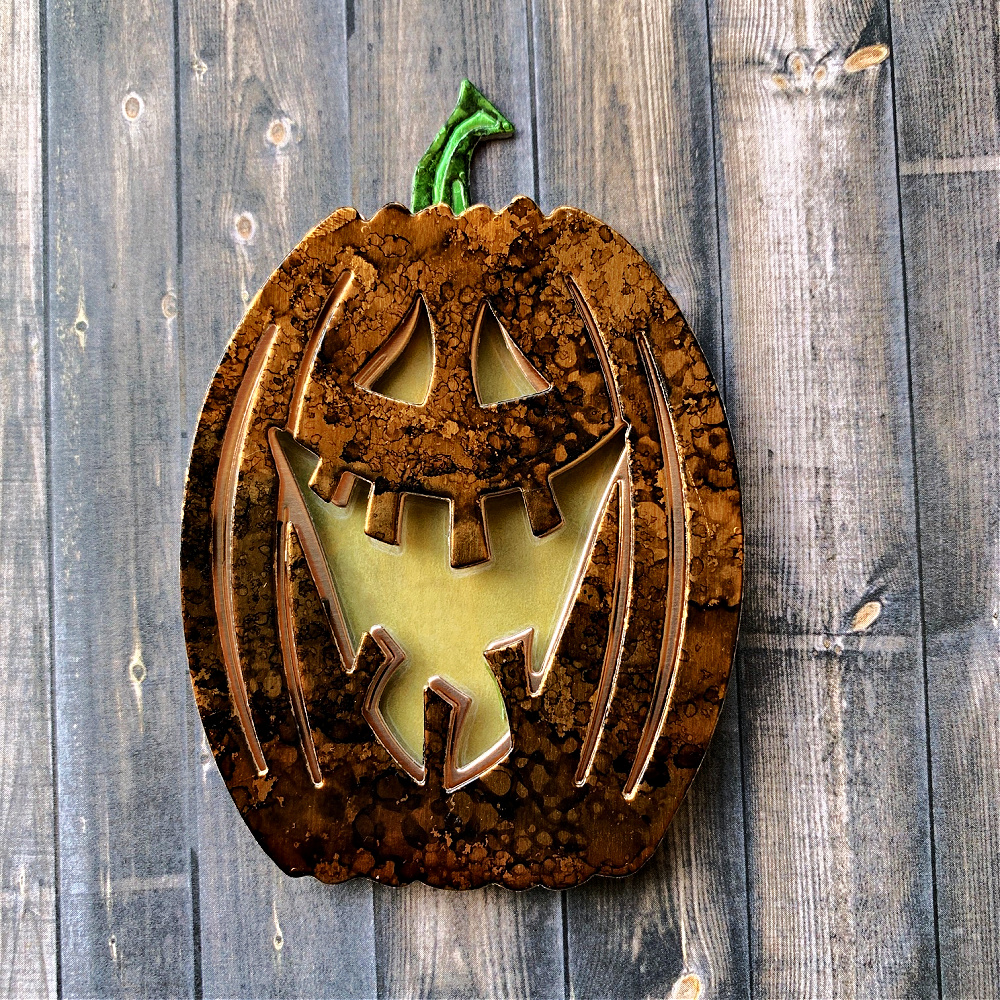
Construct Edison as shown above where the vellum piece is on the bottom, rose gold metallic piece in the middle and the alcohol inked copper metallic piece on top.
To create the stem, I used dark and light pieces of Tim Holtz green metallic kraft stock and applied mushroom alcohol ink to the outside darker piece before adhering them together.
.

Now, adhere Edison to The Count’s body and he’s all finished! (Sorry, I forgot to take a photo of him completed before adhering him to the vignette box.)
.
Tombstones
.
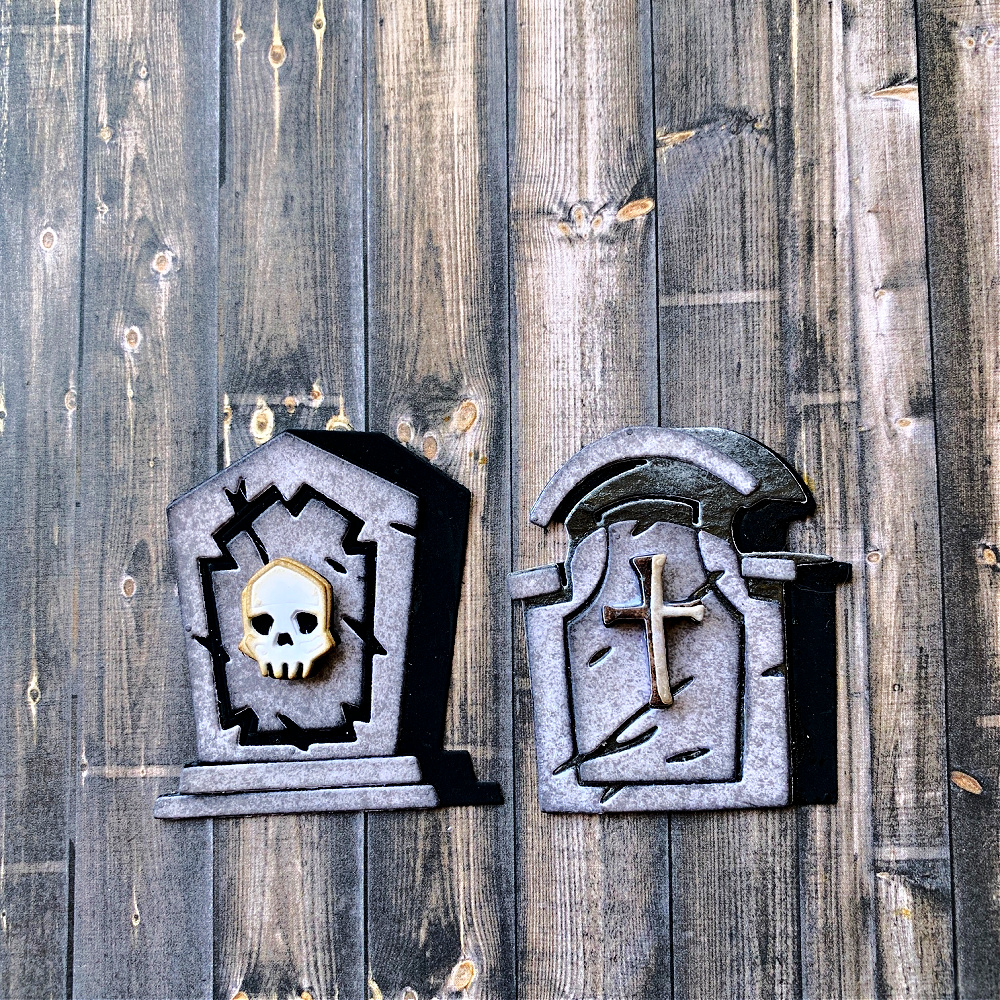
Next, create the last two main pieces for the vignette which are the tombstones. I created the tombstones out of white mixed media heavy stock that was inked with Hickory Smoke, Pumic Stone and Lost Shadow Distress inks. The background pieces were cut out of black cardstock and the skull and cross were cut from mixed media heavy stock and inked along the edges with Vintage Photo Distress ink.
.
Putting it All Together
.
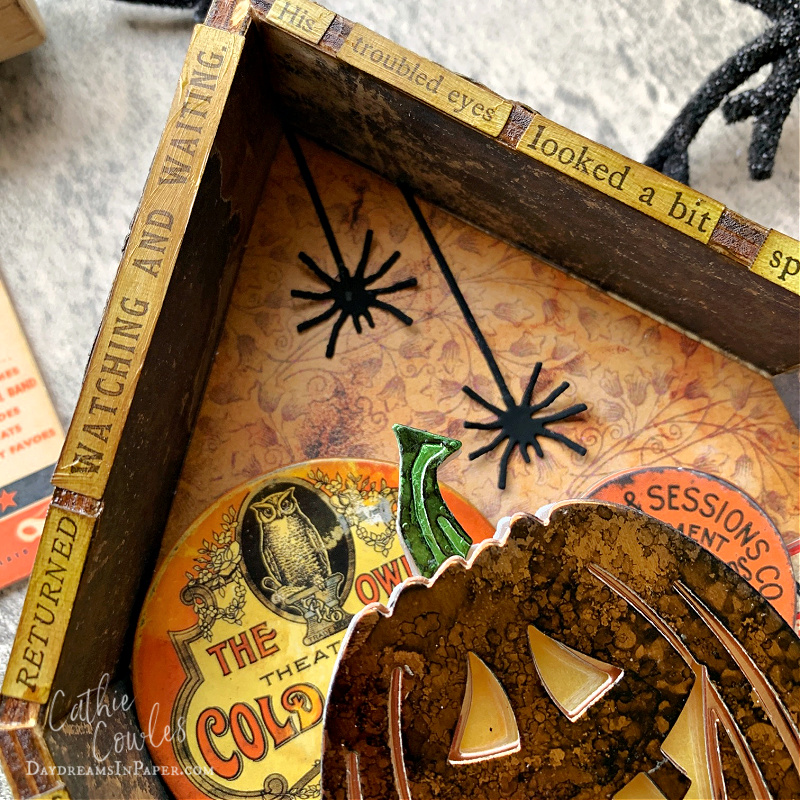
Now to put it all together. Cut out spiders from the new Big Frights die set out of black heavy stock and adhere them to the top of the vignette coming down from the roof. Choose some coordinating Idea-ology baseboard pieces and adhere them to the background of the vignette behind Edison’s head making sure not to cover the drilled hole for the lights. Cut the iron gates from the new Graveyard die set and ink them with a light dusting of Picket Fence Distress ink and adhere them to the bottom half of the vignette behind where Edison will stand. Before adding Edison, push a string of tiny lights through the hole and adhere them to the back of the vignette box where Edison’s head will land. Make sure they light up the vellum area of his head so they shine brightly before adhering him in place. Using 3D foam pieces to adhere Edison in the center of the vignette over the tiny lights. Add the tombstones to the sides of him with 3D foam pieces as well. Next, add a few twigs and dried brown moss in random areas to complete the spooky graveyard scene.
When I was finished, I decided to create a story by combining words and phrases from a past Tim Holtz Halloween sticker book and attached all the words to the front thin sides of the vignette box. Facing the box starting from the left side it reads:
Then suddenly, a strange thing happened. A much misunderstood gentleman, RETURNED WATCHING AND WAITING. His troubled eyes looked a bit spooky and flickered as his deep voice echoed, “Is something the matter?”
Here are some close-ups for you to get a closer look.
.
.
.
.

.
I hope you enjoyed seeing how I put together this Halloween vignette featuring the one and only Edison along with other amazing dies from the new Halloween collection from Tim and Sizzix. Below is a list with links to all the products I used. Thank you so much for stopping by! I appreciate the time you spend here with me!!
.

.
Tim Holtz Sizzix Edison Thinlits Dies
Tim Holtz Sizzix Graveyard Colorize Thinlits Dies
Tim Holtz Sizzix Big Frights Thinlits Dies
Tim Holtz Sizzix The Count Thinlits Dies
Tim Holtz Sizzix Entangled 3D Embossing Folder
Tim Holtz Idea-ology Vignette Shrine
Tim Holtz Idea-ology 2021 Halloween Backdrops
Tim Holtz Idea-ology 8×8 Paper Copper and Rose Gold
Tim Holtz Idea-ology Kraft Stock Metallic Colors
Tim Holtz Idea-ology Machinery Heads
Simon Says Stamp 12 Sheets Vellum
Tim Holtz Ranger Distress Black Heavystock
Tim Holtz Ranger Mushroom Alcohol Ink
Tim Holtz Ranger Vintage Photo Distress Ink
Tim Holtz Ranger Picket Fence Distress Ink
Tim Holtz Ranger Hickory Smoke Distress Ink
Tim Holtz Ranger Lost Shadow Distress Ink
Tim Holtz Ranger Pumice Stone Distress Ink
Tim Holtz Ranger Ink Applicator Tool
Tim Holtz Ranger Ink Applicator Felt
Tim Holtz Ranger Distress Collage Medium
Tim Holtz Ranger Distres Collage Medium Jar
Tim Holtz Ranger Distress Collage Brushes
The sticker book I used to write my Halloween story is no longer available but there is a new 2023 Halloween sticker book with words and phrases that you could use to write your own Halloween story Here’s the link:


I love this so much. All the details and texture. Absolutely gorgeous 💯💖💖💖
I love how this turned out!
That´s a great idea, love your make. Thank you for sharing.
Very Lovely. I liked the way you added Edison to the count. Thanks so much for sharing we us.