
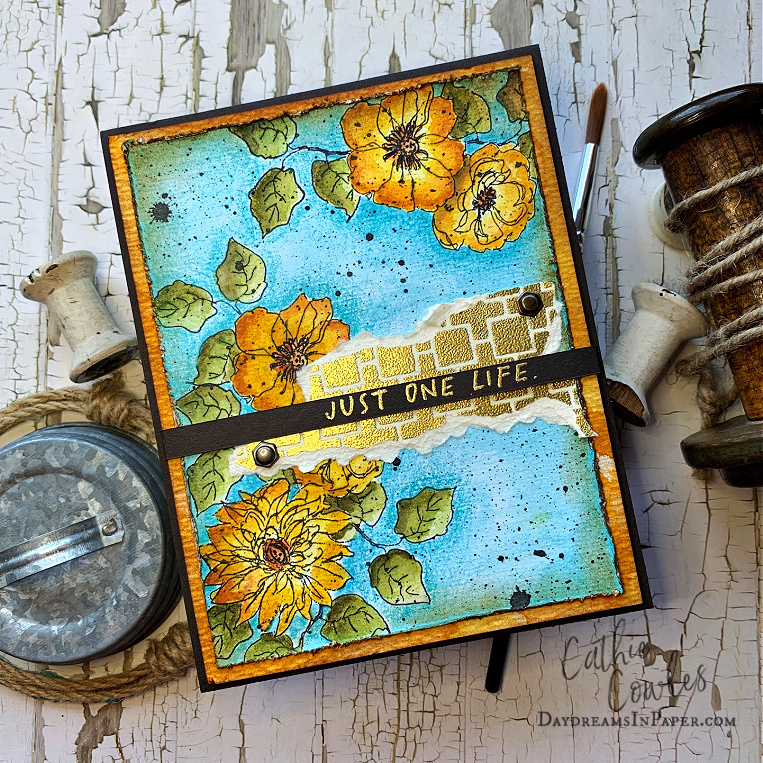
Hi Friends! Today I’m sharing a another card I created using the new Tim Holtz Stampers Anonymous stamps and stencils. The new Floral Elements stamp set is one that can be used to create so many amazing floral combinations. The great thing about this set is that you can create combinations that can be done using masking techniques or not. Either way you can create beautiful floral scenes with this set and today I’m sharing how I created my background using a masking technique. Enjoy!
Let’s Begin:
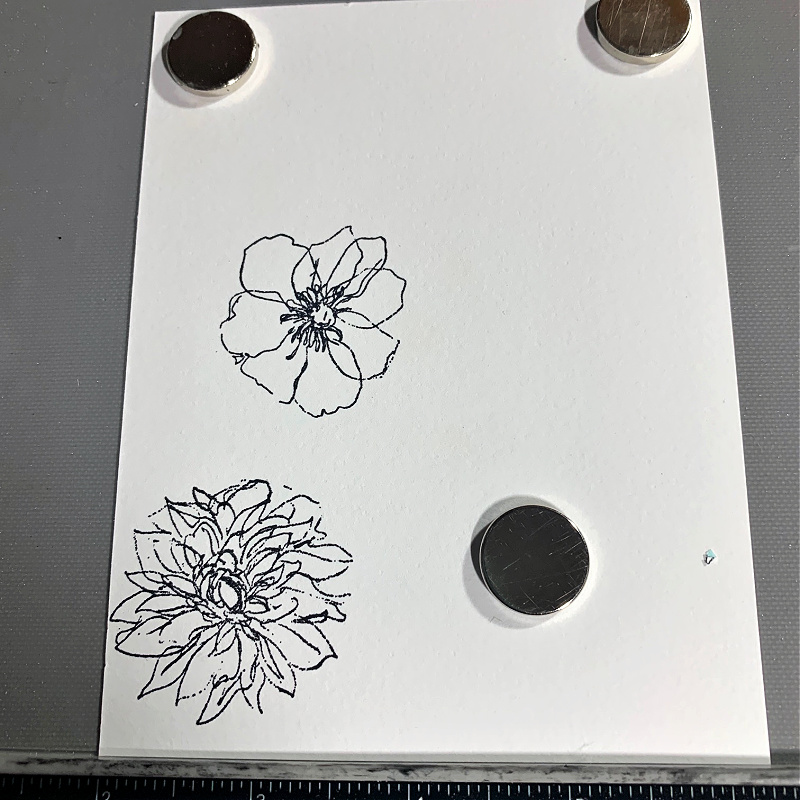
Begin creating your scene by stamping flowers that will not touch each other as shown above. I’m using Black Soot Archival Ink to stamp my images because it’s waterproof and will not run when I watercolor the images.
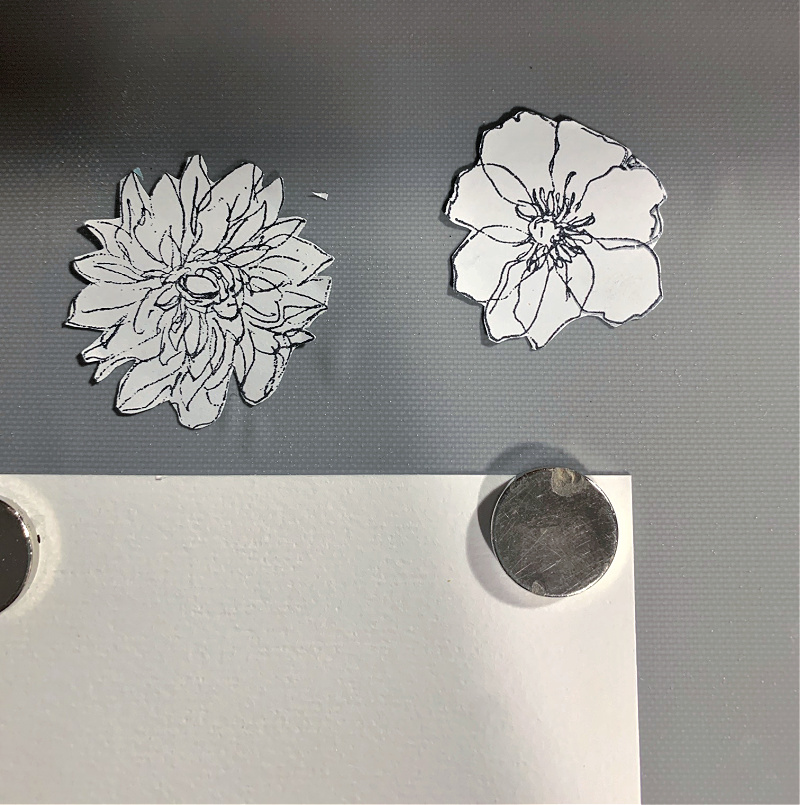
Stamp the same two images onto masking paper and fussy cut them.
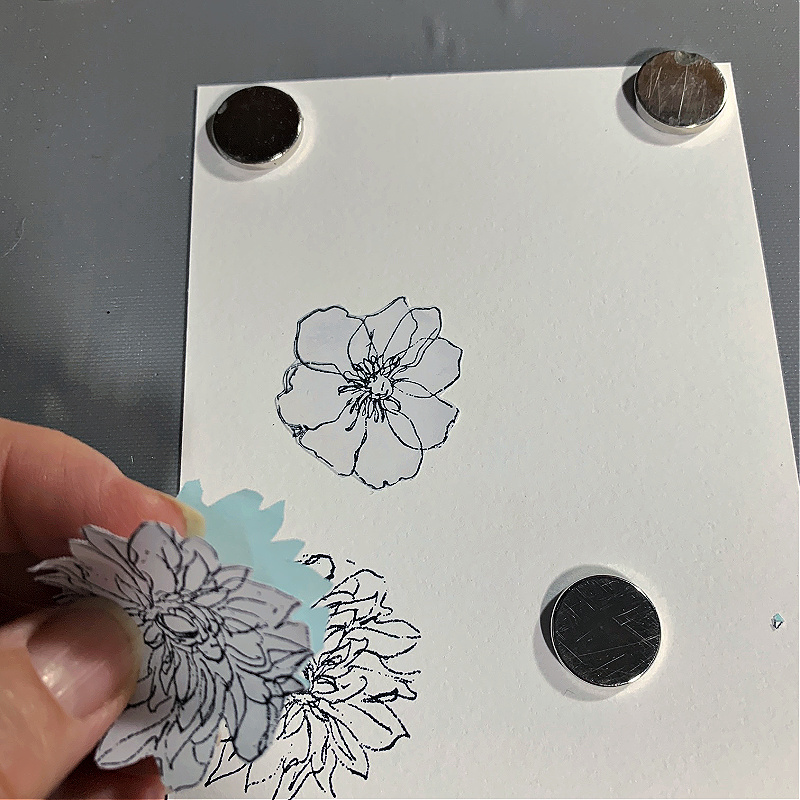
Remove the backing from the masking paper stamped images and lay them over the coordinating stamped images on your card panel.
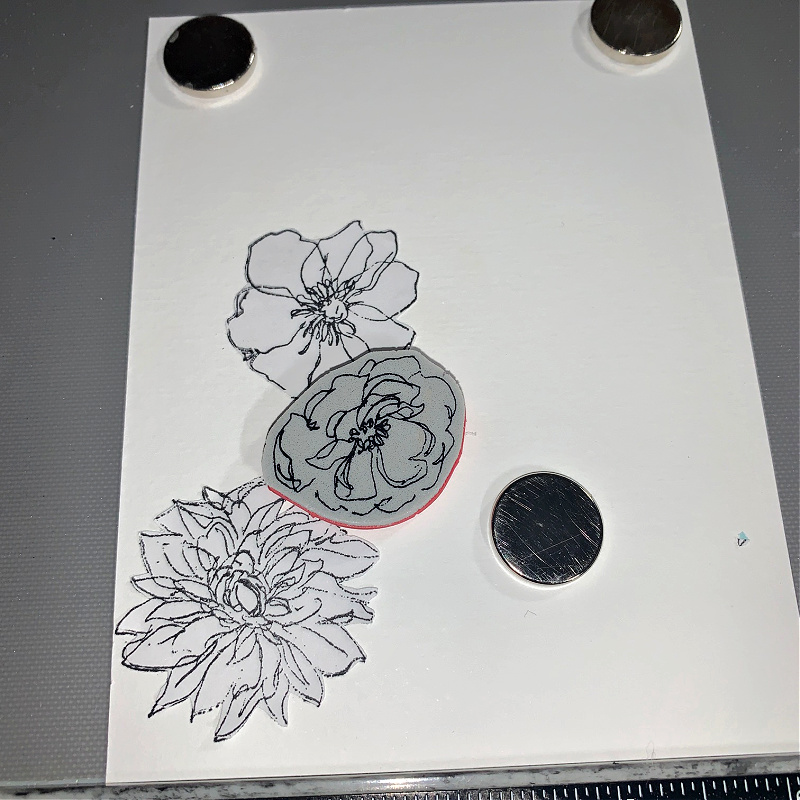
Now that the masks are over your initial flower images you can stamp another flower over the top of them.

Continue stamping your design with more flowers and leaves. Make sure to create a mask for any images you’ll be stamping over.

As you can see above, before removing the masks the image looks like a jumbled mess.
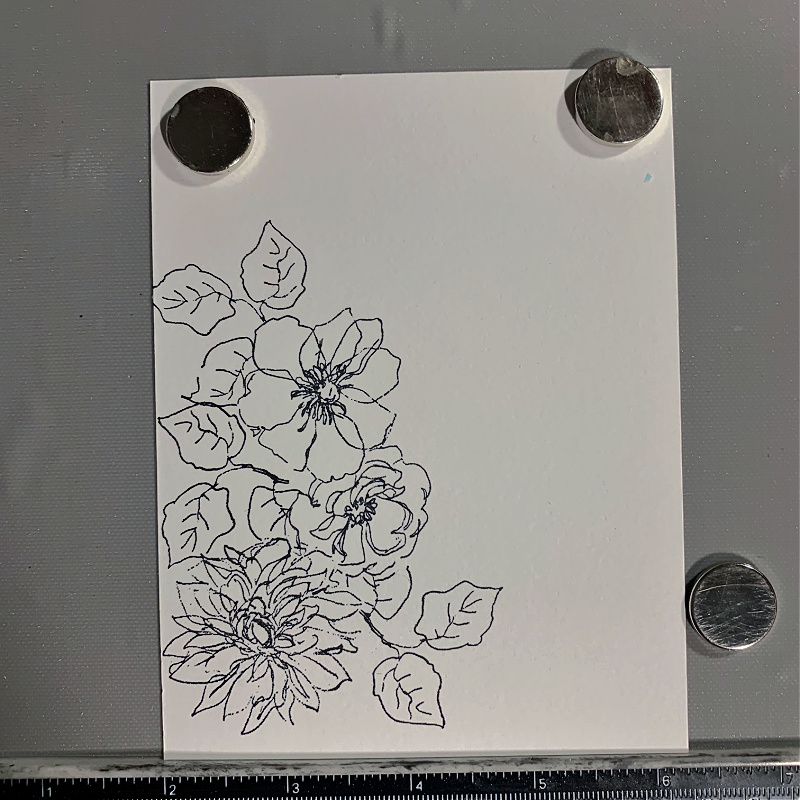
Now remove the masks and you’ll have a beautiful floral scene ready to color.
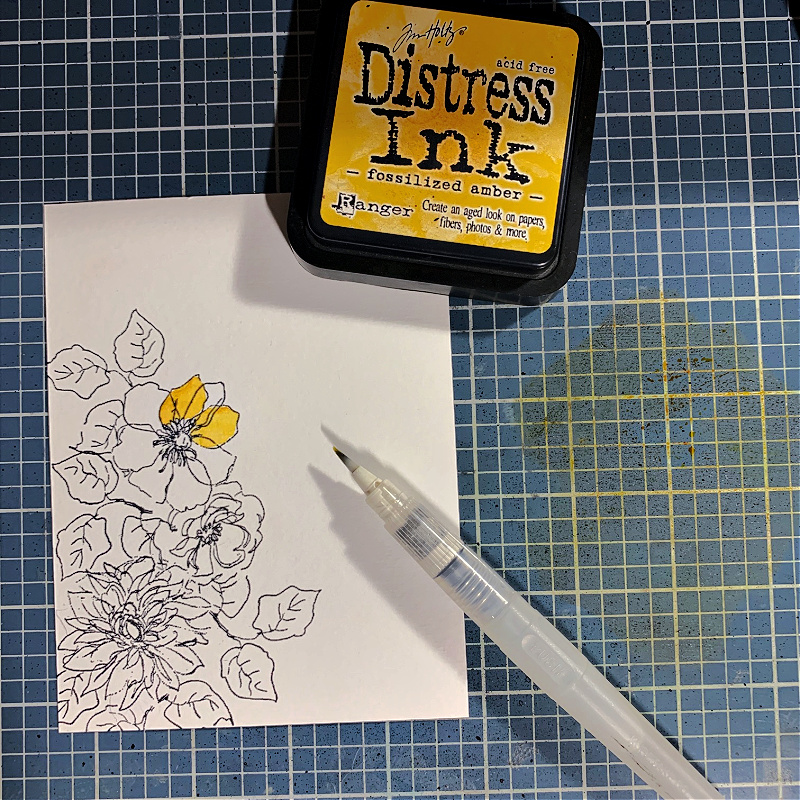
I’m using Distress Inks to color my image by smooshing the ink onto a craft mat and picking up the color with a waterbrush.
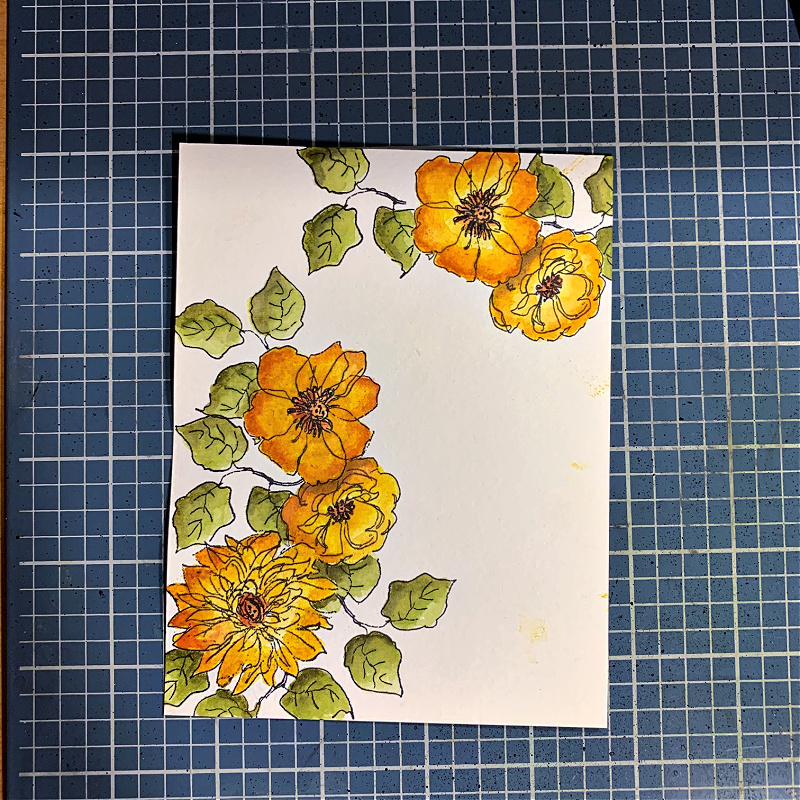
I wasn’t satisfied with flowers only in the bottom left corner of the card panel so I created another floral scene on the top right.
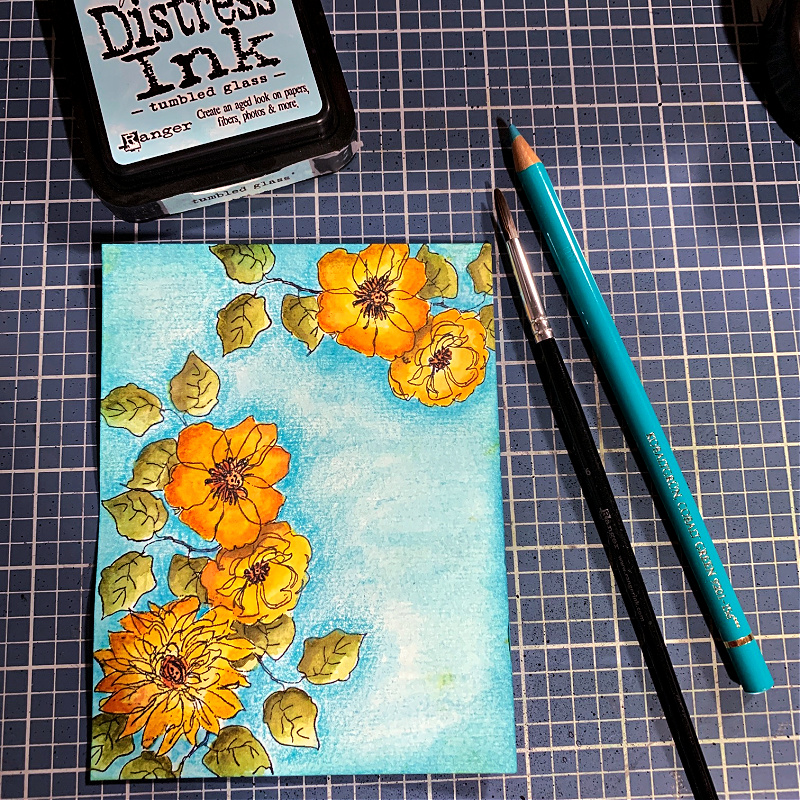
To finish the scene I watercolored the entire background with Tumbled Glass Distress Ink and then highlighted around the flowers with a Faber Castel Polychrome Colbalt Green colored pencil.
To finish the card I created a stenciled torn background behind the sentiment using the new Tim Holtz Linked Squares stencil. To create this stenciled background I used Mixed Media Heavystock. I applied embossing ink through the stencil and then added Ranger Super Fine Gold embossing powder over the image and melted it with a heat tool. When the embossing powder was completely dry, I tore the stenciled background in pieces and applied them to the main card panel. The sentiment is from the new Tim Holtz Noteworthy stamp set. I embossed the “Just One Life” sentiment using the same gold embossing powder on Simon Says Stamp Dark Chocolate cardstock and adhered that over the two torn stenciled pieces. I adhered a piece of cardstock behind the main card panel that was inked with Fossilized Amber and Rusty Hinge Distress Inks. I added a couple of Idea-ology Hex Fasteners and then adhered the entire panel over a piece of Simon Says Stamp Dark Chocolate cardstock and my card is done.
I hope you enjoyed seeing how I put this card together and that you try creating beautiful floral scenes using the new Tim Holtz Stampers Anonymous Floral Elements stamp set. It’s one of my favorites!!
Thanks so much for sticking with me to the end. I really appreciate the time you spend here with me. Have a wonderful day!

List of Supplies
Tim Holtz Stampers Anonymous Floral Elements Stamp Set
Tim Holtz Stampers Anonymous Noteworthy Stamp Set
Tim Holtz Stampers Anonymous Linked Squares Mini Stencil
Tim Holtz Ranger Distress Watercolor Cardstock
Tim Holtz Ranger Distress Mixed Media Heavystock
Simon Says Stamp Dark Chocolate Cardstock
Distress Inks:
Ranger Super Fine Gold Embossing Powder
Tim Holtz Ranger Black Soot Archival Ink
Tim Holtz Ranger Distress Embossing Ink
Tim Holtz Ranger Black Soot Distress Paint
Tim Holtz Idea-ology Hex Fasteners
Tim Holtz Tonic Paper Distresser


